Project Dingle

Restoring an old cottage...

Page 7 of 8

Attic or loft? And Lots of Dust

We’ve done a lot of garden maintenance over the past few weeks. Mostly mowing and viciously attacking the nettles (and we’ve not made much of a dent in either, if we’re honest).

What we haven’t done much of is make progress indoors. That’s been frustrating me (Vix) because there’s so much to do.

So, this past weekend, we decided to Make A Dent In The Attic. Literally.

Here’s what it looked like before. The sleeping end:

Joe contemplates the sleeping end of the attic - pre-destruction

The sleeping end (and a prisoner on day release)

You can see there’s fibre-board laid between the beams and over the rafters. And there’s a whopping great big ridge beam that looks original (hurrah!).

And here’s the other end – there’s going to be a dressing / sitting area in the middle, then a shower room at the far end. (It’s a huge space.)

Attic space with original beams and pine cladding

The other end, complete with dodgy sauna cladding

You can see at this end, there’s pine sauna-esque cladding running up to the “ceiling”, which has been lowered. We’re going to remove all this and expose the original ridge beam.

Where the paint line is, is where the old train set ran around the room. The chap who lived here had this amazing train set. He’d built an entire landscape, and it must have been quite the thing when it was going. I love miniature stuff, so I would’ve loved to have seen it. It was mostly disassembled when we moved in, so we took the rest out and gave the train tracks to Joe’s niece’s friend.

Anyway – the weekend task was to rip as much of the cladding out as we could. We’re stripping it right back to the rafters and then starting again.

We’re also considering putting new oak beams in to support the roof, because the white ones you can see in the photos are cheap softwood. They’ve also been bodged in and are a right mess where they join at the truss. We’re not boxing them in because we want the space, so we’re considering replacing them with oak, which will look amazing and will last longer than we will.

Watch this space.

This is the old staircase opening, which we’re removing. The staircase is serviceable for occasional attic use, but no good for regular use.

Old staircase opening

Old staircase opening

We’re having a new solid oak staircase built by the same chap who built our friends’ beautiful new staircase. We’re widening the opening at the top and it’ll look amazing. We’re also thinking we might have stairs built up to the truss so we can climb onto the beam easily then faceplant into bed from a height. Fun!

Here’s the plans drawn up by our master craftsman. It’ll be in before Christmas…

Our chosen stair plan.

Our chosen stair plan.

In the meantime, though, here’s how far we got with the destruction…

Exposed rafters and one of many wasp nests

Exposed rafters and one of many wasp nests

This is pretty much what the sloping walls look like now. We uncovered three solitary queen wasp nests, beautifully built. And a full, gorgeous paper wasp nest. All abandoned.

And bird nests. Not so much nests, actually, as an entire bird housing estate… I think that was mostly responsible for our roof insulation. Thankfully, the roof and the weatherproofing are in really good condition.

There is, however, a random course of bricks that has been placed beneath the roof where the walls join, so we’re going to need to look at that. Not least because they all move alarmingly when you at them hard. I think a soffit should be there. We’ll dig into that.

We haven’t uncovered the ridge beam yet – that’s next weekend’s dirty task.

In the meantime, here’s a beautiful wasp nest that resembles The Scream

Wasp nest that resembles The Scream

The Scream

Next up: finishing the destruction, then installing new horizontal beams and starting the plastering.
Nettles

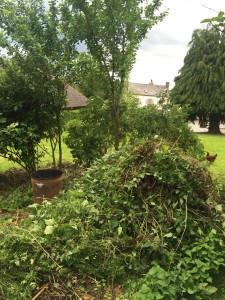
So you spend a couple of hours pulling up nettles. You’re left with a massive pile of the things, all a bit too wet to burn. Hundreds of kilograms. look:

2016-06-12 19.42.16

That’s a five foot high pile of nettles.

Upon showing this picture to people I know on facebook “Make nettle wine” was a suggestion.

“Make nettle soup!” was another. Just how much nettle soup is it possible to want?

My favourite suggestion though, was “Make nettle pesto!”  Seriously? Is there anyone on the planet that has a large enough lunacy to want to store three hundred kilos of nettle pesto?  What the hell would you do with it all?  How much would the olive oil cost?

Please, dear reader, whoever you are – feel free to nip over to our place and take as many nettles as you may wish for.  If you don’t like the look of the ready-harvested ones, you can even go and pull up your own.  There’s plenty.

In which we feel enTITLED to be rather chuffed

Our deeds have arrived!

And we’ve finally been able to shed some light on how old The Dingle might be, because the earliest record of sale that we have – beautifully written on vellum and parchment – is from 1772.

Photograph of the deeds of sale of The Dingle in 1772

They don’t make ’em like they used to…

One John Mascall sold The Dingle – conveying messuage, orchard, garden, with appurtenances – to Mr Edwards.

We’re not sure if this was the first sale of the house, or just the earliest record we have; but either way, it seems likely that the house dates from the mid-1700s. We’ll keep digging, and take the whole lot to the Records Office in Hereford at some point.

I spent an afternoon there last week, and had a root through the 1841 census records. The Dingle was in use as a shop at that time, and I think was counted as two separate units – but I’m not sure.

I do know that George and Mary Bannar, their daughter, and their twin sons lived there during that census, and that George was an agricultural labourer – like most able-bodied men at that time, I’d guess.

Fascinating stuff, but it hasn’t shed any light on whether or not there was ever a quarry here.

The Dingle itself is definitely man-made – it’s a long, thin valley in an otherwise uniformly steep slope. There are the bones of rocks poking out the sides. There’s also a mysterious alcove in the right-hand end wall. Perhaps it was a toll booth?

Our neighbours in Monkerton House, next door to the pub, have suggested that their house was built from stone from The Dingle quarry, but I can’t find any hard evidence of this!

Detective mode on. Updates will follow.

In the meantime, we’re going to look into getting that earliest deed framed, because it’s beautiful.

Stairway to Heaven

So, behind our house there is a courtyard (currently a weed-yard, soon to be a beautiful flag-stoned eating area), and from that the ground slopes up steeply into the Dingle.

Then, the bank on the right-hand side slopes steeply up to the main garden and orchard.

Steps beneath a honeysuckle arch

Steep slope on the right

It’s slippery in the wet and quite tough for our parents (and for us, to be honest!) So, we decided to build some stone steps into the bank. We want them to look like they’ve been there forever, and they will do after a few weeks I think.

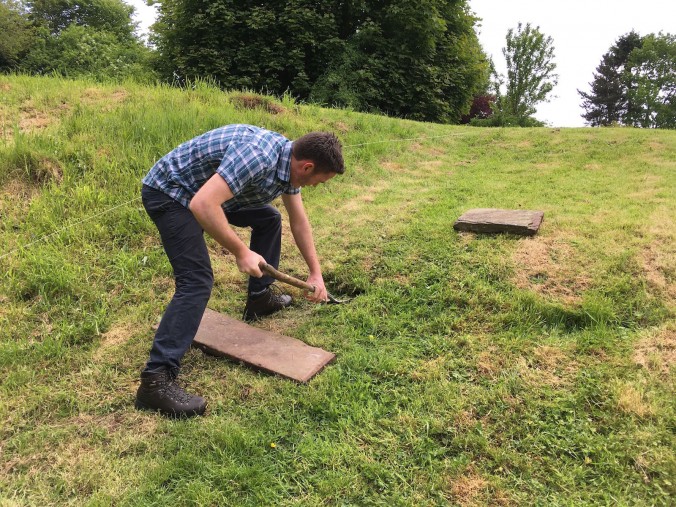
It was much simpler than we thought it would be in the end, and took us only just an afternoon in the hot sun. Powered by dandelion and burdock and chocolate cake. We started by working out how many steps we’d want to make it a fairly easy walk up the hill. We didn’t want the space between each stone to be too big, or the step up or down too large.

Then we laid the stones out where we wanted them, and started digging around them. We removed wedges of grass around the same size as each stone…

Joe digging a hole for the stone

Diggin’ an ‘ole

And dropped the big lumps of stone into the ‘oles…

A hole and a lump of stone

An ‘ole

We did go to a reclamation yard just up the road, which is filled with all manner of amazing treasure and we will be going back… but when we found the stone, here’s how the conversation went:

Joe: “How much for a pallet of sandstone?”

Man at yard: “£100 a square metre”

Joe: “You mean a cubic metre?”

Man at yard: “No”

Joe: “…”

So then we remembered all our garden walls and actual house are made out of stone, so we figured there must be some lying around in the garden. Happily, there was! Some in the courtyard (some of which is huge and will be turned into a BBQ) and some languishing under the Bridge of Death.

So we rescued it all and carried on building…

Joe building steps

Not a builder’s bum in sight

And this is the result. We’re pretty bloody chuffed with it, all things considered. And Noodle definitely approves, so that’s alright then.

Noodle cat sitting on the top step

Finis! And it has the Noodle Cat seal of approval

Next garden building project: the bank up to the Bridge of Death*. It’s very picturesque (covered in buttercups and all manner of English country flowers) but very steep. So we’re putting steps in there, too. Although we’ve run out of stone…

*Now known as the Bridge of Significant Peril, because we’ve since repaired some of the slats.

What’s This?

In our garden, just before you get to the orchard, there’s a mahoosive patch of nettles. We started obliterating them last weekend, and found this:

What's this?

What isssit?

Buried under the many nettles was a large piece of corrugated metal. We’re hoping for some kind of a bunker filled with buried treasure, but we’re being realistic. We’ll settle for just an exciting bunker.

It’ll probably turn out to be Mr G’s method of killing weeds, but we’re keeping our hopes up.

Any thoughts?

Tales From The Septic Tank

We’ve never been responsible for a septic tank before. In case you’re not familiar with such a beast, it’s basically a big hole in the ground into which goes everything that goes through us. Plus the washing up water, laundry water, shower water, etc.

It’s a bit grim. Well, it’s not, because luckily our tank is healthy… but it is.

Normally, your waste will drain away into your septic tank, then the septic tank will do its thing (more on that shortly), then it drains away downhill into a soakaway.

But here at The Dingle, things are slightly different. Of course 🙂

The house itself is in a dip at the bottom of the rise of the garden, about 12 feet off the road. So there’s no downhill for our waste to soakaway to. It’s highly illegal (thankfully) to drain effluent into public water courses or drains. So what’s going on here?

Good question.

Our tank system is pretty old, and a bit awkward: there’s a mechanical pump operated by a switch in the Rayburn Room, which means we have to remember to pump the tank every few days. We’re obviously going to replace this with an automatic system in the next year or so, but for now it’ll do fine.

Because we’re at the bottom of a hill, the grey water has to go uphill. So there’s an awkward arrangement of pipes at the front corner of the house that, frankly, is a bit unsightly. See:

Old-style septic tank

The poo hatch!

The metal hatch is the poo inspection lid (lovely). The brick contraption houses the mechanical pump. The black pipe that disappears into the bank takes the grey water away to…

…who knows where? At this point, we’re not entirely sure where the soakaway is, but we have our suspicions. The good news is, there’s no horrifying, B-movie-style bubbling and no smells, so wherever it is, it’s healthy.

The bad news is, we really will need to replace the system – or at least upgrade it – at some point. Preferably sooner than later. We heard a rumour we may be able to claim it on the buildings insurance, so fingers crossed.

The tank itself is pretty cool though. We had a chap out to empty it and take a look, and according to him it’s in good condition and healthy. We have nothing immediate to worry about, which is somewhat of a relief.

Since then, I’ve been learning about septic tanks. Many, many homes in rural areas rely on septic tanks because it’s just not possible to hitch us up to the public sewage system.

Newer tanks are bottle-shaped and made of plastic, buried underground; older ones (which we have) are usually large rectangular boxes of brick, stone, or concrete, buried underground. It’s a simple waste water treatment works.

Waste material – charmingly known as “sludge” settles in the bottom of the tank for natural bacteria to digest. It builds up, so we have to have it emptied every year or so to make sure it continues to work properly and to prevent the soakaway becoming choked.

Then the grey water drains off into a soakaway, usually a pit filled with gravel. They tend to be quite big, so are a massive pain in the backside to replace or work on. Also, it’s very expensive.

We need to find where the soakaway is to check the discharge is light grey and doesn’t include any solids.
I’ve discovered that expensive, posh toilet roll is a no-no — it doesn’t break down easily, so can block the tank.

Bleach in anything but tiny quantities is also a no-no, as is antibacterial cleaning stuff, because it kills the friendly bacteria in the tank.

And chucking cooking oil down the sink is a bad thing, because that can solidify and cause blockages.

We need to keep all this in mind when we build the new kitchen extension… but for now, everything seems to be working beautifully.

Happy days!

And lo! There was an egg

There has been great excitement at The Dingle this week, for on Thursday lunchtime, Granny Featherwax gave us our (and her) first ever egg. It’s a tiny wee egg, about half the size of a “standard” supermarket egg – but it has a good, strong shell. We’re going to eat it later.

A small egg lies nestled in the straw in a nesting box

Granny Featherwax’s first egg!

The girls are doing splendidly. They love grapes and bananas, and I truly believe there are few things in life as funny as watching a chicken steal your banana skin and legging it up the garden, with two other chickens in hot pursuit.

We’re just learning to pick them up at the moment. They don’t like it, but they do like the treats they get. Apparently they’ll get used to this, which is good because we need to be able to pick them up so we can inspect them and make sure they’re healthy.

If you’ve ever considered getting chickens, but weren’t sure – do it. They’re easy to look after and they’re endlessly delightful. And very fine-looking animals to have pottering around in your garden.

Three chickens in the sunshine and the coop in the background

Enjoying the sunshine

Electrickery

There are a limited number of things I know about the chap who lived here before us.  He was well thought of by the village. People liked him, and enjoyed seeing him thrash his motability scooter at unprecedented speeds down the high street. As a younger man he’d run the local scout group, and there’s quite a few middle-aged chaps I’ve met in the pub who knew him when they were a child. These facts have been gleaned in the local pub. There’s only really one thing I know about him that comes from the house itself.

I know he had no fear of electricity.

I know this from the junction boxes, from the randomly placed pullswitches, from the wrist-thick bundle of cables that encircle the house at gutter level.

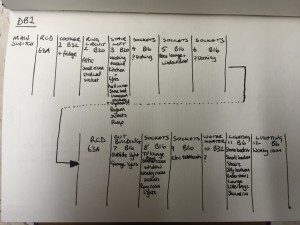
So, in an attempt to untangle the facts, we spent some time a few days ago finding out which MCB does what at the main consumer unit (which is halfway up the stairs)

So, here’s a rundown of what we found:

  • Main switch – nothing to report
  • RCD, 63 Amps. Somewhat unbelievably, this immensely complicated tangle is protected by a 30mA RCD.  I find this both reassuring, and amazing.
  • MCB1, Type B32.  Label: Cooker. Connected to.. the cooker. we’re off to a good start.
  • MCB2, Type B20. Label: Ring Circuit.  Here is where I’d expect all the wall sockets. Turns out it’s only the sockets in the attic, and one socket on the gable end bedroom.
  • MCB3, Type B20. Label: Stairlift. We don’t have a stairlift, so I was expecting this not to be connected to anything.  However, it runs the washing machine, the kitchen sockets and lights, one hall socket, the stone extension bedroom sockets and the immersion heater.
  • MCB4, Type B16. Label: Sockets. This one’s not connected to anything.
  • MCB5, Type B16. Label: Sockets. This supplies half of the sockets in the living room.
  • MCB6, Type B16. Label: Sockets. Nothing.  Nada.
  • Another RCD, 63Amps.
  • MCB7, Type B16. Label: Outbuilding. This supplies a bunch of external lights and the shed, which has it’s own consumer unit and more wiring than we can wrap our heads around.
  • MCB8, Type B16. Label: Sockets. This supplies a random smattering of sockets throughout the house, plus the lights in the stone extension ground floor.
  • MCB9, Type B20. Label: Sockets.  This powers the electric toothbrush.
  • MCB10, Type B32. Label: Water Heater. Not connected to a thing.
  • MCB11, Type B6. Label: Lighting. This supplied lighting to 70% of the house
  • MCB12, Type B6. Label: Lighting.  Lighting for one bedroom only.

Photo 25-04-2016, 19 39 29

So there you have it. I’m no expert, but should lighting and sockets be separate? Isn’t 20A a bit much for a toothbrush?

Looking at the cableruns, it looks like any time they wanted a new socket, light, or switch they simply looked for the nearest piece of wire, whether it be above or below, for lighting, sockets, ring or spur – and cut into it to splice a new bit in.

It’s not really salvageable.  The house will need a complete rewire. But it’s awesome fun!

We’d have loved to have met the previous owner. He seems like he was a real character – everyone has a good word to say about him. And he’s created this crazy, wonderful, quirky house – which looks insane, but everything works. I suspect he was something of an eccentric genius and I wish I’d known him.

Clucking Bell!

The chickens have arrived!

3 chickens huddling in their coop

The girls arrive!

Meet Amelia Egghart, Granny Featherwax, and Nanny Egg.

Amelia is so named because she is missing a toe, but she was the first intrepid chicken explorer to make her way down from the coop and into the little covered run. She’s an explorer, and undaunted by the challenges presented by being slightly toe-less.

Granny Featherwax and Nanny Egg, well… they just look a bit witchy. And very capable. And a little mischievous.

The girls stayed in their top coop for the first afternoon and night, to settle in – then we opened their ramp the next morning and tried to coax them down into the run with a little corn.

It took them a while, but by lunchtime they were all pottering around. Here’s what we’ve learned in the first couple of days of chicken-keeping:

  • They’re very chatty – every time we wander over, they chuckle at us and follow us around, which is delightful
  • They love dandelions – I mean, they proper love dandelions
  • They poo a lot
  • They drink a lot of water, too
  • They’ll eat almost anything we will (apparently they go mental for cooked leftover spaghetti – watch this space)
  • Checking for eggs is just about the most exciting thing to do ever (I’m hoping this won’t wear off)
  • They’re very clever – took themselves to bed without needing any prompting or encouragement

They’re staying in their little coop and integrated run for a few days, but next week we can let them out to free range around the garden when we’re around. I’m a little worried about the fox that lives at the back of the woodland, but we’re hoping all will be well if we’re there and if we encourage them to be out in the orchard rather than under the tight bushes.

We’ll get some better pictures up when they’re out and about and they’re more used to us.

In the meantime, here’s their posh house:

Pyramidal chicken coop, house on top, run below

The Ark of the Chickenant

Imminent Chickens!

So, it’s been a lifelong dream of mine to keep chickens – and now we’re in The Dingle, I can finally do it! Hurrah!

So on  Saturday just gone, we headed over to Wynne’s of Dinmore, which is just a few miles away, and wandered around their farm.

They have, as well as everything chicken-related, alpacas for sale. Look at this dude! They look like 80s pop stars, they’re ace. But they’ve got batshit-crazy eyes and they just kinda stare at you, so we’re not getting alpacas.

A ginger alpaca and a blonde alpaca giving us the hairy eyeball

A ginger alpaca and a blonde alpaca giving us the hairy eyeball

We might, however, get a couple of pygmy goats because you’ve never seen anything so cute as a baby pygmy goat.

Anyway – we’ve ordered a chicken house, all the gubbins to get us started, and three Calder Ranger hybrid hens. I’m expecting a call today and I’m ridiculously excited. We’re hoping they’ll all arrive before the bank holiday weekend so we can get to know them.

In other news, here’s what else we’ve accomplished so far:

  • Settled in nicely
  • Cooked two meals in the Rayburn, which were delicious (lasagne and a tagine)
  • Let the cats out for their first explore (nervous, us?)
  • Taken out a dead stump and a dead apple tree
  • Planted our three trees: a Victoria plum, a conference pear, and an apple
  • Mowed the lawn many times
  • Got broadband sorted
  • Planted a miniature herbery (mint, oregano, curry, parsley – we’ll see if the mint goes mental)

We’ve not done much in the way of, well, anything yet. We’re going to live in the cottage for a couple of months before we make any big decisions… but we are going to start stripping wallpaper and Getting Stuff Done over the bank holiday weekend.

Watch this space…

Tagine in Rayburn oven

Our first Rayburn meal – a bean tagine. Delicious.

Stone planter containing parsley, curry, oregano, and mint

Our miniature herbery: parsley, curry, oregano, mint

« Older posts Newer posts »

© 2025 Project Dingle

Theme by Anders NorénUp ↑