Project Dingle

Restoring an old cottage...

Page 6 of 8

The Mysterious Plumbing of Dingle

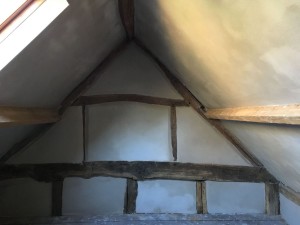
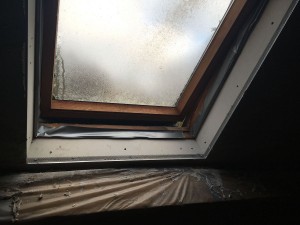
Now Christmas is over and everything’s back to normal, we decided we’d better get back to work in The Dingle. Next stop is the stairs and floor, and we still have some way to go before we’re ready for that – not least of which was getting rid of the header tank inconveniently located in the attic.

Header Tank

You can see how we wouldn’t want a water tank dripping away next to our bed, right?

Now, we weren’t entirely sure what this header tank was doing. We’d done some cursory investigations and come up stumped. So my first suggestion was to just take it out and move it into the Stone Attic.

Then Bill the plumber came round to service the Rayburn and I diverted him up to the attic instead to have a look. After some sleuthing, we figured out it was feeding the shower in the ground-floor shower room. That room will eventually be knocked down with the rest of the lean-to additions, but for now we kinda need a shower.

The hot was fed from the hot water tank in what’s currently our bedroom (the Stone Room) and cold couldn’t come off the mains because the pressure was too high. We’d just get cold water if we did that.

So we went and bought a pressure valve, some plastic pipe (temporary measures, remember!), and some courage.

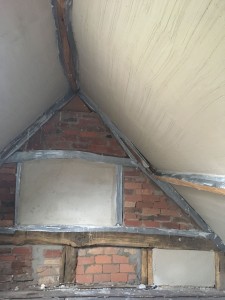
Joe set to work manfully and discovered two things. Firstly, an old pub sign was repurposed as a shower room wall panel, which is ingenious – we’ve found loads of brilliant repurposing in the house so far:

Repurposed wall panel

Repurposed wall panel

Secondly, the plumbing is interesting. There are many water feeds to different places.

  1. Mains cold water to the sink tap.
  2. Cold water to the shower from the header tank.
  3. Hot water pipe #1 to the shower.
  4. Hot water pipe #2 to the hot sink tap.

I took a picture:

Many plumbing

Many plumbing

It seems like it evolved organically. Like mushrooms.

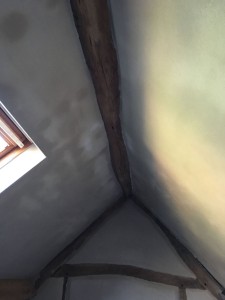
The answer was to cut out some bits of batten here and there so we could take mains cold water from the existing pipe and route it up that blank wall with lots of mystery holes in it, and around to the shower, then add a pressure valve, like so:

High-quality bodgery

High-quality bodgery

Then we (well, I say “we”. I was working. I actually mean Joe) put it all back together and ta-da! We have a working shower and no bloody header tank in the attic! This feels like real progress for the first time since the plastering went on.

I’m seriously impressed with Joe because he’s never done any plumbing before and he confessed he was a little nervous about “flooding the entire house and village and planet”. I knew he’d be fine because I’ve done a little simple plumbing before, but I wanted to watch him flapping.

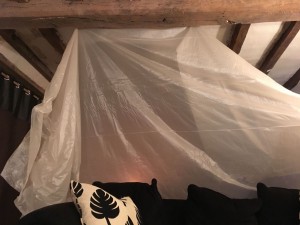
Speaking of flapping…

Here’s a little bonus for you. I heard strange noises coming from attic, so I went to investigate. Here is what I discovered…

Save

We Got Plastered!

It’s now been two weeks since the plasterers left us with a totally transformed space. The photos don’t really do it justice, because it looks absolutely stunning:

Plastered 1 Plastered 2 Plastered 3

We’re going to leave it for a few months – probably until summer – before we paint it. Advice was to leave it a year, but my level of impatience is too high for that, so we’re compromising at 8 months.

We’ll be using clay-based paint designed to go onto lime plaster, so there’ll probably be lots of posts about which colours we like and how we can’t decide.

Next job in the attic is to finish sanding and oiling the timbers. We need to lightly sand all the timbers, in fact, to take the plaster off.

Then we’ll be putting in the electrics. Yes, yes, we should have done all that before the plasterers arrived but things got on top of us and we got overexcited about the plastering. So we’ll be looking for surface-mount LED spotlights for the ceiling, and using that gorgeous old-fashioned braided flex for the wiring that’ll be exposed.

After Christmas – if we’ve got enough cash! – we’ll be getting the window in the wonky room knocked back in and the 8″x8″ beams installed to reinforce the attic floor.

We got John and his team from PlasLime to come and do the work, and they were brilliant. A total delight to have around the place, and really careful about keeping everything as clean and tidy as possible. We were pleasantly surprised at how little dust there was.

The bill was huge… but it was totally worth it. Beans on toast until springtime.

Getting Plastered

So, after all the mess and preparation and planning and mind-changing, we’re finally getting plastered.

The lads turned up on Friday – proper lovely chaps they are too – and proceeded to put the scratch layer of lime plaster on the walls and ceiling in the attic.

Joe and I are feeling quite smug because John, the master plasterer, kept saying what a beautiful job we’d done of the insulation and gap filling. Here’s what the attic looked like on Saturday morning – it’s already taking shape, and it’s certainly more echoey now.

We had some good hollow booming voices going on.

So, this is the gable end that adjoins the stone part of the house. They’ve put an extra layer on that centre panel because the brickwork was a bit of a mess where the chimney goes up the wall. So they’ve built it out to tidy it up.

Gable end 1 scratch

The other gable end. There’s still daylight under that tape, but not for much longer!

The plasterers are using special insulating lime plaster, which is not as good as using proper insulation, but is much better than just plastering onto a single skin brick wall. So it’s a decent compromise to keep the timbers on display, but not freeze to death in winter.

I guess we shall see!

Gable end 2 scratch

And the guys have tidied the windows up – which makes a big difference:

Window prep

So, today they’ve been putting some of the top layer of lime plaster on and they reckon they’ll be done tomorrow. It already looks absolutely fab. I was beginning to doubt whether we’d really end up with a lovely room, but we totally will.

I’ll update in a few days with the finished article, before we paint it…

But in the meantime, our living room has become a serial killer’s kill room. I don’t know if you’ve ever seen Dexter, but…

Kill room

Creepy.

But surprisingly effective at keeping the worst of the chill out of my office. Hopefully tomorrow, we’ll be dust free for a little while…

Giant sycamore coppice and other heavy things

When we first looked at the house, way back in February, there were three large stumps in the middle of the lawn, each with a few poles growing out of them.  By September they had transformed into a veritable coppice topping out at well over ten meters high, and a good eight meters across.

It was somewhat alarming to realise how quickly it had grown, and we feared if we gave them another year we might not have a lawn at all.

At the very least, it needed reducing in size and showing who was boss.  Out came the trusty chainsaw, and we took it from this (okay so this was taken in summer, but you can see how ridiculous huge it was):

Sycamore before

to this:

Sycamore after

A mere skeleton of its former self. But it’ll bounce back.

We also took out most of a dead apple tree, and made a start on the world’s most giant GardenStump:

Stump

At some point during proceedings, the wheelbarrow committed seppuku. I don’t think it ever really recovered from drunken midnight railway sleeper maneuverings…

Progress though. Progress.

Oh, also – the chickens appear to be digging a tremendous hole in the garden…

Tremendous Chicken Hole

Save

Save

Like Giant Drunken Jenga…

I love living here. The Sunday before last, we were in the pub having a pint, and I mentioned I was looking for railway sleepers to make raised vegetable beds. Farmer Leddy asked how many I wanted, and how long.

“Ooh, 16, about 2.4m long. Know anywhere?”

“Yep. I’ll ask.”

~ Fast forward to Monday morning ~

A tractor pulls up outside with a farmer hanging off it waving manically…

“I’ll be along in about an hour with those sleepers, alright?”

“Erm… Okay! Brilliant!”

A couple of hours later, and these are in our backyard:

All ready to move up the hill...

All ready to move up the hill…

Not too filthy, and all ready to move up the hill. Except they’re about 100kg each. Joe and I moved two of ’em, then decided it was a bit lairy. Slippery hill and potential broken legs and all that. It would have been okay if it was just moving them around on the flat.

So, last Saturday night, we were in the pub. Again. Three drunken farmer lads.

“We’ve got these sleepers…”

“Aye…”

“There’s plenty beer in it for you if you fancy helping us move ’em tomorrow please…”

“Tomorrow? Ha! Tomorrow is for WIMPS. We are men. We shall move them NOW.”

Joe goes off with three drunken farmer boys, and I wake up to this. If I hadn’t had an awful gin hangover, I would have laughed more loudly. As it was, I chuckled to myself quietly, then went back to feeling sorry for myself…

It's like a giant had enough and threw his toys out of the wheelbarrow...

It’s like a giant had enough and threw his toys out of the wheelbarrow…

So later on that day, when the woe had receded, Joe and I and my Dad created two raised bed masterpieces:

Not too shabby...

Not too shabby…

I’m going to line them with polythene so we don’t produce poisonous carrots and whatnot, then dig out all the grass and weeds, and fill ’em with topsoil and chicken poo.

I’m also going to create a border around them, either of gravel or wood chippings, so the grass doesn’t get all mashed up and muddy.

Next spring, we’ll be producing all manner of delicious goodies.

We Have No Walls Upstairs

It’s been all go here at The Dingle over the past couple of weeks. We’ve finished installing the eco-friendly insulating boards in the attic

~ (and, by the way, the professional lime plasterer who came around to give us a quote today said, “Who did this? It’s absolutely excellent. Some of the best I’ve seen.” *proud*) ~

and got Fish our joiner around to make a decision about the floor.

We didn’t so much get on with the floor as rip out everything on the first floor. From this, with the not-original dodgy stud wall:

Before, with the dodgy stud wall...

Before, with the dodgy stud wall…

To this. A big mess:

Just a wide open space...

Just a wide open space…

Now we’ve got all that space, we’ve got more options. So, here’s what we’re definitely going to do before we move up into the attic:

  • Take out the two beams supporting the attic floor. They were never meant to support a “proper” room, and according to the buildings guy who came round with Fish, were probably wall timbers supporting struts for lath and plaster before they became our ceiling.
  • Install two 8in x 8in oak beams to support the floor.
  • Knock out the “winking” panel so we can install said beams, and put in a new oak-frame window at the same time.
  • Maybe install new oak floor joists – the buildings guy said it’s not essential, but if it were his house he would do it. So we’re going to get a quote and see how much it’d add to the bill. We’d like to do it proper-like.
  • Move the stairs. The new hand-made oak stairs were going to go in the same place as the old ones, but it makes more sense now we’ve opened up the space to have them go up from the corner, more or less where the downstairs stairs come up.

So that’s all structural stuff we’ve to do, to make the building sound. All good, and it means we get a window into the Wonky Room so we’ll have more light.

Fish suggested we could put the bathroom into the Stone Room, which has given us something else to consider… It’d be an amazing huge bathroom, and I could  put a roll-top bath right in the middle, as well as a big walk-in shower…

We really need to sit down with pen and paper and decide on the layout upstairs – and how it’s going to relate to downstairs when we build the new kitchen at the back.

Anyway. In the meantime, we’ve discovered some treasures:

Old papers lining the plasterboard between the ceiling joists – from 1949 and 1950

Old papers lining the plasterboard between the ceiling joists – from 1949 and 1950

I’m going to save a couple of these panels, the ones in best condition, and varnish them and turn them into a little treasure. Same with some of the crazy wallpaper we’ve lost with the stud walls. I’d like to keep a little reminder of what was here before us.

And a rats’ nest:

Thankfully they moved out...

Thankfully they moved out…

Okay, so perhaps that’s not a treasure. And thankfully it’s an old abandoned nest. No rats here. But you can see the horizontal slots in the ceiling beam, which are odd – hence the idea they were once wall supports. And the beam itself isn’t sturdy enough, really, to support a floor. It’s like a trampoline up there…

There's a bit of a bend on this one...

There’s a bit of a bend on this one…

We’re leaving this timber in place. Partly because it’s so wonky I don’t know how we’d replace it. It’s aces. But mostly because when you jump up and down on it, it barely moves. We’re going to replace those supports with something beautiful though.

We had a quote today from a lime plastering expert, and it looks like we can get the attic plastered before Christmas which will be brilliant.

He’s solved the freezing wall problem – there’s some insulating lime plaster that gives you a “pillow” effect, so we can expose the timbers but still keep some of the chill off the wall. Looks like we’re looking at about £50 a square metre, which seems pretty standard from what I can find out.

Exciting stuff 🙂

Attic walls

The rules with an old house seem to be: Gypsum is bad. Plasterboard is bad.  Modern vapourproof insulation is bad.  None of that celotex or kingspan stuff.   It all adds to moisture imperviousness, and these old houses need to breathe.  If you don’t let the moisture out, your timbers rot.

We needed to create walls and insulate the space up in the loft, so we bought a boatload of this stuff – woodfibre board.  It came on a pallet, it’s light, dusty, fits up the stairs into the loft, and was pretty easy to cut and fit.

After a few hours of working with it, I think we got pretty good at fanangling it into corners and around tricky wonky beams and whatnot.

from this...

from this…

boarded walls

to this..


We’re quite pleased with that.  The really annoying bit is that we ran out of those fancy plastic washers that stop the screwheads pulling through the material, leaving the job unfinished..  That bit on the left on the next image- it’ll have to wait for next weekend.

ran out of washers..

ran out of washers..

Once that’s finished, we get it lime plastered and that’s that. Nice warm breathable walls.  And no squirrels.

The Attic is a Squirrel-Free Zone

So, yesterday was a super-productive day here at The Dingle. First thing, we utterly failed to go to parkrun. In our defence, it was raining…

But we did go to Kent’s in Hereford because Ronnie the builder from the pub told us it was the place to go for soffits.

So off we went.

Having no idea about these things, I figured we’d probably be shelling out a couple of hundred quid and it’d be a bit of a ballache fitting the things, because of drilling holes and putting vents in and that.

But on arrival, the helpful young man pointed out soffits with vents already within them – and we got 15 metres of the stuff, cut up small enough to fit in our car, plus a box of pins to fix them.

They’re not going to be visible at all, so we didn’t have to worry about what they looked like. And they’re not really true soffits anyway, they’re simply there to ensure no critters get into the cavity behind the rafters and set up shop there.

After a sustaining meal of boiled eggs and soldiers and a cuppa, we dragged everything up into the attic and got started.

There was a hazelnut in the middle of the floor. Like some kind of dire warning from the squirrel posse that this was their territory. Not to be deterred, though, we pressed on. Keeping a weather eye out for terrorist squirrels…

First job: removing all the bricks loosely fixed to the top of the dwarf wall. The previous owner had put them up there to make it less draughty – here’s what they looked like before we removed them:

Under the eaves with bricks...

Under the eaves with bricks…

And without. This is the front of the house:

Draughty...

Draughty…

And the back of the house. As you can see, there is no soffit here. We got a good view of the chickens bockling around in the courtyard…

Looks like there is actually a soffit on the front of the house

Looks like there is actually a soffit on the front of the house

Fitting the soffits was actually really simple, and only took us a couple of hours. We got a system going: Joe would measure all the distances between the rafters. I’d saw the soffit into the right lengths. Joe would nail them onto the timber.

Here’s the result – front of the house:

Tidy.

Tidy.

And the back of the house. Much less draughty:

Dusty.

Dusty.

A job well done. Not authentic, perhaps… but we’re beginning to realise that if we do everything exactly as it “should” be done, we’ll need a bottomless pit of money. So we’re concentrating on doing the best for the house – making sure it can breathe, making it as authentic as possible – but not bankrupting ourselves or driving ourselves crazy in the process.

We do have to chip out all the concrete that’s in contact with the timbers, though, because it rots the wood. Not breathable, see.

So that’ll be a fun job over the next few weekends.

We’re pleased with our progress today. Tomorrow (Sunday) we’ll be starting to fit the breathable, eco-friendly, insulated plasterboard.

Jobs still to do before the floor goes down:

  • Fit the plasterboard
  • Decide on lighting and wiring
  • Decide on plumbing locations for the shower room
  • Chip out concrete adjacent to timbers
  • Plaster the ceiling and walls
  • Paint the gable end wall for a textured look – or do we lime plaster it? Yet to be decided
  • Probably a bunch of other stuff we’ll discover later on…

Perhaps the most difficult job today was cleaning up afterwards. Up until now, the attic had been strewn with rubble, piles of dust and sand, old nails and tacks, and tools scattered everywhere. Now, the tools are neatly packed away, all the crap is gone, and the place is swept and tidy. Still very dusty, but it’ll stay that way for weeks, I’m sure…

Sandstorms in the Attic

We’ve been quiet for a while, mostly because we’ve been on holiday, but partly because we’ve been dithering.

There’s quite a lot to do. And we’re beginning to realise how clueless we currently are about, well, everything.

The oak flooring for the attic is arriving sometime in late October (we’ve put the dates back a little because of the amount we have to do) but before then we have tons of stuff to get on with. Here’s what we’ve done since the last update:

  • Joe and my dad – Adrian – stripped out seemingly miles of cables and nonsense from the attic. Strangely, the porch light and one of the lights in the Rayburn Room no longer work. Makes perfect sense.
  • Pulled out an uncountable number of tacks, nails, and cable ties from all the timber.
  • Removed the final bits of cladding and random battens.
  • Had some more sandblasting done.
To Sandblast or Not to Sandblast

One of our dithers was over whether or not to sandblast the timbers in the attic. We have enough cash to do the floor and the staircase before Christmas, but other than that, it’s getting a bit tight.

In the end, we decided to go for it because as Chris, our Super Sandblaster, pointed out: if it looks crap when we’ve done the rest of the room, we’ll be gutted. And it’ll be a right mess to do later.

We’re really, really chuffed we did because it looks ace. Here’s the before:

Attic space with original beams and pine cladding

Pre-sandblasting

And here’s the afters:

Sandblasted bricks and timbers

Stone end, after sandblasting (plus Hole of Doom)

He did the bricks as well, which is ace because they were a right mess, and we couldn’t tell what state they were in. As it turns out, there are many types of bricks in all manner of states.

Sandblasted end wall

End wall of the house, sandblasted

So we’ve just treated all the timbers for woodworm. We need to buy some more stuff to do the top beam and the floor. It’s odd stuff – it made Joe and I sneeze continually…

Concrete Nightmare

Once we’d done that, our next job was to tackle the panels between the floor and the ceiling slope. Interestingly, we found one panel that was still – we think – the original lath and lime plaster:

Original lath and plaster

Original building materials

I wish we’d realised before we knocked a chunk out. We’re leaving the rest of it in situ, obviously, and we’ll repair the hole we made…

Bad news for the other panels though. They’re concrete, and what looks very much like random lumps of cement. We honestly don’t know what we’re going to do with these, because if there’s no brick in the walls and we take all the concrete out, we might end up rebuilding that whole section of wall.

And it’s not just the top bit in the attic – the wall continues down into the Wonky Room below.

Any suggestions and advice welcome!

We did start chipping away at it, but it’s super-hard and it’s going to be a nightmare.

Original panel in the middle, concrete on either side

Original panel in the middle, concrete on either side

And the yukky concrete one – do we chip it all out and risk a hole in the wall? Or skim it and ignore it? I don’t want to leave it there, but neither do I want to rebuild an entire section of wall…

Concrete wall

Concrete wall woe

There’s another one of these on the other side of the original panel. And two more at the other end of the room.

What’s Next?

So, what do we have left to do before the floor arrives?

  • Put eco-friendly, natural plasterboard up on the rafters
  • Skim and paint the ceiling
  • Skim the walls? Or leave the bricks bare? Probably skim them, because they’re quite gappy
  • Put new wiring in (maybe – maybe after the flooring is done)
  • Soffits between the wall and the ceiling to stop birds nesting up there again
  • Cut out the new stairwell and remove the old stair gubbins

And probably a bunch of other stuff too…

Save

Stripping The Attic Part II

What with all the sunny weather we’ve been having, we’ve been a little lax about getting on with the vast pile of indoor jobs…

But on Sunday, we ventured back upstairs to finish the pine-cladding destruction.

It went much as before: pine removed, many dust generated, nails removed, rafters exposed. And we discovered the ridge beam is not so much a beam as an entire tree trunk by the looks of it. We need to inspect it more closely, but so far it looks sound.

Actually, that’s another job we have to do: treat all the timber in the house for woodworm. That’ll be fun.

Anyway – you can see the progress we’ve made below. It’s pretty much bare now. We need to remove the cladding corpses and as much dust, nests, and dirt as we can, then we’re ready to look at the actual improvements.

Hurrah!

Bare rafters

Bare rafters

And the ridge beam:

Mahoosive oak (we think) ridge beam

Mahoosive oak (we think) ridge beam

We still need to pull all the electrics out as well, so we can rewire properly.

In the meantime, Fish – our floor man – is coming along on August 12 to look at the horizontal softwood timbers and advise on what we can do.

The oak floor is arriving on October 17 to sit for a few days…

And we start laying on October 24! Exciting times.

So before October 17, we have to:

  • Strip out all electrics
  • Clean out the entire space
  • Make sound any gaps at the base of the roofline and ensure the wall is cool
  • Cut out the area where the stairs will go
  • Blast and treat the exposed timbers
  • Lath and lime plaster (we think) the sloping walls/ceiling

Suddenly that seems like quite a big list, considering we’re having a holiday in between now and then…

« Older posts Newer posts »

© 2025 Project Dingle

Theme by Anders NorénUp ↑