Project Dingle

Restoring an old cottage...

Page 3 of 8

Opening The Dingle’s Eyes

It’s 5.30 am. All is dark. The moon is shining through the new windows, and I can see frost glowing on the cars.

And the room is warm.

Louder, for those in the back?

The room is warm.

Plus, we have actual light shining in.

Because we gave the cottage new eyes, and those eyes are double-glazed oak-framed beauties, and I can’t even articulate how delighted we are with our new windows!

But let’s start at the beginning, with the old windows.

They were not pretty. The frames were rotting, the single glazing rattled, and the fake lead strips blocked out a surprising amount of light. The secondary double-glazing inside helped a little, but it was super-ugly.

And none of the windows opened.

Except the tiny one in the Rayburn Room, which was covered by secondary glazing, so didn’t really open at all.

Why Oak?

We chose oak because we wanted it to last another 400 years, and look beautiful. And neither of us likes uPVC. At all. Especially not on an old cottage (even though some of the new wood-look uPVC is very good indeed – it’s still plastic, and that’s not us).

We knew the new windows would make a big difference; we weren’t expecting the difference to be quite so dramatic, inside and out. We’ve had lots and lots of lovely comments from the neighbours, who are glad to see some visible progress. As are we!

Window by Window

Let’s start with the tiny window on the side of the Rayburn Room, looking out towards the rosebushes. Here it was:

Tiny window in stone wall, ivy

The tiny window

It’s a bit of a mess, with a rotting frame and largely obscured by ivy and, as you can see, a long-dead plant on the windowsill.

This was the quickest and easiest window to replace and it looks fabulous inside and out:

New oak window in stone wall

Tiny window looking smart

New oak window from inside

Tiny window looking brighter inside

Next came the main window in the Rayburn Room, in the stone portion of the cottage.

Ratty old window

Before (pretty ugly, poor thing)…

Replacing it made an enormous difference:

Beautiful new oak window in stone wall

Isn’t it beautiful?

On the list next year is getting the stone portion of the house repointed and repaired, because in the past cement pointing has been used and it’s destroying the stonework. New windows have highlighted the other stuff that needs improving…

Next is the big window in the living room. One of them was broken because someone (us. it was us.) bounced a lump of concrete off it in the summer… here it is:

Old window...

Broken old window and shonky old bricks

And here’s the beautiful new window and new oak lintel above it. Which makes us feel a lot less like the wall might suddenly crumble.

New triple oak window with new oak lintel above

Ooh isn’t it glorious?

And here’s the inside:

Beautiful new window at night, with stunning oak work

Look at that scribing on the lintel!

On the left-hand side of the house, to the left of the porch, is a small window set into 18-inch solid stone walls. It didn’t let much light in, and that end of the long living room was perpetually gloomy. You can see from this photograph that the window opening used to be much larger; we don’t know why or when it was reduced. But we decided to open it up again.

Window, house name, and previous size visible.

Embiggening a window

You can see the newer stonework with the fresher paint. And yes, the house really is as wonky as it looks in this pic.

Here it is from the inside:

Small window, gloomy corner, lit by a lamp.

A gloomy corner

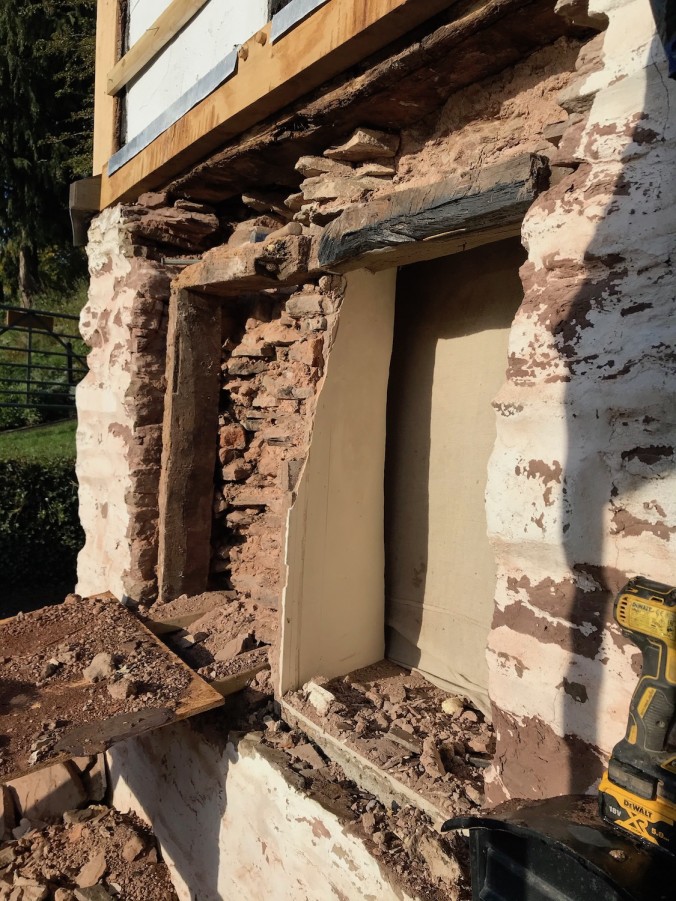
Ken Milloy and his trusty fellow wood-worker, Phil, knocked a whopping hole in the wall, gently removed the original stones (we’ll be reusing those when we build a new porch and new walls elsewhere), and we discovered this:

Original wooden frame buried in stone wall

That’s the original shutter frame!

Ken is pretty sure that’s part of the original frame (you can just see where it’s been chopped about on the right) – and that it was for shutters rather than windows. Glass was extremely expensive when this house was built, so it’s likely the cottage had shutters. But we don’t really know for sure.

That bottom piece of wood is the original windowsill and that is most definitely staying. It’ll be protected by the new piece of oak we’re putting inside as the new windowsill.

Unfortunately, we couldn’t keep the original frame in there; it’s too small. So it had to come out. However, it is staying on the property and we will reuse it as part of something else. We’re not sure what yet, but it will show up on this blog when we figure it out. Funnily enough, a chap from the USA wanted to buy it from us and turn it into a table! Sorry fella, it’s staying with us 🙂

Once again, Ken and Phil installed a new oak lintel outside – and discovered the main beams inside weren’t really being held up by anything. So there was a little extra structural oak work to do inside too. Once again, we’re a collapse-free zone.

Here’s the finished window:

New triple window in stone wall with new oak lintel

Another stunner

And just look how much light pours into that end of the room now!

New wider window lets in tons more light

Flooded with light

If you look closely at this image and the other big window, you’ll see the stunning scribing Ken did to make the new oak fit seamlessly with the old piece. It’s beautiful work and we do a little happy Snoopy dance every time we look at them.

Next is the windowsills. We’re getting 3-inch oak chunks, with wayney edges if we can, but straight-edged if not. They’ll fit perfectly under the new windows when we’ve chipped all the cement plaster out of the way.

Which has got us thinking about what to do with the rest of the living room… but that’s for a future instalment…

For now, here’s a little look at the new curtains. They’re not our forever curtains, but they’re certainly a vast improvement on the mismatched charity shop ones that have served us really well for the past few years…

Red and gold patterened curtains on night-time oak windows

Cosy and stylish!

Imagine how glorious it’s gonna look with the chunky oak windowsill… and how much warmer for the cat bums to sit on.
We’re Watertight! And Waney!

After a verrrrrrrry long summer in which nothing much happened at Casa Dingle, a lot has happened in the past three weeks.

The Front Soleplate

We discovered that the soleplate along the front of the house is solid! (Unlike the soleplate on the gable end which was thoroughly rotten.)

Soleplate over window

Surprisingly solid soleplate

So all Ken and Phil had to do was face it with a beautiful new piece of oak:

New soleplate facing

New soleplate facing

They did this because otherwise there would be a big ledge where the timber frame meets the wall. So now there is the original soleplate, the new oak facing, and the lead flashing over both – held in place by a piece of softwood which will form part of the frame for our new cork panels:

Showing how the soleplate and lead is fixed

Neatly layered timber

Here’s Phil oiling the new lead:

Oiling the lead

Shiny shiny!

And here’s the house looking alarmingly skeletal. Don’t worry, we’re assured it’s quite sound…

Ken's van in front of The Dingle

Ken Milloy: master conservation timber wizard

Over the next couple of weekends, we’ll be rebuilding those wall panels with cork and lime, and the house should warm and watertight. Because…

The Gable End Wall…

…has been weatherboarded!

Some time ago, we had plasterers come out to quote for plastering the exterior of the gable end wall, which streams water inside when it rains heavily. That end of the house gets all the weather and it suffers (hence the rotten soleplate and bricks).

Soaking wet every time it rains...

Soaking wet every time it rains…

That isn't a shadow...

That isn’t a shadow…

Their advice was to clad it in weatherboard to protect it, because we were unlikely to be able to make it watertight simply by plastering.

So we took their advice and asked Ken and Phil to sort it out, which they duly did.

They started by attaching battens and felt to the existing wall:

Battens and felt

Prep for the weatherboarding

We decided to go for waney edge oak boards, which means they retain their natural live wavey edge. It’s absolutely beautiful and looks much more natural than straight boards, and is also more in line with what the original builders would have done, had they chosen to weatherboard the house.

The electric company came and moved the power cables to a more suitable position, and updated from two cables to a single cable, so that was a bonus, and it now looks super tidy.

Isn’t this gorgeous? And it’ll weather down to silver over the next few months:

Gloriously weatherproof and stunningly detailed

Gloriously weatherproof and stunningly detailed

And just look at the wooden carved detail in the peak: our initials, and the year it went up 🙂

Vicky and Joe did this (well, commissioned it) in 2020, the Year of Weird

Vicky and Joe did this (well, commissioned it) in 2020, the Year of Weird

We’re thoroughly in love with the new end of our house. And even more in love with the fact that it’ll no longer rain indoors and blow a gale through the walls.

Thank you so much Ken and Phil, you’ve done an absolutely magnificent job.

Tomatoes, Walls, and 2020

We’re starting this entry with tomatoes because things at The Dingle have been delicious. The jam project this year will be magnificent. Vicky has grown the most enormous marrow ever. We have a shed-full of onions. And the tomatoes have been a triumph.

Tomatoes, blackberry jam, a giant marrow, and onions

Yum, yum, and thrice yum

Which is good because this has been 2020 and we think zombies are next. We’re also becoming increasingly convinced that we’re living in a simulation and the aliens running it are screwing with us.

It’s been… a weird year.

An awful one for a lot of people.

We’ve gotten to know loads of people in our village and it has been so glorious to see people looking after each other and getting to know each other well. We have new friends we might not have made before, because we were village wardens and volunteers.

So good has come out of woe.

But at Casa Dingle, things have been fruitful. And we’ve made a bloody big mess.

Again.

Plans Changed…

Our plans have changed slightly. The chaps at PlasLime recommended we weatherboard the gable end wall, so that’s what we’re doing. Ken is sorting it for us.

But next week, Ken will be back to put in a new sole plate along the front of the house because the one that’s supposed to be there… isn’t.

Which means a couple of weeks ago we replaced the top panels of brick and concrete (a rant on that will follow) with cork and lime. It looks splendid and the house now weighs considerably less.

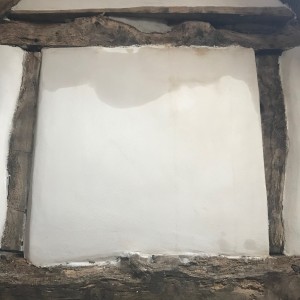
We were a bit sad to find an original panel made with lathe and plaster. We couldn’t salvage it unfortunately because the entire panel had slipped down and become unstable. That was probably the only original one left:

Original lath and plaster wall

Sadtimes.

Here’s what the wall looked like a week ago:

Old walls

That’s all gone now…

You’ll see we had proper scaffolding delivered instead of trusting to the wobbly death tower. It was also 35 degrees C that weekend so we spent some time pretending we were on a balcony in Greece.

Me climbing through the wall

Proper safe scaffolding. It was a treat.

This weekend, we’ve been replacing the bottom panels. There are two more concrete panels.

The air has been blue. Because we cannot FATHOM why anyone would fill a timber-frame house panel with cast concrete and stock fence.

It must have been far more difficult to do than use bricks. And believe us when we say it’s been a complete bloody nightmare to remove. Really, really, REALLY awful.

And the mess. God the mess.

Rage.

Joe with a hammer drill

Hammer drill action and swearing

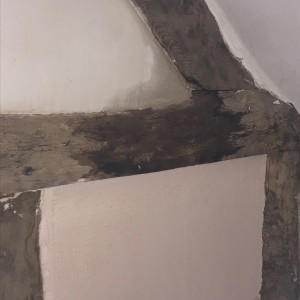
The concrete has also done a fine job of rotting the oak frame. Not all the way through, but enough to be a bit of a worry. The pic below shows a shake stuffed with concrete. The wood all around the concrete and a few mm in is rotten and crumbles away, which is not great.

What not to do with timber

Concrete in timber. Rot.

We’ve removed it, and the house is now happier and lighter and we can move on from the trauma of it all.

Oh, we also broke a window when some debris bounced off the wobbly death tower (yes that’s back).

Broken window

Oops.

Good job we’re having beautiful new oak windows later this summer, eh?

Next stop: panelling the walls with cork and lime again, Ken puts the soleplate in, then we badger Kelvin for our glorious new windows.

Hopefully not too long before the weatherboard happens too.

After that – it’s time to focus on the bathroom, which we’re going to turn into a plant-filled jungle paradise 🙂

Storm Dennis Stops By

Luckily, we don’t live in an area that floods – although the roads in and out of the village can get bad.

Late last year, Vicky’s old Xsara drowned on its way out of the village. It was at this point we decided The Dingle should have at least one vehicle that can cope with floods, mud, ice, and snow. So Harvey the Freelander joined us.

Anyway, this isn’t about flooding so much as it is about our plans for this year, which include getting Plas Lime back to plaster the outside of the gable end wall, and possibly the front of the house, too.

There’s no massive urgency, but we do want the house more watertight than it is right now by next winter…

IMG_6514 As you can see, there’s a little water soaking through…

IMG_6518

The great thing about lime plaster and cork, though, is this will dry out beautifully. If we’d used modern plaster and concrete, the walls would be in big trouble…

Vicky Has A New Office

Ever since I started my business, I’ve been working from the dining room table. At Cedar Tree Farm, I was in the main living room. Here at The Dingle, I’ve been working in the Rayburn Room.

I’ve been waiting a long time – nearly eight years – for an office of my own… and finally I have one!

Two weeks ago, I moved into Casa Moxie – and it’s been magnificent.

Not only because I now have my own space, and a proper routine, and can shut the door on work – but because it now means we can start sorting out the stone part of the house.

The room I’ve been working in for the past few years will become our library/snug/music room, and the room above it (once our bedroom) will become the most fabulous bathroom in the world.

But back to Casa Moxie. Let me show you what we did…

Log Cabin-Tastic

We spent a lot of time scouting around, reading endless articles, getting option paralysis, and eventually just staring at all the options in dismay – until my friend Dawn, who’s building her own house, told me about Keops. They’re building a three-bedroom house log cabin on the land they’ve bought.

Keops is a company that builds bespoke log cabins at much lower prices than you might think. Turns out, one of our neighbours lived in a big Keops cabin while he was building his house, and he showed us around it. His cabin is much bigger than what I needed, but it made my mind up, and I made an appointment to go and see them.

A few days later, and I’d paid the deposit and got organised. First task:

A Great Big Concrete Slab

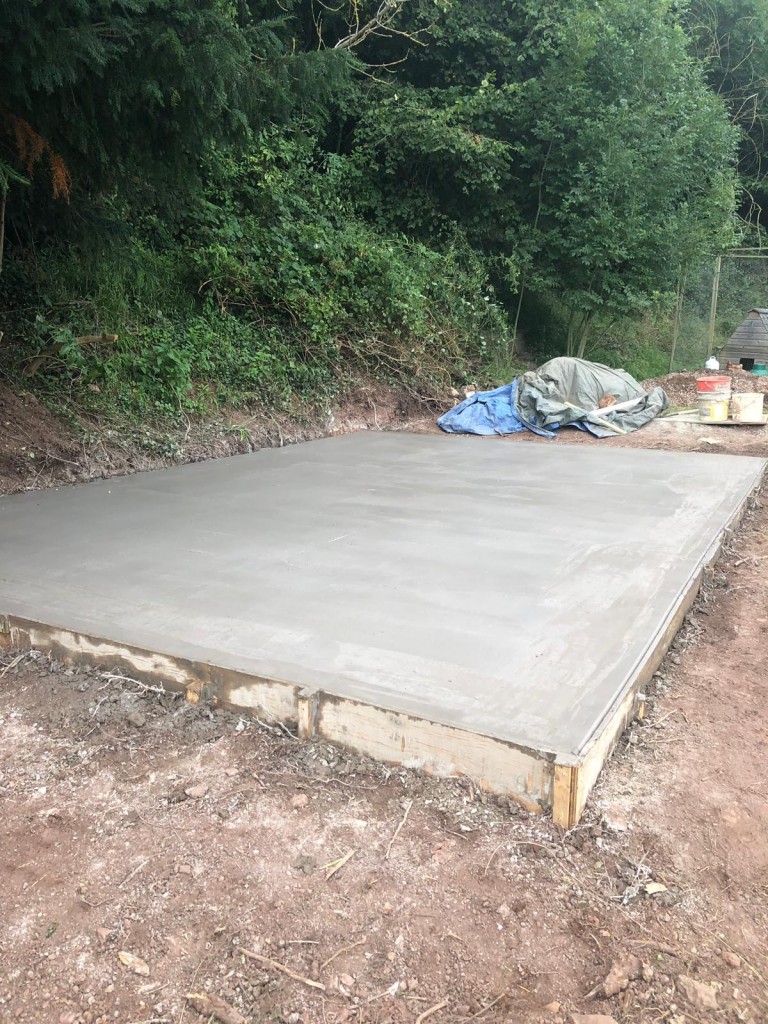
Our neighbour Graham is a builder, so we asked him to lay our concrete slab. After a couple of days having adventures on our awkward steps to get everything up and in place, he did a brilliant job and the perfectly level slab was ready to go.

Preparation for the concrete slab

Filled with rubble and ready to go

Another bonus: we got rid of two dumpy bags full of rubble and crap, because Graham used it as hardcore. There’s something underneath that slab, too – some kind of void filled with larger bits and pieces. I like to think it’s an ancient Templar hidey-hole, and one day Things will burst forth from it. (Don’t worry, it’s perfectly solid and safe.)

Slab

Shiny!

We chopped back the trees to create enough vertical space, and pushed the bank back a little, and all we had to do was wait for the materials to be delivered…

Flat-Pack Office

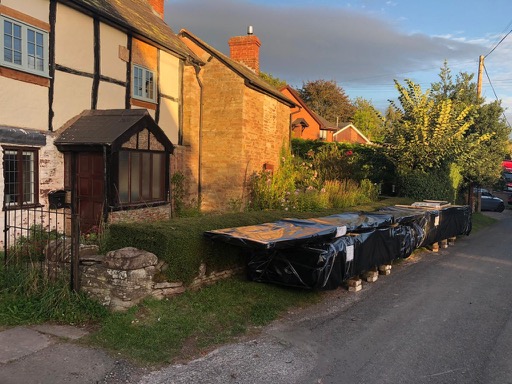
It seems incredible that this:

Office materials by side of road

Flat-pack office

And this:

Insulation and OSB by side of house

Insulation and OSB

Could turn into this:

Office from up the bank

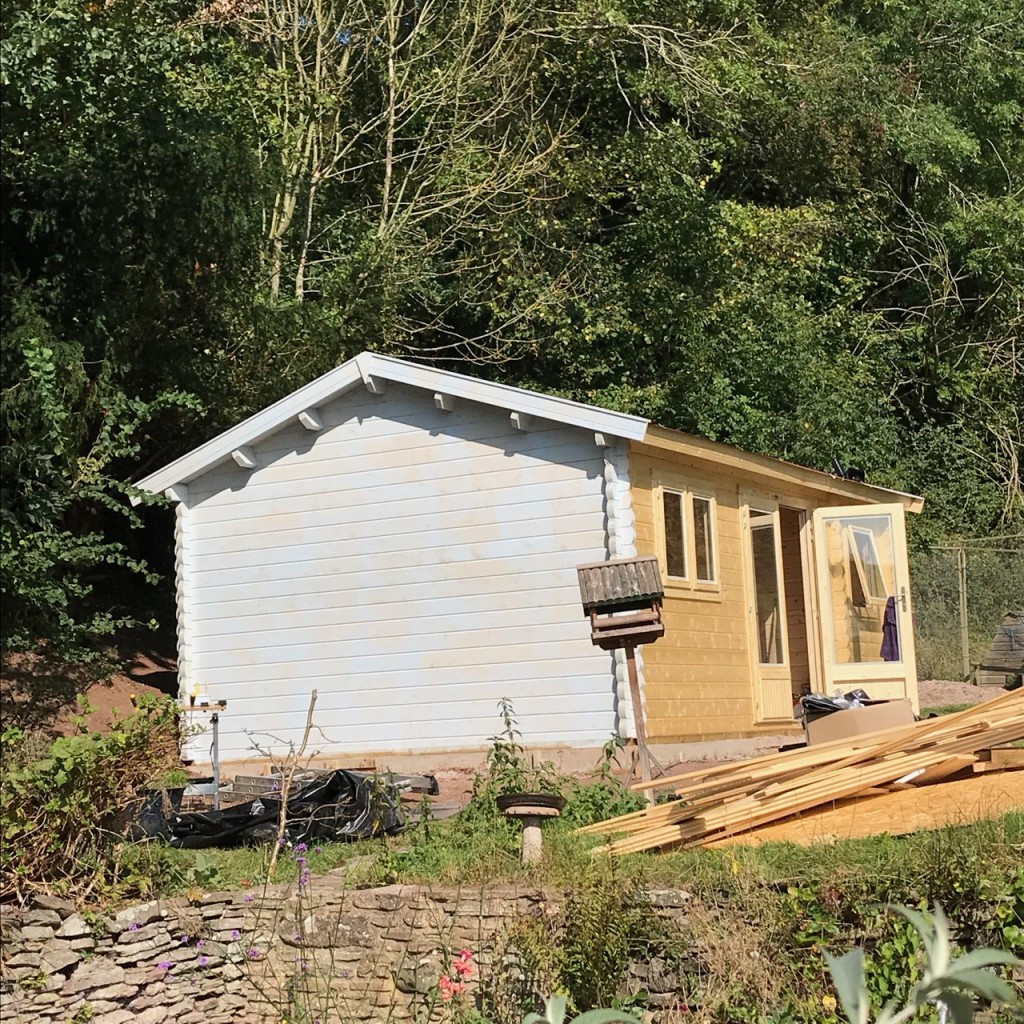
My office!

Isn’t it fab? And it went up in two days, which is incredible. The materials all come ready-made and ready to lock in together, then the workers fit it all like Lego, put the insulation in the roof and floor, lay the roof, fit the windows, then bugger off.

I made a time-lapse video:

And another:

Timelapse 2

Making It Weatherproof

We only had a few days to make it as weatherproof as possible before it started raining – and it hasn’t stopped since. About a month. Ugh.

Anyway, we treated the entire structure, inside and out, with Sadolin wood preserver, which didn’t take too long.

Then we painted the outside with Sadolin Classic weatherproof paint in gossamer blue. Or, that was the idea. We did about two-thirds of the outside before the weather defeated us and we got properly grumpy about the whole thing. It’s a really, really, REALLY dull job. So I’ve decided to pay an odd-job person to do it for me. It looks kinda patchy at the moment because it’s unfinished. It’ll look gorgeous when it’s done, though.

Side view of office showing painted portion

Part-painted building (the front is mostly done now)

We took the gutters off to paint the fascias, and they’re back on now. It was fun up on the roof – I took a panoramic pic of The Dingle:

View from the roof of the office

Roof-eye view of The Dingle

Going Indoors…

Time to go indoors for painting, floor-laying, and shelf-building.

I painted the walls in the main office in Little Greene’s French Gray Mid, and the details (skirting boards, window frames, door) in French Gray Pale:

Painted walls and skirting board

Beautiful walls!

In the kitchen alcove, I used Little Greene’s Edith’s Eye, which is a kind of yellow-green and I love it. The window frame and details are in French Gray Pale again:

Shelves and worksurfaces in kitchen alcove

My Tea Palace

I was going to have a little fridge in the kitchen, but for now I don’t need one. The water filter does a good job, I have a kettle, loads of different teas, and some funky mugs. Happy days.

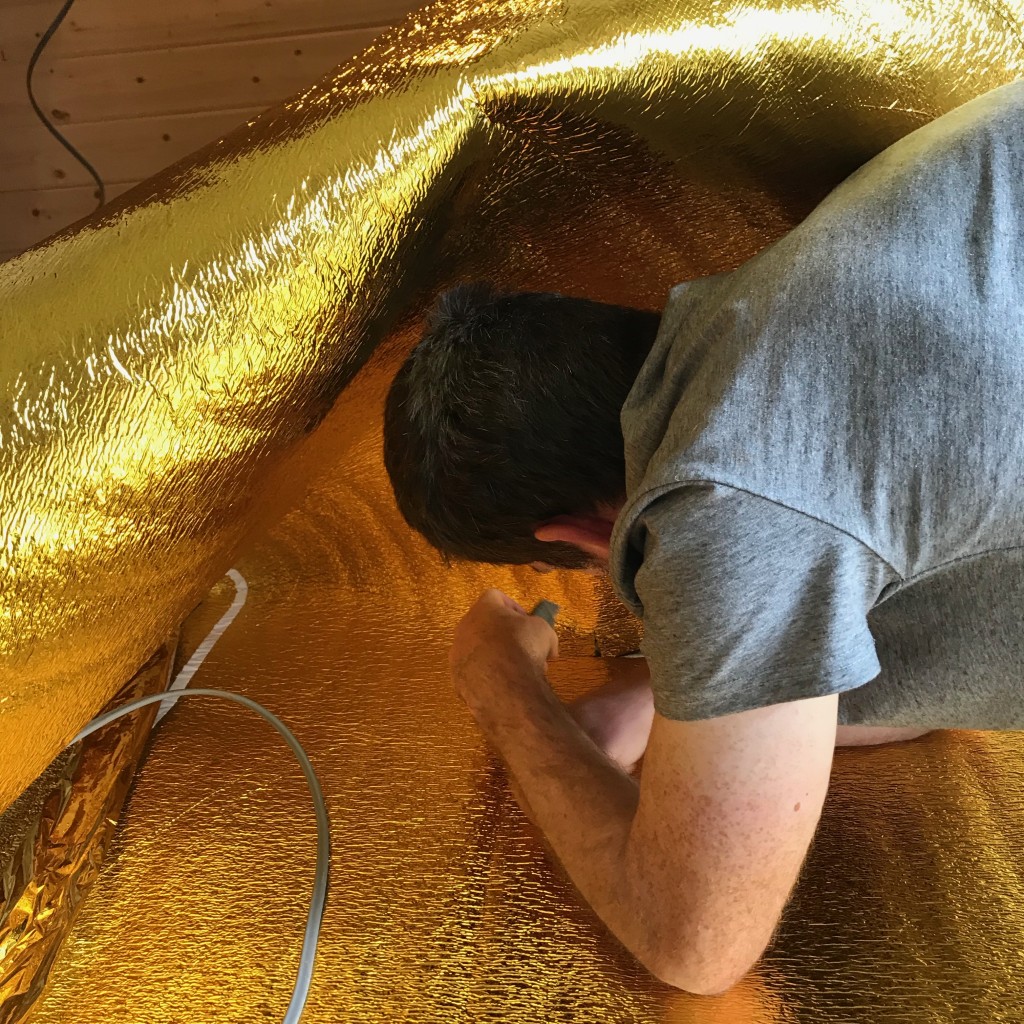
Next step: laying the floors. I found the cheapest laminate flooring online I could, and I may live to regret it. We’ll see how long it lasts… it was great fun laying the underlay, because I got to imagine I was building a space station. It was also delightfully warm.

Rolls of gold underlay

Fun with underlay

Pretending the underlay is a space station

See? Space station

And then we laid the laminate floor on top. I suspect the more expensive, thicker laminate is easier to lay… but it wasn’t too bad and it looks great:

Mostly finished laying the floor

Lovely smooth floor

We boxed all the electrical wires inside the skirting board, and fixed the plug sockets just above on the wall. There are track lights running the length of the office, and a light inside the cupboard and in the kitchen alcove.

We’re fitting outside lights this weekend, because I’ve discovered that coming out of a bright office into the pitch-dark Dingle leads to face-planting down the stairs.

Being Thrifty

We left the cupboard as bare wood, partly because we were fed up of painting, but mostly because I wanted to leave some of the cabin in its natural state. It’s a fantastic great big cupboard that I’ve organised beautifully.

The shelves are all made from left-over cabin building materials, which makes me happy:

Shelves

Shelves

Tons of space :)

Tons of space 🙂

I have a solid worktop on each side of the office so I can package up books, do filing, and generally organise my stuff.

My whiteboard lives in the cupboard, too – as does my sewing machine and arty bits and pieces.

Making It Beautiful

Finally, I’ve made it into the stunning office I’ve always wanted! I still have a few pictures I want to frame and hang, and framed book covers to sort out, but it’s more-or-less there. And I have a giant squishy armchair arriving from IKEA tomorrow.

Here it is!

Decorated for Hallowe'en videos

Decorated for Hallowe’en videos

And here’s Flamingo Corner:

Neon flamingo light and potted plant

Flamingo Corner

My mail rack, complete with beautiful flamingo crocheted by my lovely friend Jenn:

Mail rack

Mail rack

My desk, complete with one of my absolute favourite things: my map of Ankh-Morpork:

Ankh-Morpork

Ankh-Morpork

And a little office-warming sheepy gift from my friend Dawn:

Rupert the Rainbow Sheep

Rupert the Rainbow Sheep

A noticeboard for helping me to choose curtain fabric – and to show off Sean D’Souza’s beautiful cartoons:

Choosing curtain fabric

Choosing curtain fabric

The most important thing of all: my bookcase. Complete with extra space for my pole-dancing and trapeze trophies 🙂

Treasure

Treasure

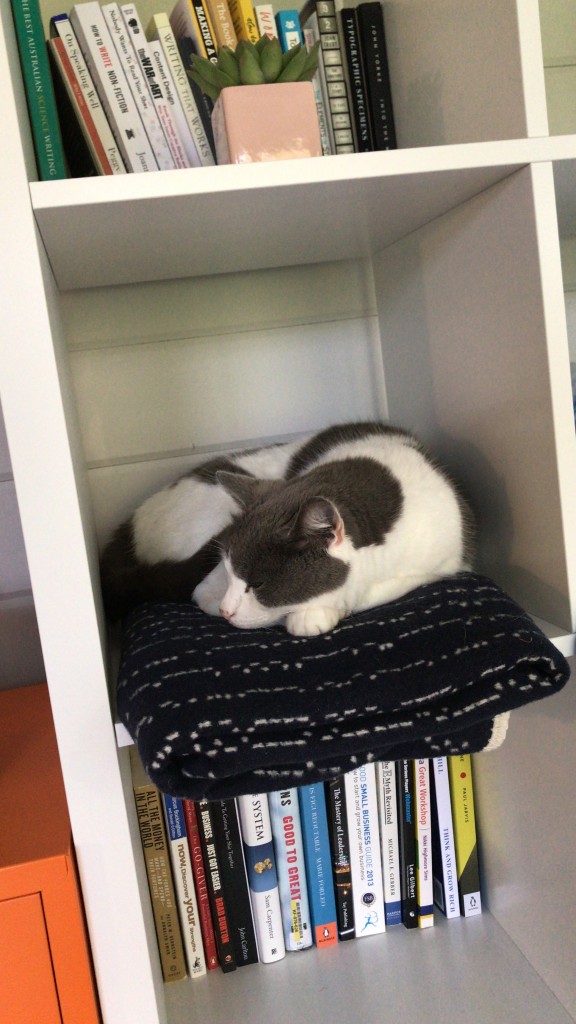
And a space for Noodle the Office Manager:

Noodle the Office Manager

Noodle the Office Manager

Investment

It was surprisingly inexpensive to build and fit out the office, and we suspect it’s already added more value to the house than I’ve spent on it. Here’s a breakdown – hopefully it’ll help if you’re thinking of building a home office.

  • Concrete slab = £2,145
  • Log cabin (including build) = £10,798
  • Wood treatments and paint = £395.28
  • Electrical, lighting, and decorating gubbins = £292.78
  • Flooring = £211.08
  • Kitchen worktop = £100
  • Furniture (desks, bookcases, chairs, sundries) = £1,630.72

Total cost (so far – and there won’t be much more to spend) = £15,583.36

I’m delighted with my new office. It’s very much an investment, and I’m already feeling the benefits – I’m much more focused, much less easily distracted, and I feel like a “proper” business owner now. It’s lovely to have the house back as ours, without me commandeering one of the rooms.

Next step: turn the stone portion of The Dingle into a bathroom and a library. Onwards!

Behold The Chicken Palace

Would you like to see the most over-engineered, elaborate chicken run door in the multiverse?

Of course you would.

Here it is:

The fanciest chicken run door latch ever

The fanciest chicken run door latch ever

You’ll note the piece of oak forming the latch. No cheap softwood for our girls. And that giant knob? I found it in a junk shop and was determined to make a door handle, then promptly forgot about it. Joe did not forget, and kept mocking me for leaving it lying around – so he turned it into a chicken run door handle.

We’re super-chuffed with our new Chicken Palace – and owe huge thanks to our lovely friend Jodie for gifting us the framework.

We chose a spot in the TinySheep paddock, at the back near the compost heap, and spent a couple of weekends moving several tonnes of earth. By hand.

It was bloody hard work, but when we’d done, we had a flat surface which we laid slabs on:

Slabs inside a framework

Easy-clean surface

We ran out of enthusiasm and couldn’t be bothered to dig out the stump, so we left that space in the middle for the hens to turn into a dust bath. They love it.

We covered the framework with weld mesh, zip-tied it all together, and left a skirt of around 18 inches around the edge. We’ll bury it under a few inches of soil and that should keep foxes and rats out.

When we first made the run and put our new ex-battery hens in, the new fancy coop from Solway Recycling hadn’t arrived yet. It being warm, we improvised with part of our Wobbly Scaffold Tower of Death and a tarpaulin:

Improvised chicken coop

Improv

It worked pretty well for a few days – and all the girls, new and old, are now settled in and getting on well. We now have eight hens: five new ones joined Peggy, Eggwina, and Yolko.

So far, only two of the new ones have names: Chuck Norris, because she looks like hell and is a total badass boss. And Gimpy, because she had a limp for the first week (she’s better now). Any name suggestions gratefully welcomed. Winners get free eggs.

New rescue chickens

New arrivals

Peggy and Chuck Norris face off

Peggy and Chuck Norris face off

It’s been a big couple of weeks for The Dingle animals, but it’s fantastic having them all in one place. We can let the hens out during the day with the TinySheeps, and nobody can escape. Everyone gets grass and fresh air, and everyone’s happy.

Especially us 🙂

Strip Some Wallpaper, She Said

As several years’ worth of rain has fallen in the past week, we decided against knocking a hole in the front of the house today.

(Of course, it’s been sunny all day so we could have done the wall panel in the end.)

Instead, we fired up the wallpaper steam stripper, opened the windows in the Stone Room, and got stripping.

A Little Background

The Stone Room is the Victorian addition to the house. It’s a square, solid stone, two-storey structure stuck onto the left-hand side of the original house. It’s offset slightly too – it protrudes about four feet to the front of the house, presumably because of the shape of the banks behind the house. But who knows.

There used to be a window in the front until the 1950s (we think), then the previous owner filled it in. We haven’t decided whether or not to reinstate it yet, but we’ll definitely be rebuilding the in-fill because it looks a mess from the outside and we’d rather it blends in.

The Stone Room was our bedroom until a month or so ago, when we moved up into The Beautiful Attic. It’s going to become our huge, decadent bathroom.

There’s a small-ish window in the back, looking up the garden, and a tiny window in the side.

Small windows

We’re going to make the window on the left bigger

We have plans to make the back window much bigger and take it down to the floor so Vicky can lie in the bath and look up the garden.

Saturday Stripping

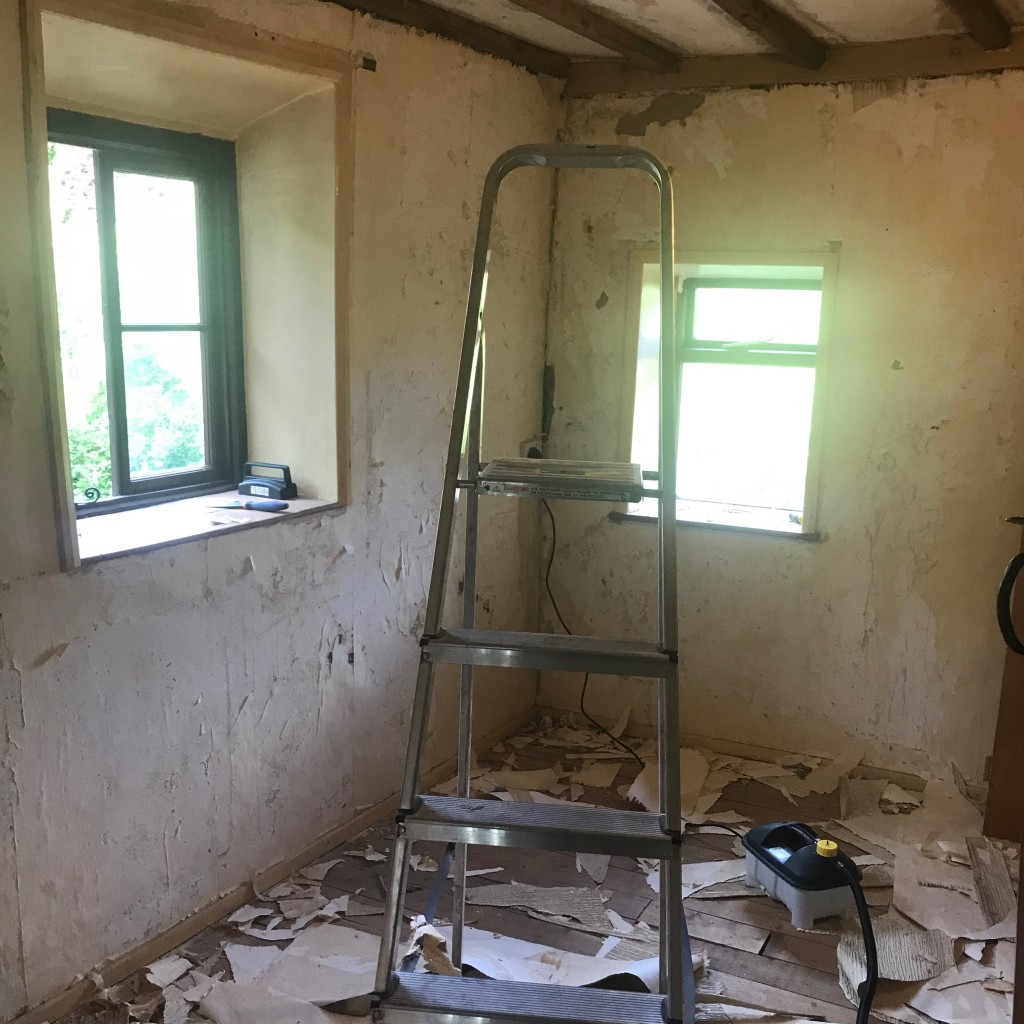
Before any of that happens, though, we need to strip the room back to its bones. We’ll need to replace the floor so it can take the weight of a bathtub (and, you know, people) and we’ll need to replace the ceiling because it’s a bit of a horror show.

Also, the roof leaks and the roof space is dark and full of terrors.

Awful mess

The Stone Room roof space is dark and full of terrors

We also wanted to investigate the impression on the far wall – you can see where there was once a fireplace. We’re not holding out much hope, but you never know… We’ll probably put one back when we start making the room beautiful.

Before beauty, though, comes The Great Horror.

We stripped all the structural anaglypta wallpaper off…

Stripper Joe

Stripper Joe

And we found some cool remnants of old pretty wallpaper:

Archaeological wallpaper

Archaeological wallpaper

That Escalated Fast…

And knocked some bloody great holes in the wall. Which was exciting.

Turns out there’s just random bricks shoved into the old fireplace, and we can still see the firebox and firebrick. Nothing pretty though.

A lot of plaster came off with the wallpaper, so we thought, “Sod it, let’s see what the stone walls are like.”

Turns out, the interior stone wall is in pretty good shape. It’ll need repointing and whatnot, but we may make it a feature stone wall and limewash it.

Big mess

Feature wall, yes?

The rest of the walls, we’ll repoint then insulate with cork boards (probably) and lime plaster. We may put some wood panelling up. No idea yet. Watch this space!

Creatures On The Ceiling

One thing we will miss about sleeping in that room is our Ceiling Creature Companions. When we had the timbers sandblasted, it created some interesting shapes on the plasterboard. Like this velociraptor:

The velociraptor

The velociraptor

And this kingfisher:

The Kingfisher

The Kingfisher

Anyway – having made a mahoosive mess, we’re done for the day. Tomorrow will be more of the same if the weather is wet, or we’ll knock a great big hole in the front of the house again.

Sheep Shearing For Muppets

Things I never thought I’d do Number 4,916: learn to shear sheep.

When the TinySheeps came to live with us, we kind of knew they’d need a haircut at some point, but it was an abstract concept. We ignored it for quite a long time because, well, sheep shearing was something that happened to other people, in another world.

Then spring arrived, and we thought about it again, briefly. Watched a couple of YouTube videos. Went back to not thinking about it.

Cue summer, and the local sheep start looking rather less woolly… and we have a fistful of choices.

1. Ask the local farmers if we can bring our TinySheeps over when they have their mass shearing.
2. Find a shearer who does small flocks and pet sheep, and fling them around £50 to do our boys.
3. Buy a pair of shears and have a go ourselves.

One of my Life Values is to try as many new things as possible. Learn as many new skills as possible. And extract maximum satisfaction and value from life by doing real, practical things we can look at afterwards and think, “I did that. I did it with my whole heart and I did my best and it was fun.”

Also we like to amuse ourselves and our loved ones, so we decided to have a go ourselves.

Yesterday, we watched some YouTube videos of farmers and shearers shearing their sheeps and making it look easy.

They lie.

I thought we’d be shearing today – Sunday – so it came as something of a surprise when I went outside yesterday evening to ask Joe if he was ready to go out to our friends’ son’s birthday party in their field, and was confronted with this:

Joe's butt and Bronson's alarmed face

Surprise shearing!

Joe had wandered outside with our new shears, wrestled Bronson into a sitting position, and got clipping. Note Bronson’s alarmed face: they’re only a year old, so this is their first experience of the baa-bers. (Geddit? I’m funny. Shut up.)

Joe managed to shear about half of Bronson’s woolly coat, then Bronson got wriggly. So I took over the shearing while Joe immobilised our little woolly buddy.

Sheep Anatomy

Shearing the back, shoulders, and back of neck is fine. It goes smoothly and is relatively non-scary because there’s plenty of fleece and the skin is taut. It’s easy to bend the sheep in such a way you don’t risk cutting them.

But when you get to their undercarriage, it gets a bit nervy – their soft bellies are vulnerable, and you can’t really see their neck skin very well. Their willies hide in their belly wool and are not necessarily where you’d expect them to be if you’re not familiar with sheep anatomy. And their crotch and leg skin pulls easily and is delicate.

Which means we’ve not given them as close as shave as we could have done, but we didn’t want to risk any cuts or injuries.

It’s funny – when you tip a sheep on its butt, they go strangely docile. You can manoeuvre them around as long as you keep them on their butts and keep their shoulders firmly in place. They don’t like it… but they don’t panic and they don’t get angry. Or that’s what we thought. More on that later.

It took us about 45 minutes and two sessions to shear Bronson (he escaped at one point).

We’re not going to win any prizes for speed or neatness, but for a first attempt, we’re pretty damn chuffed with ourselves.

We’ve given Bronson the bouclé look. He’s smart and fashionable.

And he looks TEENY.

Freshly-sheared sheep

Bronson’s bouclé haircut

Fast-forward to today…

Though he be but tiny, he be fierce

First up this morning was Picard. He’s feisty, is Picard, so we thought we’d tackle him first.

Turns out, not all sheeps go totally docile when you tip them onto their butts. Some of them wriggle and bellow at you.


Unhappy TinySheep

This is Picard’s WTF ARE YOU DOING face

Picard still has a dangly bit of wool hanging from his undercarriage, but he, too, is now freshly clipped. He sustained a couple of tiny grazes, which I feel awful about (but he doesn’t seem to care).

He was so mad at us, he wouldn’t even eat his strawberries for about an hour. To put his rage into perspective, Picard’s favourite thing ever is strawberries. He’d eat an entire basket of them all at once if you let him.

But he looks super-smart now.

The Goodest Good Boy

Finally, we sat Kernic on his butt and sheared him, too. Kernic is the cuddliest little sheep you ever did meet: if you sit quietly while they’re all out munching, after a while, you’ll get a warm snuffling in your ear and Kernic will lean on you and ask for a cuddle.

He loves to have his chest rubbed. He gets a little smile on his face, and his back legs get shorter, and he goes all sleepy.

We expected him to be pretty chilled about being sheared, and he was. He didn’t like it, but he was fairly co-operative, which is good because he had by far the most fleece to clip.

Good sheep being sheared

Here’s Kernic being the goodest good boy of all

A total of two hours and five minutes later, we have three TinySheeps in their summer uniforms and all is forgiven.

Don’t they look smart?

Three tiny sheared sheep

Tidy.

Things We Have Learned

  1. The first time you shear a sheep it takes bloody ages.
  2. It’s far more stressful for me than it is for the sheep. I was in a constant state of anxiety about cutting them.
  3. Sheep are the oiliest creatures in the entire multiverse.
  4. Lanolin (the sheep oil) washes off remarkably easily.
  5. Fleeces are sooooooooooo soft, like a cloud.
  6. Picard’s and Kernic’s fleeces were softer than Bronson’s (Ouessant pure-bred vs Bronson’s Jacob X Ouessant).
  7. Sharpen your shears between sheeps.
  8. Sheep can kick really hard and it hurts when they hit your kneecap.
  9. Three tiny sheep fleeces fill two big black bin bags.
  10. That much wool will make a LOT of hats.

Woolly Plans

You may be wondering what we’re planning to do with all that fleece.

Good question!

We shall discover how to prepare it, how to spin it, and then we’re gonna learn how to knit. So if you’re a close friend or family member, expect to get home grown and inexpertly made woolly hats and scarves for Christmas, okay?

We’ve Finished A Room!

Actually, we’ve more-or-less finished it, and that was a couple of weeks ago.

The attic is done! Look how pretty it is:

Beautiful cottage bedroom

It’s a proper sanctuary and we LOVE it

We absolutely love it. It’s restful and beautiful and waking up with the sun is delightful.

Here’s how we’ve decorated it…

  • The rug and lights are from Bailey’s near Ross-on-Wye. Their shop is a massive barn showroom filled with stunning things, including lots of recycled and upcycled beauties. It’s a delight just to visit.
  • The large trunk came from Joe’s sister (thank you!).
  • The small trunk came from the fabulous and extremely friendly Salvaged in Leominster.
  • The lampshades and cushions were designed and hand-made by my beautiful and talented friend Katherine Wibmer.
  • All our bedding is always from Cologne & Cotton because it’s lush.

Also, you need to see the extravagant and gorgeous lampshade Joe bought me for my 40th birthday. I’d put a deposit on it, and he surprised me with it.

You need to see it because it’s extravagant and gorgeous, but also because putting it up was a horrifying experience. Here’s why:

  1. Erecting the DangerScaffolding around, through, and over the staircase.
  2. Starting an unstoppable oscillation atop said DangerScaffolding and unable to relax even with Joe shrieking “RELAX RELAX AND IT’LL STOP” at me. (Helpful)
  3. The shade is extremely fragile.
  4. Also extremely heavy.
  5. Also awkward to get your hands in and out of.

Good job it’s 1,000,000% worth it. It’s never, ever coming down though…

Beautiful shell lamp

The Amaze-Lamp. It’s a bit like a spaceship.

Yes, that is daylight you can see in the background, through the wall. We’re on the case.

Things still to do in the attic bedroom:

  • Fit skirting board to the panels either side of the staircase.
  • Fit glass over the triangle timbers on either side and above the doorway.
  • Have a door made with a big window so we can see the lamp.
  • Fill the gaps between the walls and the floor with new plaster so the room is sealed.

But it’s basically done.

Next stop: replacing all the brick wall panels in the front of the house, putting a new oak sole plate in (well, Ken is), then cracking on with turning our old bedroom into a posh bathroom.

I can’t tell you how good it feels to have finished a room. It feels like real progress, when sometimes we just think we’re getting nowhere.

Paint and Oil

The attic is almost done! The attic is almost done!

We’ve spent the Easter weekend painting the attic walls and ceiling in Flutterby clay paint by Earthborn. It’s delightful stuff: goes on easily and dries super-fast and looks gorgeous. Putting it on with a roller, it retains most of the lime plaster texture.

Then we oiled all the exposed timber with Osmo Polyx Oil – same as we used for the floor.

Doesn’t it look beautiful:

Vicky sitting on the floor oiling the timbers

Freshly painted and mid-Osmo

We still have to put skirting board up – but we’re getting Ken to come and take a look. He’s making us a door, too. And we’re getting some architectural glass to fit over the frame at the end. But other than that… we’re almost done.

We’d have been moving into the bedroom tomorrow if we’d read an email properly.

The bed-frame we have now is gorgeous, so we’re moving it up to the attic. But the mattress is pretty aged, so we bought a new one from Emma – it was 35% off and is rated as the UK’s best mattress, so we’re pretty chuffed with that. Paid extra for fast Saturday delivery, thinking it’d arrive Easter Saturday… only on checking the email, it said delivery for Saturday 27, which is too late. So I’m waiting for them to call me and rearrange delivery and give me my extra delivery cash back.

We’re so excited because we also have brand new duvet and pillows made from Merino wool, and gorgeous new bed linen from Cologne & Cotton.

And we have a chair, which I’m going to reupholster in some amazing fabric.

Tomorrow, I shall start making the attic cosy.

And we’re fitting the most magnificent light above the stairs…

Happy sunny Easter, Dingle fans 🙂

« Older posts Newer posts »

© 2025 Project Dingle

Theme by Anders NorénUp ↑