Restoring an old cottage...

Author: Vicky Fraser (Page 4 of 7)

Wiring Up The Attic Like A BOSS

Ancient houses bring interesting challenges, such as: how to deal with the wiring.

With a newer building, you just chase the wires into the wall and plaster over them, job done.

In an ancient structure, with exposed timbers and lath and plaster, and newer cork panels, and strong oak joists, it’s not that simple. You can’t wire through oak joists because they’re smaller than softwood ones, so there’s a risk of banging a nail into a live wire. Not a big risk, but the regs don’t like it.

And you don’t want to go chasing wires into walls when there are timbers in the way.

So what do you do?

You find the World’s Most Expensive Cable and the World’s Most Expensive Sockets and Switches, and you crack on.

Of Chalk And Saddle Clips

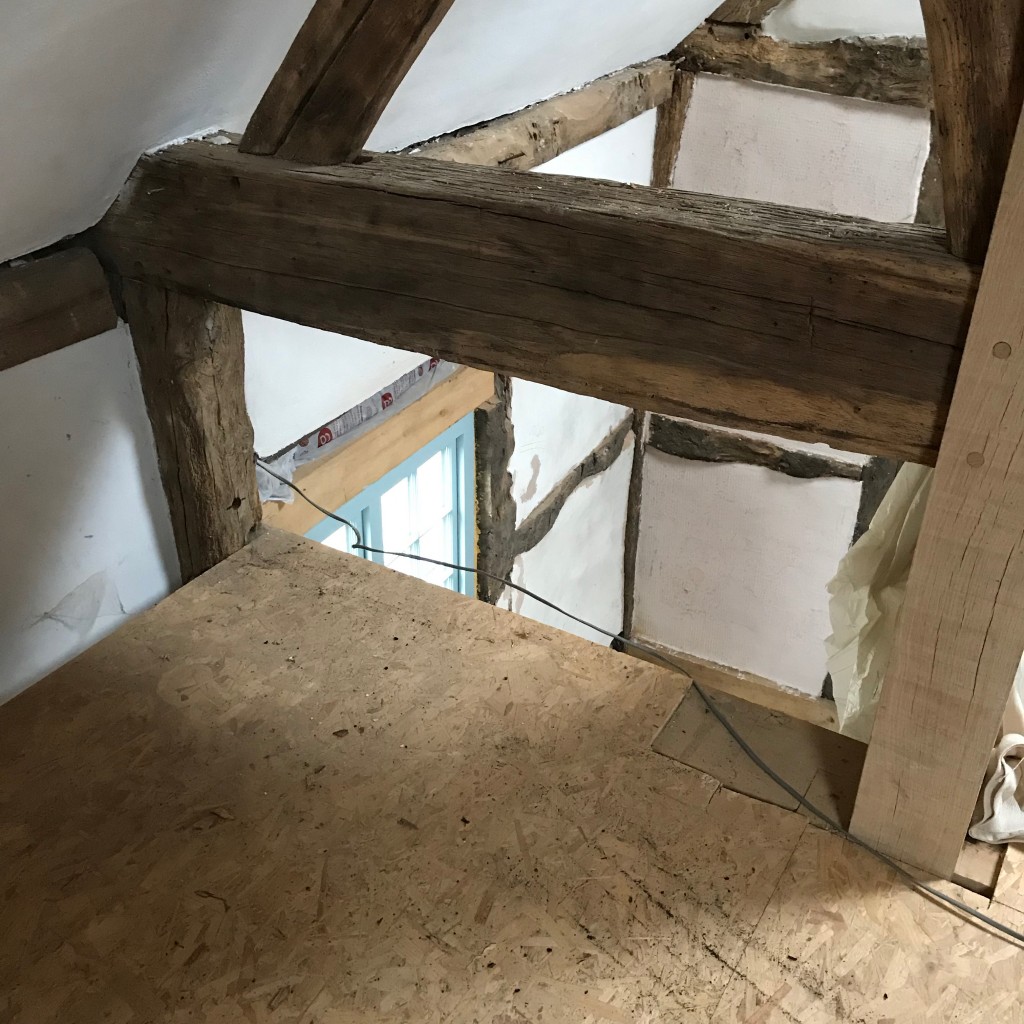
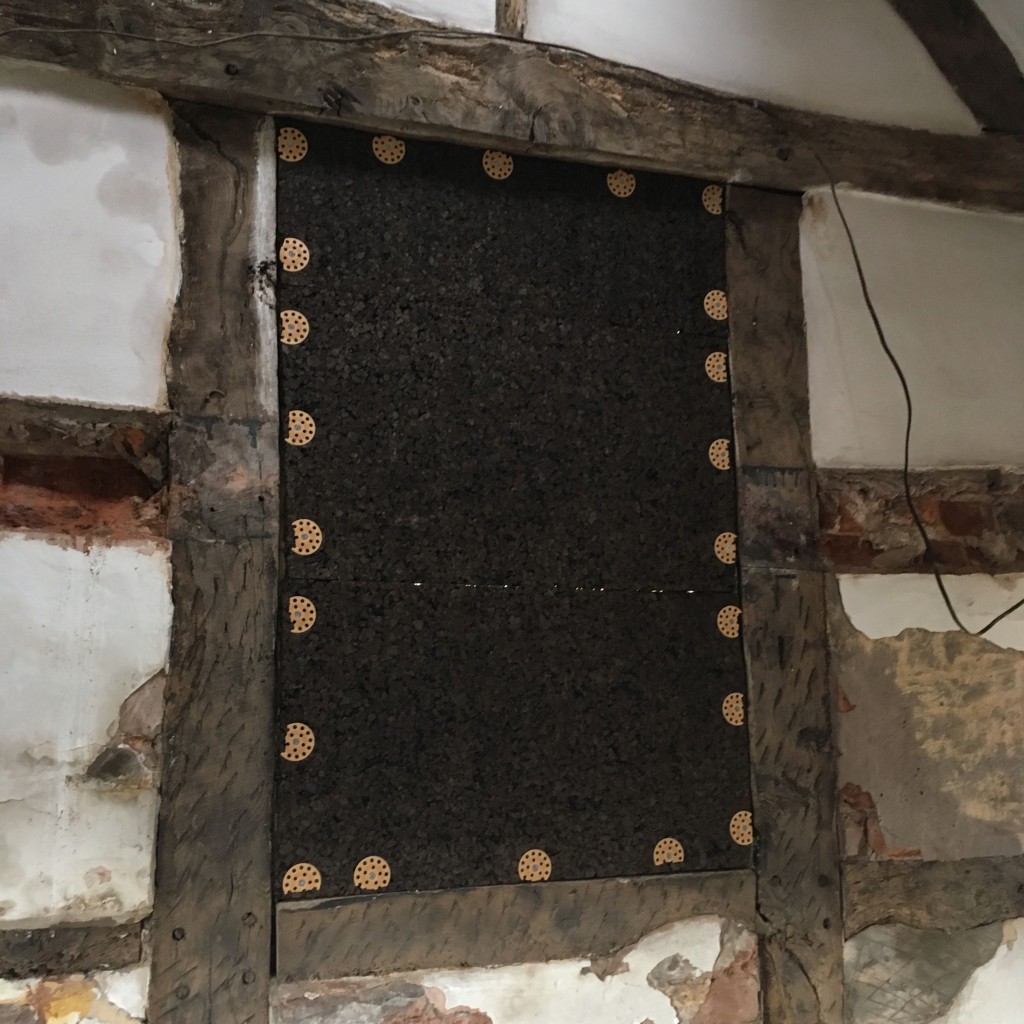
We started with chalk and marked out where we wanted the sockets, switches, and saddle clips for the cables. Don’t want any (more) expensive mistakes.

Chalk mark on timber

Deciding where to put sockets.

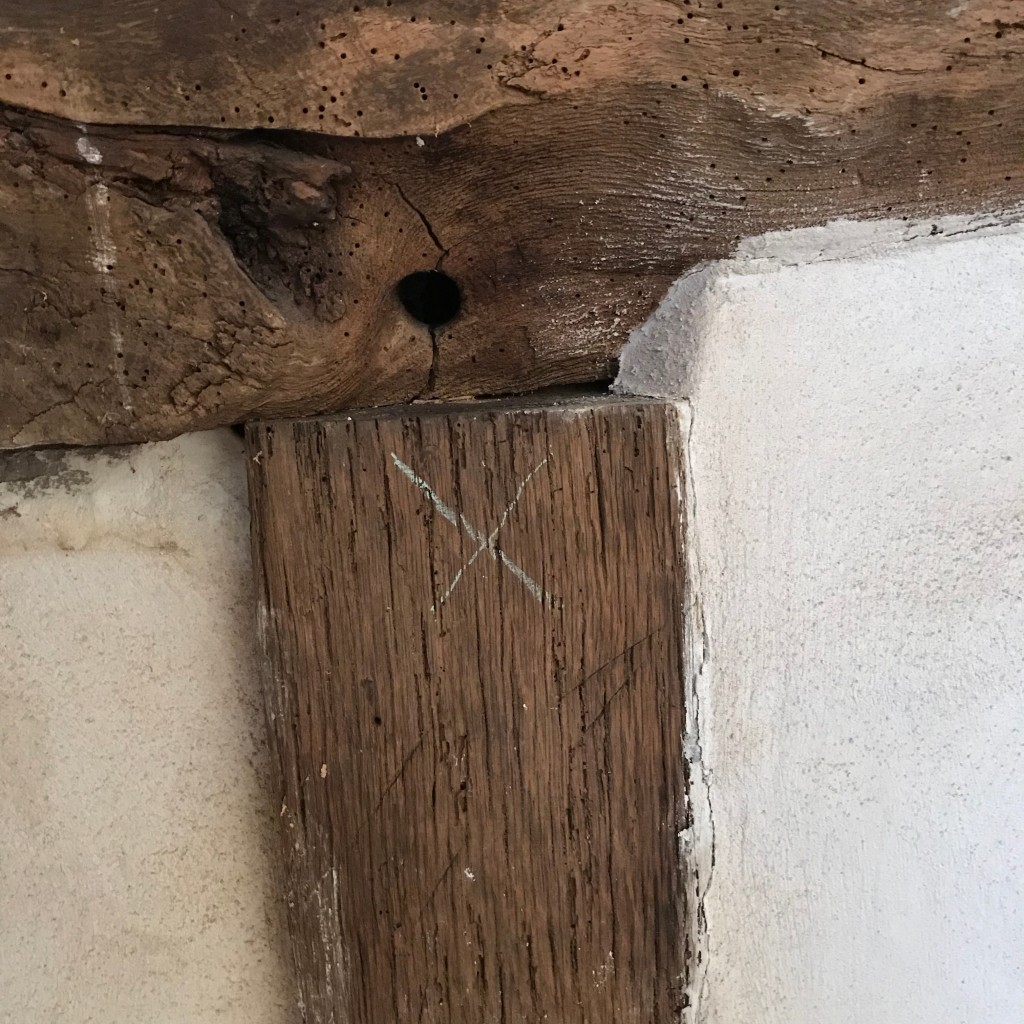
We didn’t put the sockets on the timber in the end, we put them on the plaster in the corner to the left of that X.

Chalk mark and saddle clip on timber

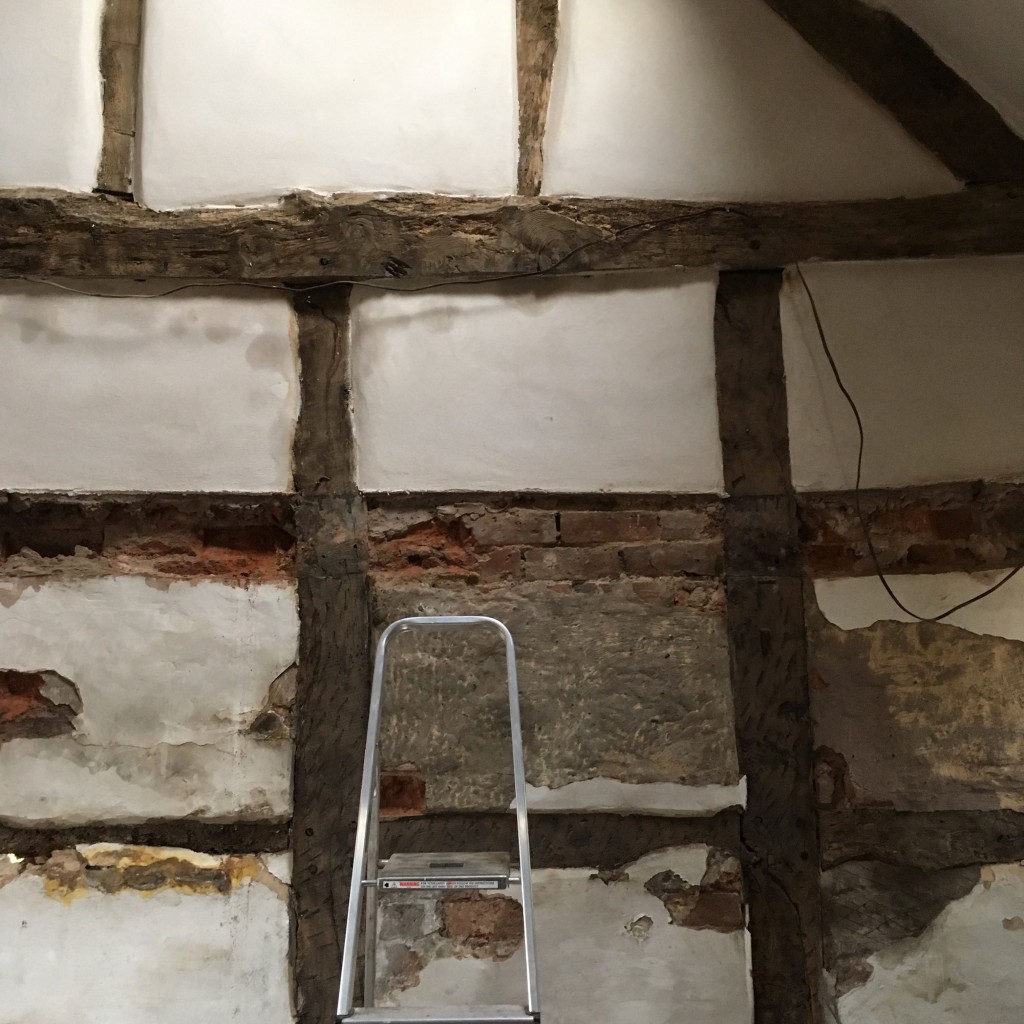
Marking saddle clip positions.

We made sure the saddle clips were spaced at regular distances (except when we had to wire around bends). This was exactly as fiddly and annoying as it looks like it was. I mangled many innocent tacks.

One Week Later

I now have a new respect for conservation sparkies.

I’ve never done anything so fiddly in my life. There was much swearing and gnashing of teeth – but we’re delighted with the results. Here’s what we did.

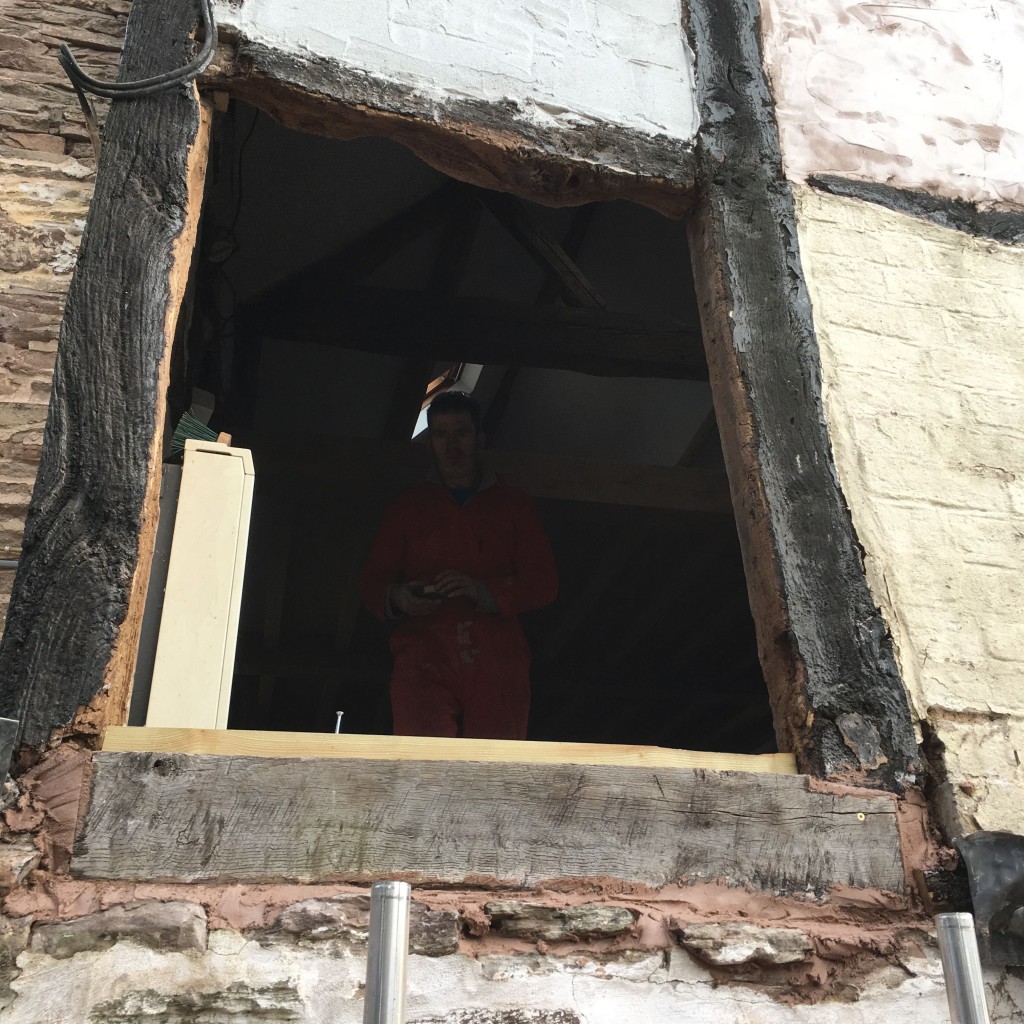
We took the 2.5 twin-and-earth wire (beautifully braided in old gold and a special order from the fabulous chaps at Flexform) from the junction box, into and out of four sockets, through the panel, and along the front of the mezzanine. When we’ve finished plastering, we’ll take pics. It’s actually pretty neat and tidy and it looks fab.

However, it was not as easy as it sounds: there are no straight lines in this house, so we followed the lines of the timber. It’s a work of art and it took hours.

Wiring and timbers

Wiry Art

You might be wondering why there’s a cheap-ass black plastic back-box on that there wall. Good question. Especially when you find out these beautiful bashed antiqued brass sockets go on top:

Antique brass sockets

Glorious sockets

We chose one with USB ports and three standard double sockets, all from Jim Lawrence. They’re beautiful but super expensive. With brass back-boxes too, we wouldn’t have been eating this month. The black ones are barely visible unless you know they’re there…

Which, of course, we do. So I’m going to replace them one by one, when Joe isn’t looking.

One of the sockets has turned out to have a faulty switch, but the woman at Jim Lawrence couldn’t have been more helpful. They’re sending a replacement next week. The others work perfectly.

When we turned on the ring main, with Joe working his way along the fusebox switch by switch, it was just like that scene out of Jurassic Park. Not even kidding.

Fuse box scene from Jurassic Park

Scenes from The Dingle earlier today.

Two Weeks Later

Mum and dad came over for the day and brought soup and an extra pair of hands.

Joe and Dad and I got cracking on the lighting circuit. We’re putting three pendant lamps in the attic bedroom and one pendant lamp in the double-height hallway above the stairs.

There will be two switches in the bedroom – one for the bedroom lights and one for the hallway light – and one switch on the first floor, for the hallway light.

Normal lighting wire for moving volts around is three-core (two plus earth) 0.75mm. Wire to the switches is four-core (three plus earth).

We tacked them up the oak doorway frame and into an oak pattress, then into gorgeous antique brass dolly switches thusly:

Braided cable on oak frame

Tidy.

Chalk marking the pattress position

Chalk marking the pattress position

Dolly switches

Dolly Parton switches (because they’re so pretty)

That earth tape is to mark which switch is which. The bottom switch – the one marked with the tape – works the attic bedroom lights. The top switch works the hallway light.

Or they will, when the lights arrive…

Always Be Learning…

The great thing about this is, I knew nothing about electrics before we started this. In fact, I feared the electrical world. Joe understands electrics, because he has his 17th Edition.

(Yes, we’ll need to get an electrician to certify everything when we’ve finished the house.)

I now understand how to wire a ring main, how to wire a lighting circuit, how to wire sockets and switches and lamps. In fact, I’ve done all these things in the last three weeks. That’s pretty damn cool.

Behold The Very Tiny Wall In The Attic

When the new amaze-stairs went in, we were left with some pretty triangular strut-work above the truss, and two big gaps below, one on either side of the stairs.

Gap between oak truss and floor on 2nd floor.

It’s an ‘ole. Needs filling.

So we got down to filling them.

Wooden battens inside the hole frame

Framing the big ‘ole.

Cork panel from below

Lovely tidy cork panel

Like the gable end wall,  we used the cork panels and lime-cork-hemp plaster-glue to stick them together. We’ve only done one so far, because the builders will need to use the other hole to fit the last floor joists and we don’t want to do the job only to have it damaged. We’re pretty quick at doing this panelling now anyway, so it won’t take long.

Joe lime-plastering the new cork panel

Scratch coat of lime plaster.

Then we got the scratch coat of lime plaster on.

It’s made a big difference to the feel of the attic bedroom already.

Under The Eaves

While we were there and had the gloop made up, we turned our attention to the gaps under the eaves. Here’s where we made a mistake a year or so ago.

When we got overexcited about the attic ceiling panels we’d fitted, we rushed ahead to get them plastered with lime by the expert chaps at PlasLime. They did a great job, exactly what we’d asked for… oh, if only we’d thought it through properly.

At the time, we didn’t know what we were going to do about wiring up the attic, so we asked them to leave a couple of inches gap at the bottom between the sloping ceiling and the supporting timber.

Turns out, we’re mounting all the wiring on the surface using The Most Expensive Wire In The World. So we didn’t need those gaps… and now we need to fill them. Doh.

So we did.

We’re using offcuts of cork:

Cork slivers

Waste not, want not

And stuffing them into the eaves gaps with the cork-hemp-lime-plaster gloop:

Filling gaps with cork

Filling gaps

That gap beneath the timber is annoying. When we put the new windows in, the wall panel above slipped down a little. We need to kick it out and replace it anyway because it’s brick, and we want to cork it, but still…

Then Joe got up on a ladder (I don’t do ladders because they are HORRIFYING) and wobbled around filling more gaps until the gloop ran out:

Joe up a ladder filling gaps

Precarious gap-filling

Plastering: The Final Coat

Finally, we decided to have a go at putting the posh top coat of lime plaster onto one of the gable-end wall panels:

Putting the top coat on

Putting the top coat on

Joe’s done a really lovely job. It needs a little sanding and finishing, but it looks great:

Smooth top coat of lime plaster

Looking smooth!

Coming up next: Tiny Sheep Agility Training!

Predictable Delays But Awesome Stairs

So, somewhat predictably, we weren’t in the new attic bedroom by Christmas.

But our new stairs are up and they look magnificent.

We’re completely delighted with them – not least because they came in £3,000 under budget. Which should give you some idea of how extravagant they were.

But we wanted solid oak, we wanted them to look beautiful and feel beautiful, and that doesn’t come cheap. Nor would we want it cheap.

Still, three grand lighter is a result!

Wanna see them?

Here they are:

View looking up stairs

Magnificent new door frame

And beneath the stairs, we’re going to panel the slope with wine crate lids, then build a cupboard door at the bottom for a little storage:

View under the new stairs

A little secret storage

We’re really pleased with the new floor, too.

Obviously we decorated the stairs with fairy lights for Christmas…

Stairs with fairy lights

Twinkle twinkle little bat

View down the stairs

Twinkle down the stairs

And they pass the Noodle Inspection:

Cow-print cat on stairs

Noodle gives the stairs a good sniffing

We gave the stairs two coats of Osmo oil to protect them, and they’re just about done.

Ken is coming back after the New Year to fit the final floor joists and fix the ugly bracket, and then we can lay the floor, which we’re doing ourselves.

In the meantime… it’s full electrics ahead!

Exciting Times At The Dingle!

The stairs are here! The stairs are here!

After months of waiting and delays, I am writing this with Noodle purring on my knee, listening to our new oak staircase being fitted upstairs.

I am SO. EXCITED. I. MAY. EXPLODE.

Because, you see, when the stairs are up, we can get up to the attic properly and finish off the room. Things we’ll be able to do:

  • Finish the plastering onto the beams.
  • Fit electrics and beautiful lighting.
  • Lay an oak floor.
  • Move our bed up there.
  • Choose some gorgeous furniture.
  • Find an amaze-rug.
  • Fit glass panels to the oak structure.
  • Have a proper beautiful bedroom for the first time in nearly three years.

We really really REALLY want to be able to move in up there by Christmas. We have guests for New Year and we’ve promised them a bedroom instead of a sofa bed, so that’s our goal…

In the meantime, here are the stairs in bits:

Stair parts on props

All fitted together and ready for takeoff.

Oak pieces for stairs

Bits of stairs, newell posts, and other assorted gubbins.

Backside of the stairs.

Backside of the stairs.

Not sure what this bit is.

Not sure what this bit is.

The stairs are going to go up as we enter the first floor, then turn and go straight up to the attic.

Ken the Wonder Joiner is going to chop out a big piece of oak truss (eep) to create a new doorway, then rearrange the oak props and beams so the roof doesn’t fall off.

We also need a new patch of floor around where the stairs will sit, because the beautiful old oak floor you can see in the pictures above is patched where there used to be a staircase from below.

We’ll do pictures when we get to that.

Right now, we’re too excited about the prospect of stairs…

Of Wonky Sheep And Patient Husbands

So, we have two little sheeps.

Which came of as much as a surprise to me as to you, I can tell you.

It all started when I visited a friend down in Somerset. Her garden runs down to a field, and when I arrived lambing was happening. We ran into the farmer later, and got chatting, and he said, when we asked how lambing was going, “Great. We’ve hardly lost any this year, and it’s been mostly easy. But I don’t know what I’m going to do with this little chap. Think I’m going to have to knock him on the head.”

At which point, I – in slow-motion reminiscent of an 80’s melodramatic action film – shouted, “NOOOOOOOooooooooooooooo! I’ll have him!”

Meet Eric the Wonky Lamb:

IMG_5813

Joe is a wonderful man and I love him very much 🙂

In a right hurry, we cleared out the garage (which badly needed doing anyway, so really this was a good thing that caused other good things), and fashioned a stable out of old pallets, an old cupboard door from upstairs, and a lot of straw.

Then Eric needed a friend, so I found Tigger (so named because she is very bouncy). She was an orphan lamb and was bottle-fed from birth, and didn’t really like big flocks, so she was perfect. Meet Tigger:

Look at her tiny face!

Look at her tiny face!

Then the story gets sad. When I took Eric to the vet to get advice about how to straighten up his wonky foot, the vet told me to put him down. Nothing they could do.

Well, no bloody way.

He was having a great time running around with Tigger, and was otherwise perfectly healthy. So I decided he’d stay, and I found him a new home. A farm rescue sanctuary in Warwickshire which has experience with all sheep, wonky and otherwise.

So Tigger needed a friend, and Bronson arrived. He’s a Jacob-Ouessant cross and he’s lovely. Look at him:

Little black lamb

Bronson meets Tigger

I’m writing this in October.

We no longer have Tigger. She got ill, very fast, and died, all within the space of a few hours. Bronson and I were totally broken, and he cried every time I left him alone. So did I.

So we got him two friends: Kernic and Picard, both miniature Ouessant sheep.

Here’s the whole woolly family 🙂

This is Kernic, Bronson, and Picard posing for the camera

This is Kernic, Bronson, and Picard posing for the camera

Bit crazy for keeping sheeps? Maybe. But I don’t care. We love them. They are hilarious and nibbly and they keep the grass nicely mown.

We miss Tigger every day, too. She was so full of love and bounces.

And Joe has finally accepted that this is a place where animals will gather together 😀

Our Crumbling Sole Plate

So, of all the things you want to happen when you knock all the bricks out of one of your wall panels and open a gaping hole to the outside world, this isn’t one of them…

(Parental advisory: Joe swears)

The first course of our house is stone. The timber-frame part sits on top of that stone. Once upon a time, there was an oak sole plate sitting on top of the stone wall – a massive long piece of timber forming the bottom of the frame.

Then, someone put a concrete sill on top of that timber, fixing it to the wall. You can see it in the next photo – it was covered in lead flashing. There’s a red arrow pointing to it.

Crazy man in orange jumpsuit stares at wall

Joe peels back the lead flashing to reveal… CONCRETE DOOM

Unfortunately, concrete destroys timber. It literally dissolves it: it pulls water in, and holds it there, so the timber rots. And you end up with this:

Rotten timber

Rotted timber woe

The wood has crumbled to nothing next to the upright, which is pretty rotted too. Luckily, there’s still a little solid wood in there. The sole plate is dead though. We pulled it to shreds with our bare hands.

The face of woe: holding the rotten sole plate

We both wore this face for a good hour

I sent a panicked text message to Ken, who is a conservation timber expert and master carpenter, and who will be doing all our oak work… but it was Saturday, so we really didn’t expect to hear from him, which is fair enough.

Every time a car went by, we got all excited in case it was Ken. We really, really wanted a grownup to tell us what to do next.

But in the absence of any grownups, we decided to take care of it. After all, we couldn’t really live with a 1.5m by 1m hole in the house for several days.

Ideally, we’d have waited and got Ken to replace the whole sole plate with a piece of timber the length of the wall, but that wasn’t an option. So we decided to do the best we could, fully expecting Ken would pull it out and do the job properly within the next few weeks.

We have loads of old oak lying around from when we ripped the attic floor out, and Joe found this piece, which we cut down to size. We cut a notch out to sit around the second upright:

New old oak

A likely-looking candidate

Then we cleared out all the old concrete and timber splinters and rot, and took the stone wall back to as clean as we could:

Sole-less

Sole-less

Loose stones on the top of the wall

Loose stones on the top of the wall

Those two stones up there are just sitting loose, so we took them out, cleaned them up, and then laid a bed of limecrete to sit them in. This was Vicky’s first ever go at building a stone wall. It’s only two stones, but it counts:

Lime bed for the stones

Lime bed for the stones

We bedded the two loose stones back in, then laid another thick bed of lime on top for the new-old timber to sit in. We squeezed plenty of it into the corners, too, because there wasn’t really any support in there before. Then we laid the new timber thusly:

New sole plate with batten frame, ready for corking

New sole plate with batten frame, ready for corking

We scrambled to get the cork panels in place as before, and frankly weren’t really sure whether we’d done the right thing.

Well, Ken popped by today (Sunday) and had a quick look – and said we’d done really well. Obviously he’d have taken the whole lot out at once and replaced a whole new piece, but he said what we’ve done is perfectly adequate. He’ll make us a fake peg to hide that wood screw, then put a new timber in for the rest of the wall length.

We might ask him just to do the entire length so it’s “proper”… we’ll see.

Either way, we’re pretty chuffed with ourselves. And now the temperature is up again, the lime should be fine.

All in all, an exciting weekend… so we celebrated with mountains of Mexican food and Black Panther at the cinema. Chin chin!

A Big Big Hole…

And yea verily did the weather gods decide these two idiots had pushed their luck far enough…

Idiot on scaffold tower in snow. Other idiot taking photo.

Putting up a new wall panel in an actual blizzard

A mere 10 minutes before this, the sun was shining and we were cracking on. You can’t really tell from this photograph, but it was the beginnings of an actual blizzard. Then it matured into more of a blizzard. Then we decided to call it a day…

But what are we up to? Good question.

Over Christmas, we both got frustrated at the lack of progress we’d made, so we made a plan. A 12-week plan to replace all the wet brick panels in the gable end wall. We’re on schedule.

Joe did a lime-plastering course at Ty Mawr, and learned all manner of useful and interesting things – such as, we can replace the bricks with cork panels. Originally, it would have been wattle and daub, and elsewhere in the house there are still a couple of panels knocking around. We’ll leave them be. But this wall is not original infill and it’s soaking wet, and we’re freezing, so cork it is. It works well with lime, is eco-friend, and is super-easy to use – and fairly inexpensive.

At the moment, costs are at around £800, which is massively less expensive than getting actual grownups to do it for us. But where’s the fun in that?

Okay, so here’s what we did. This is week 2, we did the first panel a couple of weeks ago. Here’s our neat stack of materials – EcoCork insulation boards, big plastic washers to fix them to the frame, and various screws.

A massive pile of cork panels

A massive pile of cork panels

We chose cork because it’s natural and renewable (it’s extracted from the cork-oak tree every nine years). It’s breathable, chemical-free, no synthetic resins or carcinogens. It has a low thermal conductivity so it’s very energy efficient. When we put our hand on the new cork panel in the wall, and the other hand on the old brick and plaster panel, the difference in temperature is remarkable.

We also had bags of ADHERE Vit lime adhesive to stick the boards together. And lime plaster and sand for the scratch coat.

The chaps at Ty Mawr advised us to seal the gaps between the frame and the original timber, just to stop water getting between them and festering. To do that, we’ve used Orcon F sealant, which is eco-friendly and suitable for all the stuff we’re doing.

Before…

Inside of the gable end wall before renovations

It’s a bit of a mess…

The outside of the gable end wall, before renovations

It’s a bit soggy…

Note the terrifying and shaky aluminium tower of doom (Vicky’s Christmas present from Joe. Vicky does not have a massive life insurance policy) and the horrifying ladder of death.

We made a cup of tea, had a think, and decided we’d better get on with it. Only one way forwards: we had to knock a mahoosive hole in the side of the house. So we did. It was an alarming thing to do, just in case you’re wondering. Especially in January.

Alarmed face as we push the bricks out

The face says it all, really

Carefully knocking bricks out

Carefully knocking wet bricks out

Massive hole in wall

Not a window

That little blue blob to the right of Joe? That’s bubble wrap and foam packing, from where we accidentally knocked a little hole in the wall before Christmas. Why not start there? Good question. Because the timber horizontal above it needs replacing, and Ken’s not available just yet.

Next up: we took the top layers of woodwormy, rotten timber off the original frame, sanded it smooth, and brushed the dust off.

Original timber frame ready for sanding

Sanding the top layer off

Then we fitted a timber batten frame inside the original oak frame, screwing the battens in.

Fixing a timber batten frame

Fixing a timber batten frame

And finally sealed the gaps between the new batten frame and the original oak.

Frame sealed and ready for cork

Frame sealed and ready for cork

Then we fitted the cork boards onto the frame. This is a 20mm thick board, fitted inside the batten frame and screwed onto it.

Cork board screwed into frame

First layer of cork goes on

New cork wall panel

New wall panel!

It fits neatly inside the timber frame, with a few millimetres all around for the lime plaster to push into.

Joe on the tower outside the house

Ready for the next layer

Vicky up a tower putting cork adhesiveon

Slapping the cork adhesive on

The next layer goes on outside – another 20mm thick board. We fix it using the cork-lime adhesive, which we mix in a big bucket, and apply like lime plaster.

Then another layer goes on top of that – a 40mm thick board.

So all in all, the new cork wall panel is 80mm thick. We’ll be lime plastering over the top of that.

The first coat is just a scratch coat of lime, because we’ll be sandblasting the external timbers and the stone wall in the summer. Then the final coats of lime plaster and limewash will go on later this year.

Newly plastered wall panel

Newly plastered wall panel

We’ll no longer need that lead flashing, because it’ll all be watertight. No more water pouring down the walls…

The second panel was a little tricker, as you can see…

Not a square frame

Not a square frame

Joe's amazing frame bodge from one of our new oak offcuts

Joe’s amazing frame bodge from one of our new oak offcuts

Apart from the blizzard, it’s been an epic couple of weekends. We’ve made great progress and we’re having tons of fun 🙂

Whirlwind Dingle Update

Gosh. It’s suddenly November, and we seem to have not updated since… summer.

A lot has happened.

So, in brief…

The House Has Eyes

The windows are in. They may come out again, because I’m not entirely happy with how they’re fitting at the moment, and I’m certainly not chuffed with the expanding foam that’s in there. Evil stuff.

Painted in Celestial Blue from Little Greene Paint.

Painted in Celestial Blue from Little Greene Paint.

The plyboard is temporary, natch. And we really need to redo that ex-window in the stone part of the house, because it does not look good.

We’re now thinking we may go for oak for the rest of the windows, sell these ones, and replace them. Because obviously we’re not making this easy for ourselves…

Another Dingle Tragedy

Remember Nugget, our poory little rescue hen? She was sick, and we were giving her antibiotics every day. She was getting much better, much more lively, and was a clever little hen. Then a fox took her.

Vicky basically cried for a week.

Then there were four hens, who are all most fabulous: Granny Featherwax (the original and leader of the pack), Shirley (the other rescue hen), Big Betty (a Bluebell), and Mrs Pickles (a Cheshire blue, who Vicky trained to fly up onto your arm).

chicken sitting on my arm

Mrs Pickles has come home to roost

Floors…

We pulled up the scabby old carpet in the living room to find a roomful of quarry tiles. Sadly, they’re not all in beautiful condition, and there are two different types.

We’re probably going to put flagstones down in here.

Quarry tiles of variable quality

Quarry tiles of variable quality

The Garden…

We have been pretty busy in the garden, though. We got a good crop of vegetables, and more squash and pumpkin than any reasonable person could wish for.

More squash than you can shake a courgette at

More squash than you can shake a courgette at

Two of them became Hallowe’en pumpkins:

Meet Bob and RuPumpkin (we've been watching a lot of RuPaul's Drag Race)

Meet Bob and RuPumpkin (we’ve been watching a lot of RuPaul’s Drag Race)

And we’ve started preparing the Chicken Palace and new mower shed. The idea is, where the compost heap is at the moment was a big patch of wasteland, really. 15 feet of brambles and nettles at the end of the orchard, next to the field.

So we’ve cleared that lot out, started levelling it, and acquired 60 paving slabs. Some of those paving slabs will go to form the floor of the new mower shed and chicken feed shed. The chicken house will be attached, and raised off the ground leaving a few feet for the hens to mooch around beneath, then there’ll be a big permanent run that’s totally fox-proof.

Watch this space.

But for now, here’s the progress (we put Vicky’s niece Ella to work):

Child labour. Cheap and cheerful!

Child labour. Cheap and cheerful!

But perhaps most excitingly in the garden, we now have a greenhouse! Joe’s sister offered hers up to the first taker — and never one to pass up a bargain, we snapped it up.

We took down the shaky little shed next to the vegetable beds and levelled the land:

Shed. Mostly held together by clematis.

Shed. Mostly held together by clematis.

Clear and level, on the hottest day of the summer.

Clear and level, on the hottest day of the summer.

Then we lumped thousands of paving slabs up the hill and Vicky became the most irritating fussy person in the world: they had to be millimetre perfect… after Joe had finished chilling, there was further levelling.

A job well jobbed.

A job well jobbed.

Then up went the greenhouse. Hurrah! And we only broke two panes of glass in the whole transportation and erection process.

#winning

Greenhouse is ready for action

Greenhouse is ready for action

Then we filled it with chilli plants:

The future of many trips to buy soured cream...

The future of many trips to buy soured cream…

Compositions in Fibonacci…

And finally, Joe and the chickens inadvertently arranged themselves into a Fibonacci sequence. And Joe learned that, when presented with peanut butter, chickens give zero flips about manners:

Fibonacci chickens

Fibonacci chickens

What’s Next?

Today, we’ve been pondering attic electrics, looking at the neighbour’s amazing timber-framed extension, and planning the bathroom.

Harvest at The Dingle

Vegetables! Every day this week, Vicky has had a giant plate of rocket, chard, spinach, and lettuce, and two hard-boiled eggses — all from the bountiful Dingle.

Here’s what we’ve been growing:

Spinach & rainbow chard

Spinach & rainbow chard

Lettuce, strawberries, wild rocket, and raspberries

Lettuce, strawberries, wild rocket, and raspberries

Potatoes

Potatoes

And in the background behind the potatoes is asparagus, garlic, onions, leeks, beetroot, carrots, and cabbages.

Oh, and we took a bloody great dead ivy-choked tree out and created space and light. From this:

Big old stump

Big old stump

To this:

Cleared fence

Big space

That big space there is where the beautiful new mower shed, chicken house, and chicken run are going to go. Handbuilt by us.

Skellington Floors

It’s been a while, but things are moving on. Fish has created a skeleton floor with the new oak beams — which are gorgeous — and new oak joists.

We were going to go for cheaper softwood joists and cover them, but Fish managed to find some green oak that was pretty much the same price, so we’re dead chuffed. They look great.

Oak beams and joists and a temporary platform

New oak beams and joists in the skeleton floor

In the process, Fish created Mount Dustmore:

A pile of sawdust fenced in with an offcut

Mount Dustmore

There’s space for a final joist once the holes in the wall are fixed:

Gap between joist and wall

Room for a little one

So that’s where we are for now. We’ve still not decided on a final floor plan — we need the architect for that — but the windows are hopefully going into the front of the cottage before the end of May. I’ve got some paint test pots from Little Greene, so I’m pretty impatient…

« Older posts Newer posts »

© 2025 Project Dingle

Theme by Anders NorénUp ↑