Restoring an old cottage...

Category: walls (Page 2 of 2)

Behold The Very Tiny Wall In The Attic

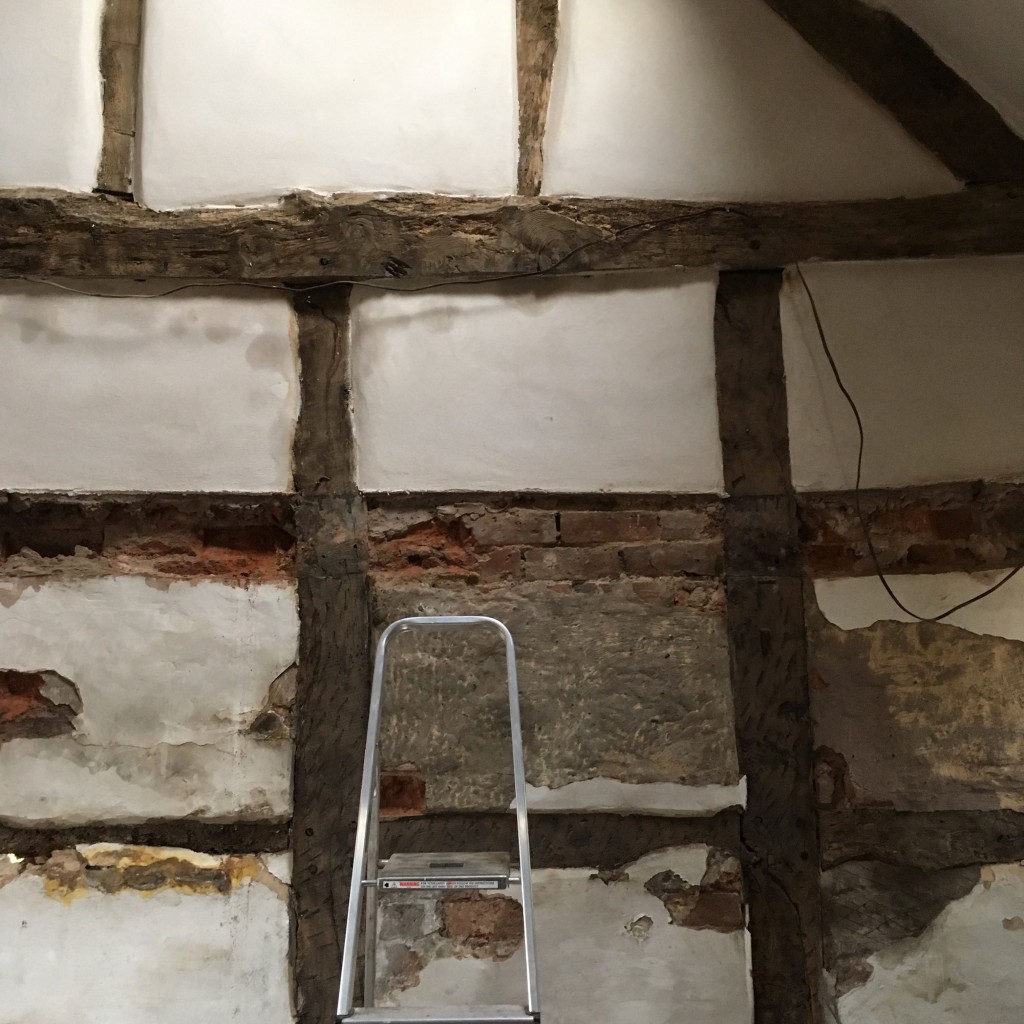
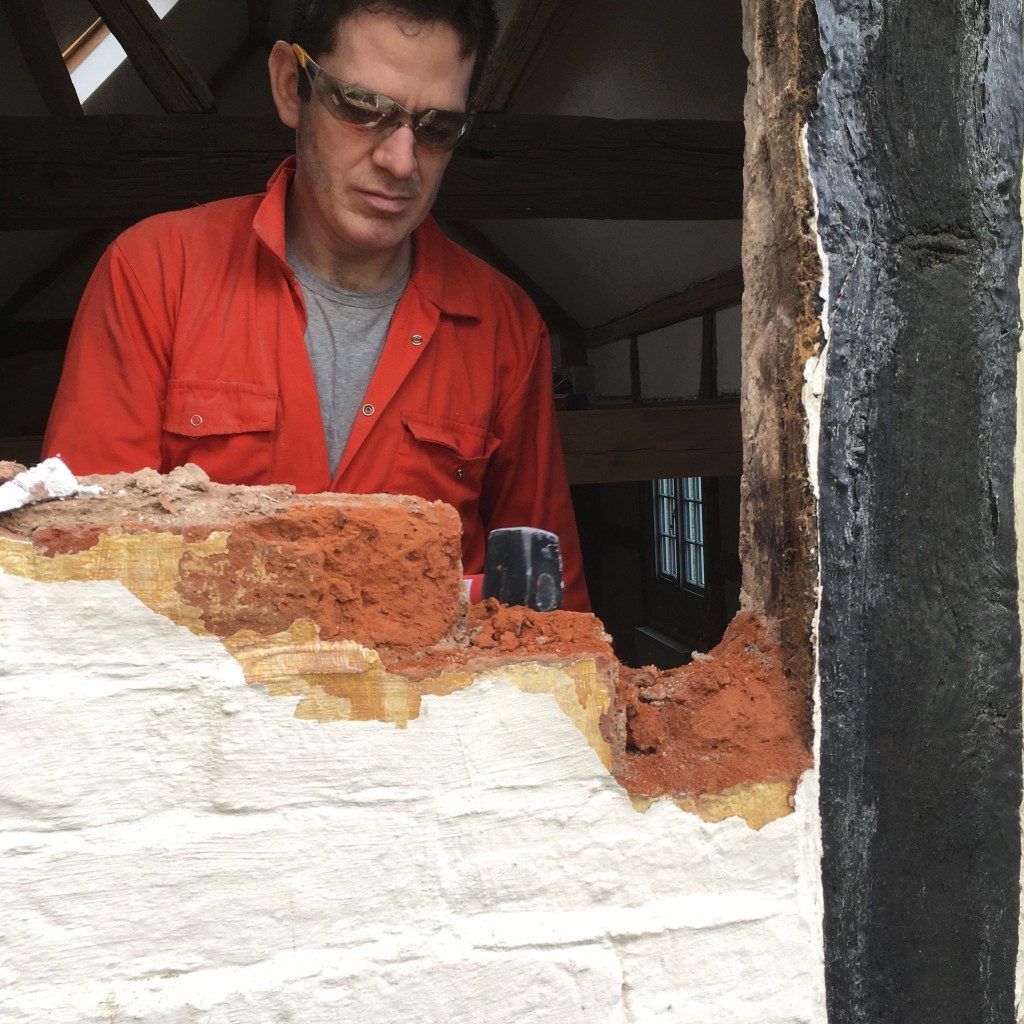
When the new amaze-stairs went in, we were left with some pretty triangular strut-work above the truss, and two big gaps below, one on either side of the stairs.

Gap between oak truss and floor on 2nd floor.

It’s an ‘ole. Needs filling.

So we got down to filling them.

Wooden battens inside the hole frame

Framing the big ‘ole.

Cork panel from below

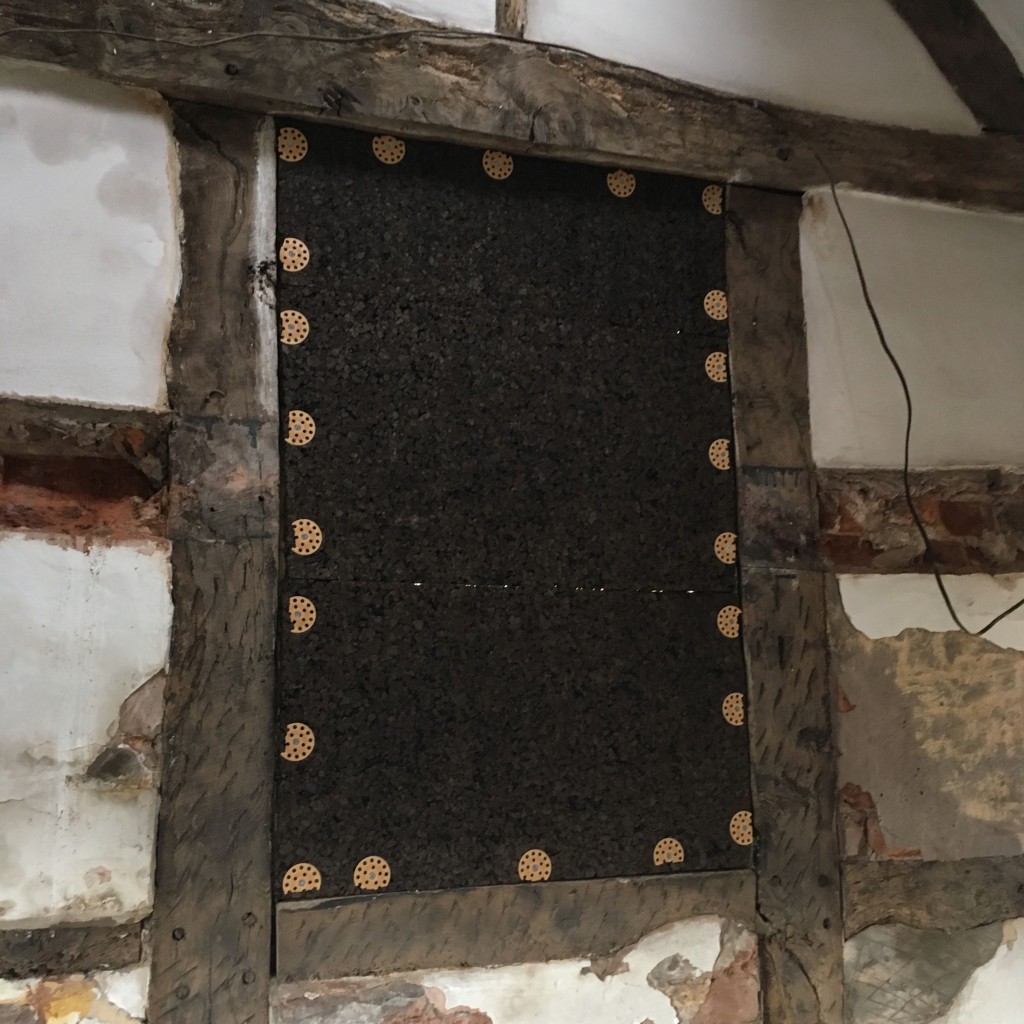
Lovely tidy cork panel

Like the gable end wall,  we used the cork panels and lime-cork-hemp plaster-glue to stick them together. We’ve only done one so far, because the builders will need to use the other hole to fit the last floor joists and we don’t want to do the job only to have it damaged. We’re pretty quick at doing this panelling now anyway, so it won’t take long.

Joe lime-plastering the new cork panel

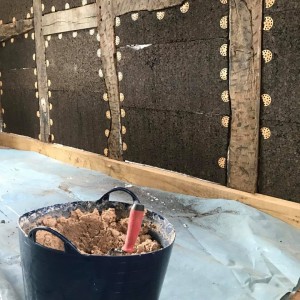
Scratch coat of lime plaster.

Then we got the scratch coat of lime plaster on.

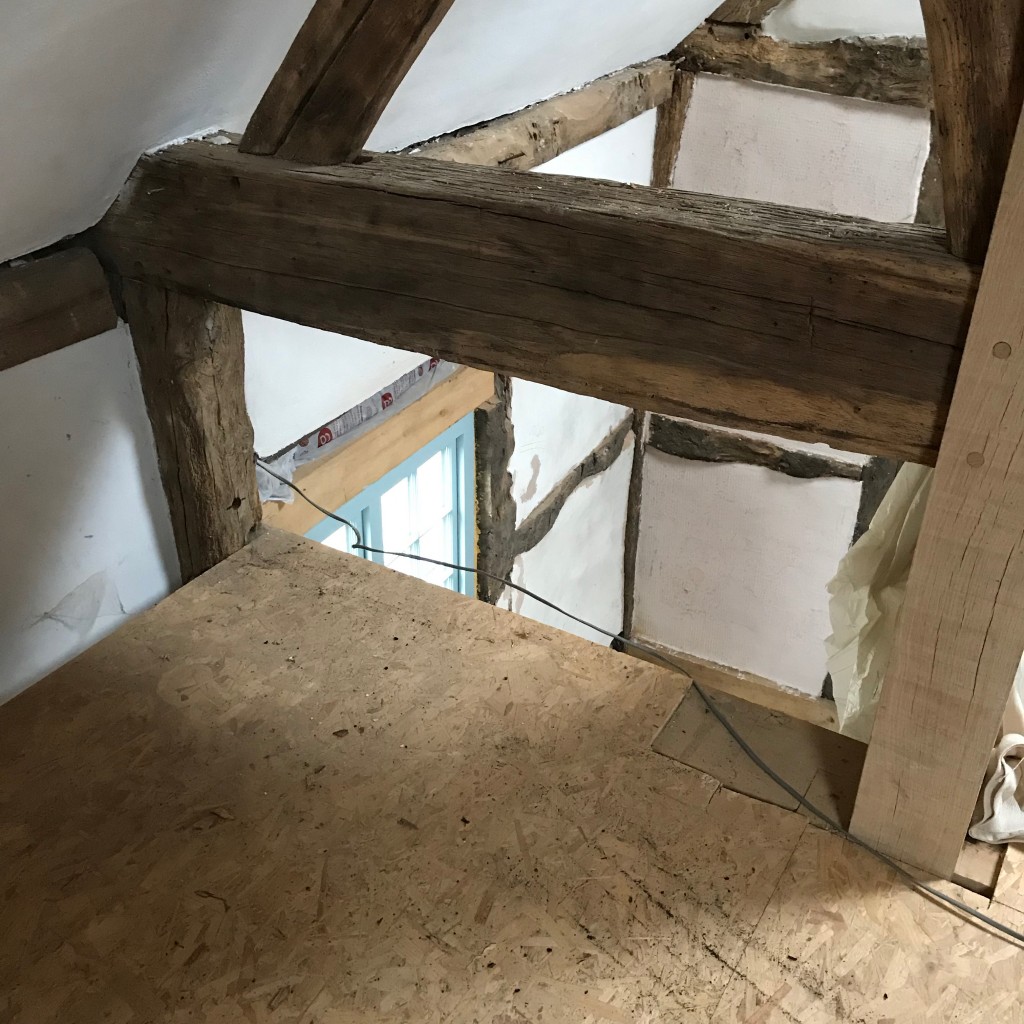
It’s made a big difference to the feel of the attic bedroom already.

Under The Eaves

While we were there and had the gloop made up, we turned our attention to the gaps under the eaves. Here’s where we made a mistake a year or so ago.

When we got overexcited about the attic ceiling panels we’d fitted, we rushed ahead to get them plastered with lime by the expert chaps at PlasLime. They did a great job, exactly what we’d asked for… oh, if only we’d thought it through properly.

At the time, we didn’t know what we were going to do about wiring up the attic, so we asked them to leave a couple of inches gap at the bottom between the sloping ceiling and the supporting timber.

Turns out, we’re mounting all the wiring on the surface using The Most Expensive Wire In The World. So we didn’t need those gaps… and now we need to fill them. Doh.

So we did.

We’re using offcuts of cork:

Cork slivers

Waste not, want not

And stuffing them into the eaves gaps with the cork-hemp-lime-plaster gloop:

Filling gaps with cork

Filling gaps

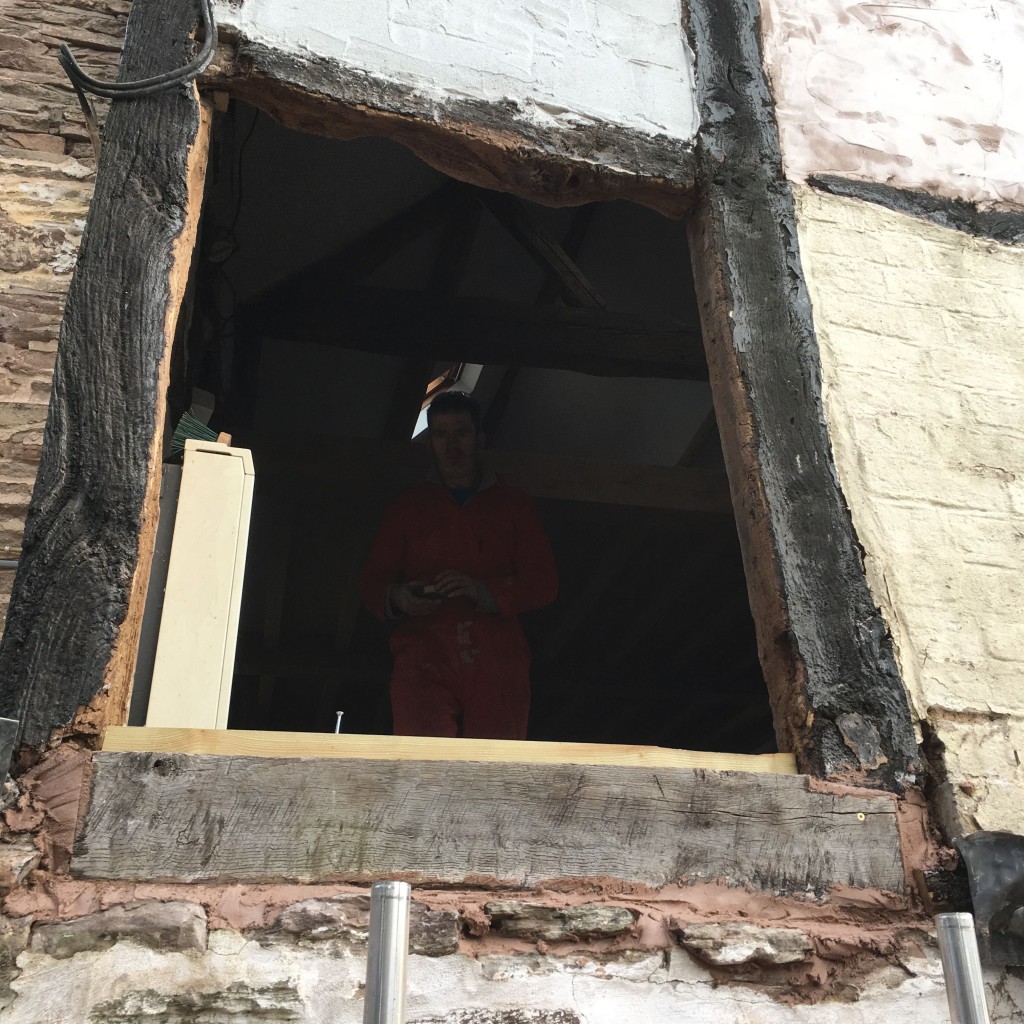
That gap beneath the timber is annoying. When we put the new windows in, the wall panel above slipped down a little. We need to kick it out and replace it anyway because it’s brick, and we want to cork it, but still…

Then Joe got up on a ladder (I don’t do ladders because they are HORRIFYING) and wobbled around filling more gaps until the gloop ran out:

Joe up a ladder filling gaps

Precarious gap-filling

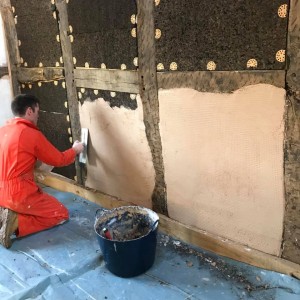
Plastering: The Final Coat

Finally, we decided to have a go at putting the posh top coat of lime plaster onto one of the gable-end wall panels:

Putting the top coat on

Putting the top coat on

Joe’s done a really lovely job. It needs a little sanding and finishing, but it looks great:

Smooth top coat of lime plaster

Looking smooth!

Coming up next: Tiny Sheep Agility Training!

Plastering and all that

On the first floor, we have the gable-end wall that we’ve posted about earlier in the blog. There were 8 big rectangular panels of soggy bricks in a very old oak frame.

We’ve kicked the bricks out, replaced them with lovely cork (which is light, breathable, renewable, insulating, and basically perfect for the job).

Externally that’s had a scratch coat put on it, but does ned a second coat of lime to add a bit more weatherproofing and make it look pretty.  While this was going on, Ken Milloy, our splendid heritage timber man from Ludlow replaced the rotten sole plate and added a couple of repairs to the frame. I’d link to his website, but he’s a bit oldschool for that.

plaster 1

Internally, it’s getting

a couple of layers of hemp lime (that’s lime plaster with chopped up hemp in it).

The hemp does good things ; it adds strength to the mix, just like adding fibres does. It also reduces the weight of the plaster, which is nice for both  the wall and the plasterer.

Yesterday we knocked up about 20kg of it, and I squashed it onto the wall.  Knocking up is the process of mixing the plaster to get energty into it, and it loosens up the mix and makes it easier to handle and spread around. We also added about a litre of water to it, to loosen it further, as it was pretty chewy and I couldn’t really spread it.

It’s unlikely that the finish will end up looking the same as the rest of the attic, so we’ll probably whitewash all the plasterwork to standardise the apearance internally.  Once the surface of the first layer was about where I wanted it to be – something between 3mm and 10mm, we pressed a mesh into it. The mesh adds further strength to the layer, and will hopefully prevent cracking later on.

It was fairly hard work – both the mixing and the applying, but the end result looks ok to me.

I find jobs like this look terrible when you’re doing them, you’re so up close and examining every aspect of what you’re doing. If you go away and look at it an hour later you suddenly realise it’s fine, and it actually looks good. Almost like someone who knows what they’re doing has done it.  Almost.

plaster2

Next weekend we’ll hopefully get a few more panels done, if my blisters have subsided by then..

All the materials for this wall have been supplied by Ty-Mawr Lime, who have been hugely generous with their time and advice.  If you’re thinking of doing something like this, I’d really reccommend talking to them.

Our Crumbling Sole Plate

So, of all the things you want to happen when you knock all the bricks out of one of your wall panels and open a gaping hole to the outside world, this isn’t one of them…

(Parental advisory: Joe swears)

The first course of our house is stone. The timber-frame part sits on top of that stone. Once upon a time, there was an oak sole plate sitting on top of the stone wall – a massive long piece of timber forming the bottom of the frame.

Then, someone put a concrete sill on top of that timber, fixing it to the wall. You can see it in the next photo – it was covered in lead flashing. There’s a red arrow pointing to it.

Crazy man in orange jumpsuit stares at wall

Joe peels back the lead flashing to reveal… CONCRETE DOOM

Unfortunately, concrete destroys timber. It literally dissolves it: it pulls water in, and holds it there, so the timber rots. And you end up with this:

Rotten timber

Rotted timber woe

The wood has crumbled to nothing next to the upright, which is pretty rotted too. Luckily, there’s still a little solid wood in there. The sole plate is dead though. We pulled it to shreds with our bare hands.

The face of woe: holding the rotten sole plate

We both wore this face for a good hour

I sent a panicked text message to Ken, who is a conservation timber expert and master carpenter, and who will be doing all our oak work… but it was Saturday, so we really didn’t expect to hear from him, which is fair enough.

Every time a car went by, we got all excited in case it was Ken. We really, really wanted a grownup to tell us what to do next.

But in the absence of any grownups, we decided to take care of it. After all, we couldn’t really live with a 1.5m by 1m hole in the house for several days.

Ideally, we’d have waited and got Ken to replace the whole sole plate with a piece of timber the length of the wall, but that wasn’t an option. So we decided to do the best we could, fully expecting Ken would pull it out and do the job properly within the next few weeks.

We have loads of old oak lying around from when we ripped the attic floor out, and Joe found this piece, which we cut down to size. We cut a notch out to sit around the second upright:

New old oak

A likely-looking candidate

Then we cleared out all the old concrete and timber splinters and rot, and took the stone wall back to as clean as we could:

Sole-less

Sole-less

Loose stones on the top of the wall

Loose stones on the top of the wall

Those two stones up there are just sitting loose, so we took them out, cleaned them up, and then laid a bed of limecrete to sit them in. This was Vicky’s first ever go at building a stone wall. It’s only two stones, but it counts:

Lime bed for the stones

Lime bed for the stones

We bedded the two loose stones back in, then laid another thick bed of lime on top for the new-old timber to sit in. We squeezed plenty of it into the corners, too, because there wasn’t really any support in there before. Then we laid the new timber thusly:

New sole plate with batten frame, ready for corking

New sole plate with batten frame, ready for corking

We scrambled to get the cork panels in place as before, and frankly weren’t really sure whether we’d done the right thing.

Well, Ken popped by today (Sunday) and had a quick look – and said we’d done really well. Obviously he’d have taken the whole lot out at once and replaced a whole new piece, but he said what we’ve done is perfectly adequate. He’ll make us a fake peg to hide that wood screw, then put a new timber in for the rest of the wall length.

We might ask him just to do the entire length so it’s “proper”… we’ll see.

Either way, we’re pretty chuffed with ourselves. And now the temperature is up again, the lime should be fine.

All in all, an exciting weekend… so we celebrated with mountains of Mexican food and Black Panther at the cinema. Chin chin!

A Big Big Hole…

And yea verily did the weather gods decide these two idiots had pushed their luck far enough…

Idiot on scaffold tower in snow. Other idiot taking photo.

Putting up a new wall panel in an actual blizzard

A mere 10 minutes before this, the sun was shining and we were cracking on. You can’t really tell from this photograph, but it was the beginnings of an actual blizzard. Then it matured into more of a blizzard. Then we decided to call it a day…

But what are we up to? Good question.

Over Christmas, we both got frustrated at the lack of progress we’d made, so we made a plan. A 12-week plan to replace all the wet brick panels in the gable end wall. We’re on schedule.

Joe did a lime-plastering course at Ty Mawr, and learned all manner of useful and interesting things – such as, we can replace the bricks with cork panels. Originally, it would have been wattle and daub, and elsewhere in the house there are still a couple of panels knocking around. We’ll leave them be. But this wall is not original infill and it’s soaking wet, and we’re freezing, so cork it is. It works well with lime, is eco-friend, and is super-easy to use – and fairly inexpensive.

At the moment, costs are at around £800, which is massively less expensive than getting actual grownups to do it for us. But where’s the fun in that?

Okay, so here’s what we did. This is week 2, we did the first panel a couple of weeks ago. Here’s our neat stack of materials – EcoCork insulation boards, big plastic washers to fix them to the frame, and various screws.

A massive pile of cork panels

A massive pile of cork panels

We chose cork because it’s natural and renewable (it’s extracted from the cork-oak tree every nine years). It’s breathable, chemical-free, no synthetic resins or carcinogens. It has a low thermal conductivity so it’s very energy efficient. When we put our hand on the new cork panel in the wall, and the other hand on the old brick and plaster panel, the difference in temperature is remarkable.

We also had bags of ADHERE Vit lime adhesive to stick the boards together. And lime plaster and sand for the scratch coat.

The chaps at Ty Mawr advised us to seal the gaps between the frame and the original timber, just to stop water getting between them and festering. To do that, we’ve used Orcon F sealant, which is eco-friendly and suitable for all the stuff we’re doing.

Before…

Inside of the gable end wall before renovations

It’s a bit of a mess…

The outside of the gable end wall, before renovations

It’s a bit soggy…

Note the terrifying and shaky aluminium tower of doom (Vicky’s Christmas present from Joe. Vicky does not have a massive life insurance policy) and the horrifying ladder of death.

We made a cup of tea, had a think, and decided we’d better get on with it. Only one way forwards: we had to knock a mahoosive hole in the side of the house. So we did. It was an alarming thing to do, just in case you’re wondering. Especially in January.

Alarmed face as we push the bricks out

The face says it all, really

Carefully knocking bricks out

Carefully knocking wet bricks out

Massive hole in wall

Not a window

That little blue blob to the right of Joe? That’s bubble wrap and foam packing, from where we accidentally knocked a little hole in the wall before Christmas. Why not start there? Good question. Because the timber horizontal above it needs replacing, and Ken’s not available just yet.

Next up: we took the top layers of woodwormy, rotten timber off the original frame, sanded it smooth, and brushed the dust off.

Original timber frame ready for sanding

Sanding the top layer off

Then we fitted a timber batten frame inside the original oak frame, screwing the battens in.

Fixing a timber batten frame

Fixing a timber batten frame

And finally sealed the gaps between the new batten frame and the original oak.

Frame sealed and ready for cork

Frame sealed and ready for cork

Then we fitted the cork boards onto the frame. This is a 20mm thick board, fitted inside the batten frame and screwed onto it.

Cork board screwed into frame

First layer of cork goes on

New cork wall panel

New wall panel!

It fits neatly inside the timber frame, with a few millimetres all around for the lime plaster to push into.

Joe on the tower outside the house

Ready for the next layer

Vicky up a tower putting cork adhesiveon

Slapping the cork adhesive on

The next layer goes on outside – another 20mm thick board. We fix it using the cork-lime adhesive, which we mix in a big bucket, and apply like lime plaster.

Then another layer goes on top of that – a 40mm thick board.

So all in all, the new cork wall panel is 80mm thick. We’ll be lime plastering over the top of that.

The first coat is just a scratch coat of lime, because we’ll be sandblasting the external timbers and the stone wall in the summer. Then the final coats of lime plaster and limewash will go on later this year.

Newly plastered wall panel

Newly plastered wall panel

We’ll no longer need that lead flashing, because it’ll all be watertight. No more water pouring down the walls…

The second panel was a little tricker, as you can see…

Not a square frame

Not a square frame

Joe's amazing frame bodge from one of our new oak offcuts

Joe’s amazing frame bodge from one of our new oak offcuts

Apart from the blizzard, it’s been an epic couple of weekends. We’ve made great progress and we’re having tons of fun 🙂

Newer posts »

© 2025 Project Dingle

Theme by Anders NorénUp ↑