
And yea verily did the weather gods decide these two idiots had pushed their luck far enough…

Putting up a new wall panel in an actual blizzard
A mere 10 minutes before this, the sun was shining and we were cracking on. You can’t really tell from this photograph, but it was the beginnings of an actual blizzard. Then it matured into more of a blizzard. Then we decided to call it a day…
But what are we up to? Good question.
Over Christmas, we both got frustrated at the lack of progress we’d made, so we made a plan. A 12-week plan to replace all the wet brick panels in the gable end wall. We’re on schedule.
Joe did a lime-plastering course at Ty Mawr, and learned all manner of useful and interesting things – such as, we can replace the bricks with cork panels. Originally, it would have been wattle and daub, and elsewhere in the house there are still a couple of panels knocking around. We’ll leave them be. But this wall is not original infill and it’s soaking wet, and we’re freezing, so cork it is. It works well with lime, is eco-friend, and is super-easy to use – and fairly inexpensive.
At the moment, costs are at around £800, which is massively less expensive than getting actual grownups to do it for us. But where’s the fun in that?
Okay, so here’s what we did. This is week 2, we did the first panel a couple of weeks ago. Here’s our neat stack of materials – EcoCork insulation boards, big plastic washers to fix them to the frame, and various screws.

A massive pile of cork panels
We chose cork because it’s natural and renewable (it’s extracted from the cork-oak tree every nine years). It’s breathable, chemical-free, no synthetic resins or carcinogens. It has a low thermal conductivity so it’s very energy efficient. When we put our hand on the new cork panel in the wall, and the other hand on the old brick and plaster panel, the difference in temperature is remarkable.
We also had bags of ADHERE Vit lime adhesive to stick the boards together. And lime plaster and sand for the scratch coat.
The chaps at Ty Mawr advised us to seal the gaps between the frame and the original timber, just to stop water getting between them and festering. To do that, we’ve used Orcon F sealant, which is eco-friendly and suitable for all the stuff we’re doing.
Before…
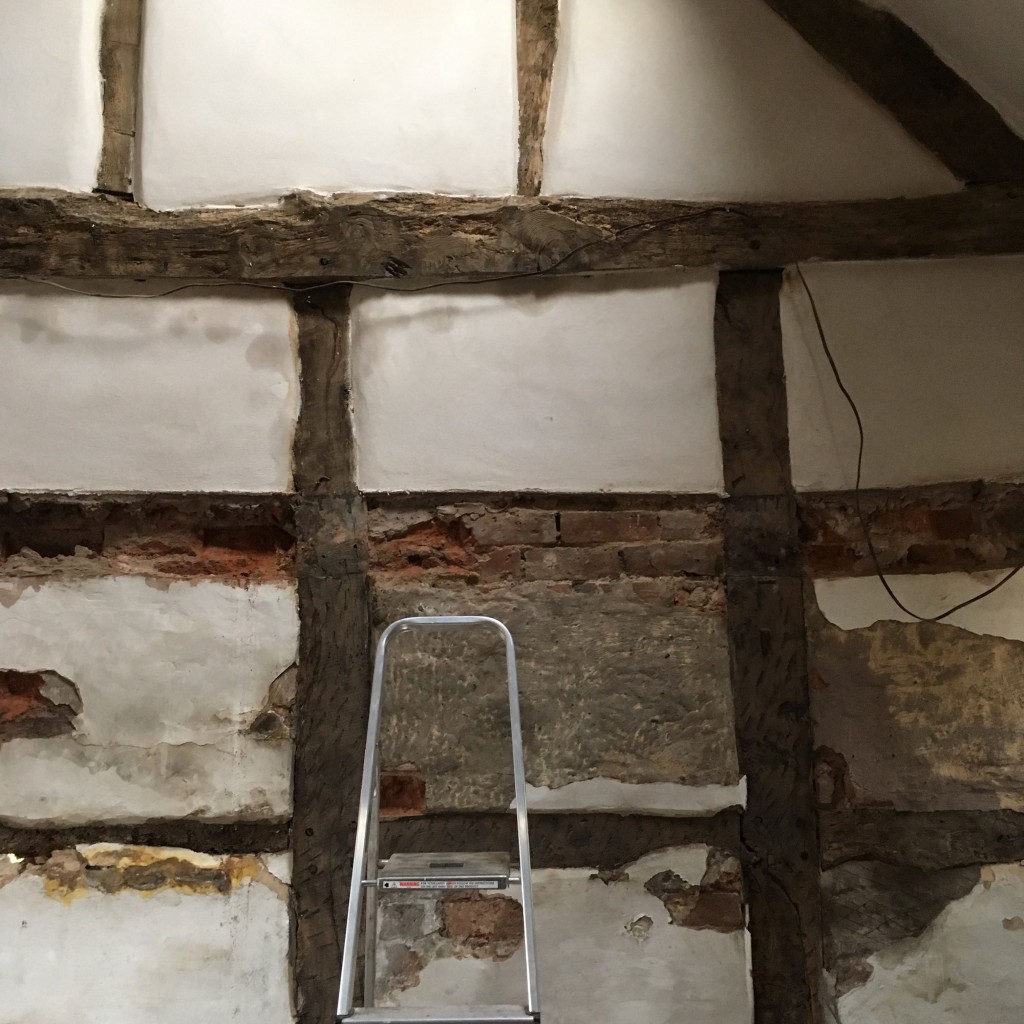
It’s a bit of a mess…

It’s a bit soggy…
Note the terrifying and shaky aluminium tower of doom (Vicky’s Christmas present from Joe. Vicky does not have a massive life insurance policy) and the horrifying ladder of death.
We made a cup of tea, had a think, and decided we’d better get on with it. Only one way forwards: we had to knock a mahoosive hole in the side of the house. So we did. It was an alarming thing to do, just in case you’re wondering. Especially in January.

The face says it all, really
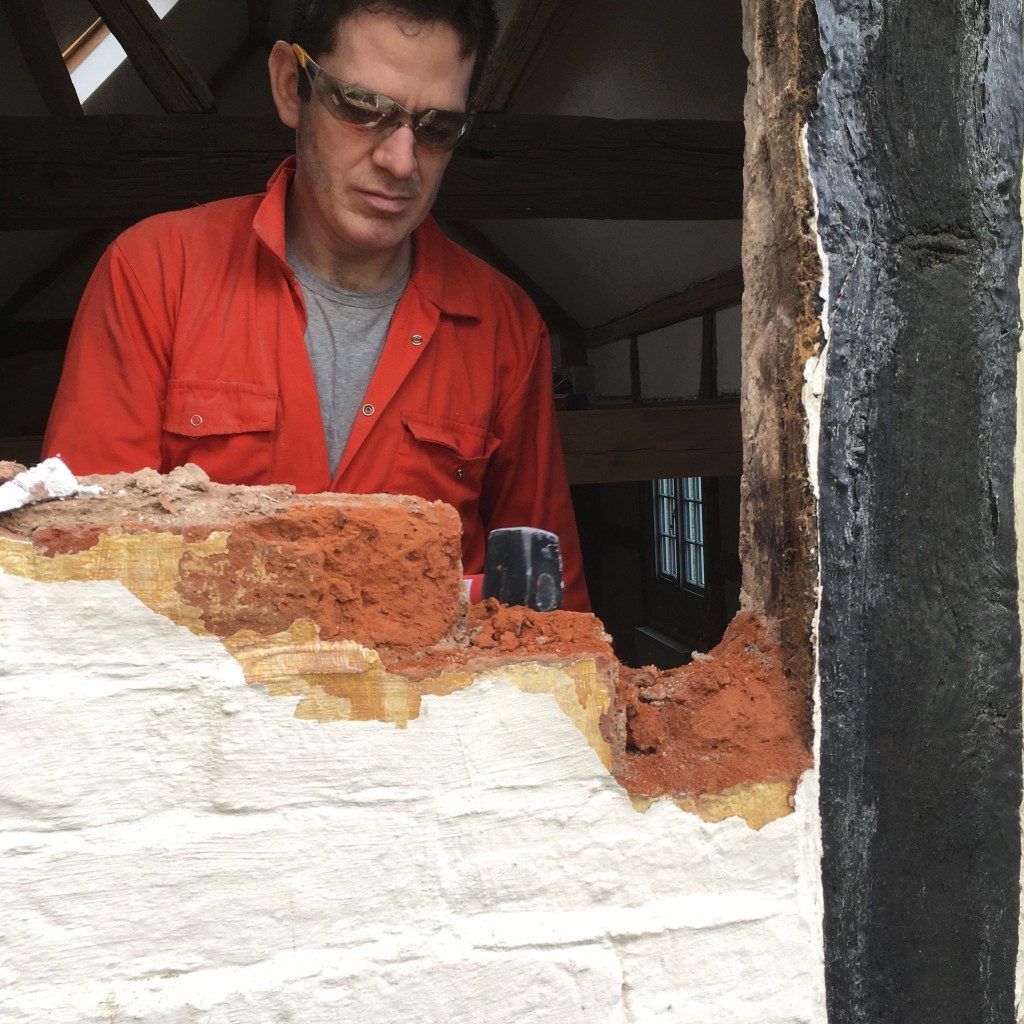
Carefully knocking wet bricks out

Not a window
That little blue blob to the right of Joe? That’s bubble wrap and foam packing, from where we accidentally knocked a little hole in the wall before Christmas. Why not start there? Good question. Because the timber horizontal above it needs replacing, and Ken’s not available just yet.
Next up: we took the top layers of woodwormy, rotten timber off the original frame, sanded it smooth, and brushed the dust off.

Sanding the top layer off
Then we fitted a timber batten frame inside the original oak frame, screwing the battens in.

Fixing a timber batten frame
And finally sealed the gaps between the new batten frame and the original oak.

Frame sealed and ready for cork
Then we fitted the cork boards onto the frame. This is a 20mm thick board, fitted inside the batten frame and screwed onto it.

First layer of cork goes on
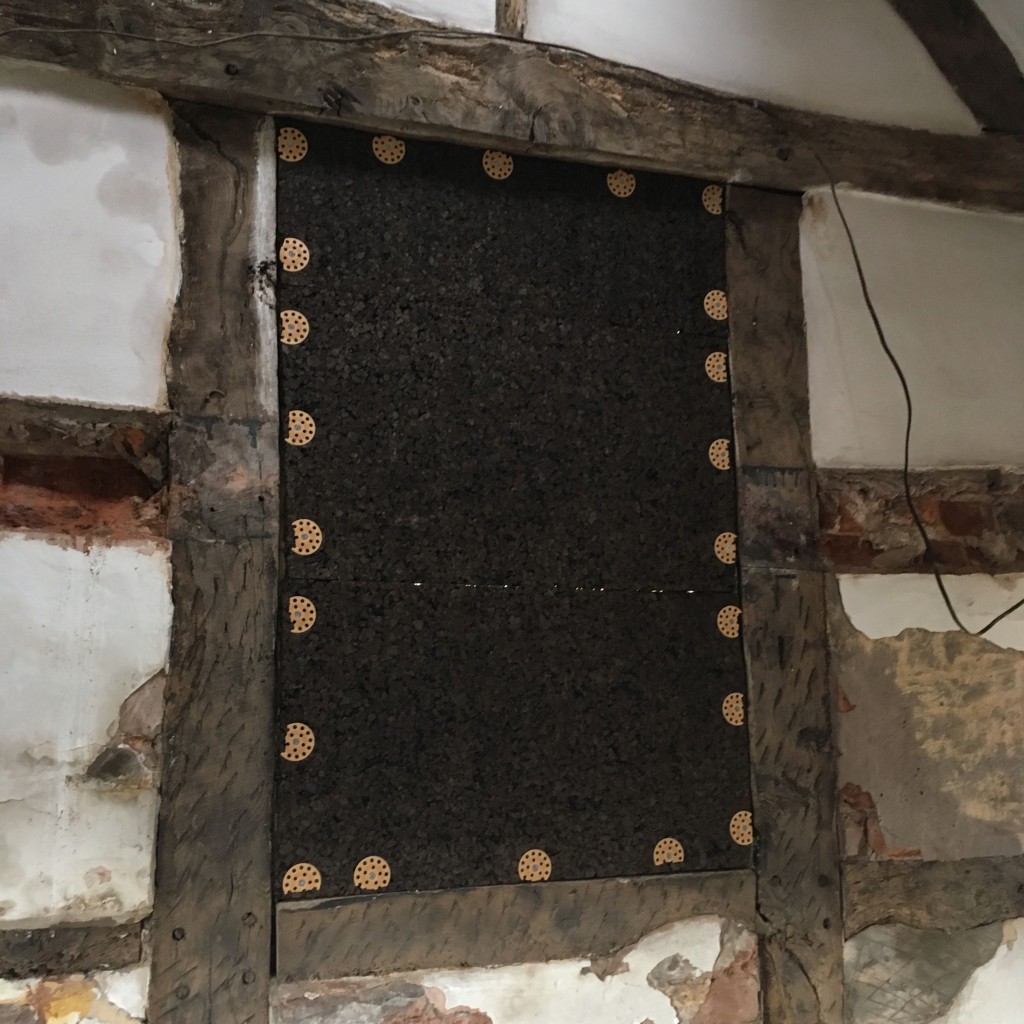
New wall panel!
It fits neatly inside the timber frame, with a few millimetres all around for the lime plaster to push into.

Ready for the next layer

Slapping the cork adhesive on
The next layer goes on outside – another 20mm thick board. We fix it using the cork-lime adhesive, which we mix in a big bucket, and apply like lime plaster.
Then another layer goes on top of that – a 40mm thick board.
So all in all, the new cork wall panel is 80mm thick. We’ll be lime plastering over the top of that.
The first coat is just a scratch coat of lime, because we’ll be sandblasting the external timbers and the stone wall in the summer. Then the final coats of lime plaster and limewash will go on later this year.

Newly plastered wall panel
We’ll no longer need that lead flashing, because it’ll all be watertight. No more water pouring down the walls…
The second panel was a little tricker, as you can see…

Not a square frame

Joe’s amazing frame bodge from one of our new oak offcuts
Apart from the blizzard, it’s been an epic couple of weekends. We’ve made great progress and we’re having tons of fun 🙂
Leave a Reply