Restoring an old cottage...

Category: Uncategorized

The Most Glorigeous Bathroom in the World

Welp, it’s pretty much finished: behold the fruits of about two years’ labouring. We LOVE IT. The shower is amazing, like standing under warm rain. The cubicle is huge; you could have a party in there with at least five people comfortably.

Here’s what we’ve done since we finished and fitted the oak door…

  1. Fitted an octopus hook just outside the shower cubicle to hang towels so they’re easy to grab without dripping all over the floor.
  2. Fitted a drunk octopus hook on the back of the door for dressing gowns.
  3. Fitted the towel rack above the radiator (just got to learn how to fold towels all fancy like a posh hotel or an Instagram influencer).
  4. Made little shelves from scraps of oak and fitted them inside the boiler cupboard. On the right is all the cleaning products, away from any electrics. On the left is a shelf full of loo rolls, which we buy in bulk from Who Gives a Crap because they’re super-ethical and they wrap their loo rolls in funky paper. Just inside, below any switches, is a shelf for the electric toothbrushes.
  5. Re-spoke-shaved and sanded the door because it swelled and started sticking.
  6. Took the shower controls apart to find out why we couldn’t change the temperature and realised we’d been flannels, and fixed it so we can now have showers of variable temperatures.
  7. Got my Vogue mirror reframed and hung it.
  8. Wallpapered the toilet alcove wall in the most incredible Oceania wallpaper from Mind The Gap. We only used a tiny bit so watch out for us papering more of the walls in this elsewhere in the house…
  9. Bought our Big Boi plant from my friend Steph’s shop Löv-Leaf and he looks amazing.

We do still have a few things to do:

  1. Make a mirror out of bits of oak to go behind the sinks.
  2. Make towel rails out of scraps of copper pipe, to fix to the sides of the sink unit, so we don’t drip all the way over the floor to the towel rack.
  3. Add a little trim to the cupboard corner.
  4. Touch up a little paintwork here and there.
  5. Add architrave to the doorframe to tidy it up.
  6. Find some amazing artwork for one of the walls. I have my eye on a piece in a local art shop.
  7. Find a chair to put clothes on and so the cats can sit and watch us have a bath like the little weirdos they are.

But it’s pretty much finished. We’re delighted, and super proud of ourselves, and we love it in there.

Next project: turning the Rayburn Room into a cosy games room. One day it’ll be a library, but first we have to do the building work when we extend and build a new kitchen. Which will hopefully be next year!

We’re Watertight! And Waney!

After a verrrrrrrry long summer in which nothing much happened at Casa Dingle, a lot has happened in the past three weeks.

The Front Soleplate

We discovered that the soleplate along the front of the house is solid! (Unlike the soleplate on the gable end which was thoroughly rotten.)

Soleplate over window

Surprisingly solid soleplate

So all Ken and Phil had to do was face it with a beautiful new piece of oak:

New soleplate facing

New soleplate facing

They did this because otherwise there would be a big ledge where the timber frame meets the wall. So now there is the original soleplate, the new oak facing, and the lead flashing over both – held in place by a piece of softwood which will form part of the frame for our new cork panels:

Showing how the soleplate and lead is fixed

Neatly layered timber

Here’s Phil oiling the new lead:

Oiling the lead

Shiny shiny!

And here’s the house looking alarmingly skeletal. Don’t worry, we’re assured it’s quite sound…

Ken's van in front of The Dingle

Ken Milloy: master conservation timber wizard

Over the next couple of weekends, we’ll be rebuilding those wall panels with cork and lime, and the house should warm and watertight. Because…

The Gable End Wall…

…has been weatherboarded!

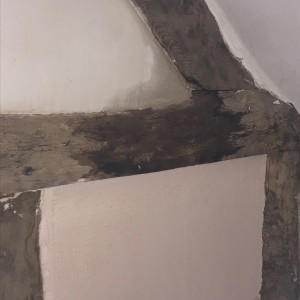
Some time ago, we had plasterers come out to quote for plastering the exterior of the gable end wall, which streams water inside when it rains heavily. That end of the house gets all the weather and it suffers (hence the rotten soleplate and bricks).

Soaking wet every time it rains...

Soaking wet every time it rains…

That isn't a shadow...

That isn’t a shadow…

Their advice was to clad it in weatherboard to protect it, because we were unlikely to be able to make it watertight simply by plastering.

So we took their advice and asked Ken and Phil to sort it out, which they duly did.

They started by attaching battens and felt to the existing wall:

Battens and felt

Prep for the weatherboarding

We decided to go for waney edge oak boards, which means they retain their natural live wavey edge. It’s absolutely beautiful and looks much more natural than straight boards, and is also more in line with what the original builders would have done, had they chosen to weatherboard the house.

The electric company came and moved the power cables to a more suitable position, and updated from two cables to a single cable, so that was a bonus, and it now looks super tidy.

Isn’t this gorgeous? And it’ll weather down to silver over the next few months:

Gloriously weatherproof and stunningly detailed

Gloriously weatherproof and stunningly detailed

And just look at the wooden carved detail in the peak: our initials, and the year it went up 🙂

Vicky and Joe did this (well, commissioned it) in 2020, the Year of Weird

Vicky and Joe did this (well, commissioned it) in 2020, the Year of Weird

We’re thoroughly in love with the new end of our house. And even more in love with the fact that it’ll no longer rain indoors and blow a gale through the walls.

Thank you so much Ken and Phil, you’ve done an absolutely magnificent job.

Revenge of the Brambles

Wow. Joe has been busy in the garden today.

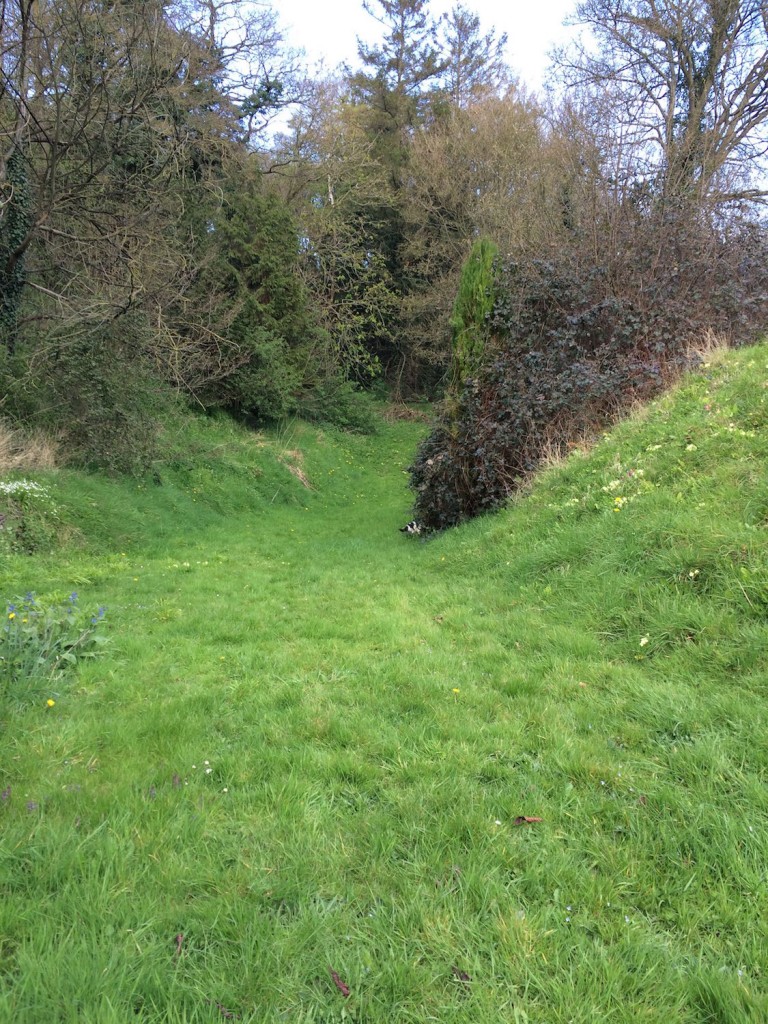
Remember the bramble motherload that was cascading down one side of the dingle? It is no more. And we’ve now got about an extra 10 feet of width in the dingle, loads of light, and a slightly-used very steep bank.

I seriously thought there might be a castle with a princess buried in there somewhere, but there wasn’t. Just lots and lots and lots of brambles.

Before:

Brambles and a grassy dell

Brambles, taking over everything

After Joe and his chainsaw onna stick:

Cleared dingle and chicken house

Space!

We have SO much more space now. It’s fab. We’re planning on smoothing out the bank a little, and sprinkling wildflower seeds all over it. Then planting daffodils, crocuses, snowdrops, primroses, and generally making it beautiful.

Or possibly terracing it, depending on how much work that is…

Anyway. Then we had loads of stuff, so obviously we made a big fire:

Save

Giant sycamore coppice and other heavy things

When we first looked at the house, way back in February, there were three large stumps in the middle of the lawn, each with a few poles growing out of them.  By September they had transformed into a veritable coppice topping out at well over ten meters high, and a good eight meters across.

It was somewhat alarming to realise how quickly it had grown, and we feared if we gave them another year we might not have a lawn at all.

At the very least, it needed reducing in size and showing who was boss.  Out came the trusty chainsaw, and we took it from this (okay so this was taken in summer, but you can see how ridiculous huge it was):

Sycamore before

to this:

Sycamore after

A mere skeleton of its former self. But it’ll bounce back.

We also took out most of a dead apple tree, and made a start on the world’s most giant GardenStump:

Stump

At some point during proceedings, the wheelbarrow committed seppuku. I don’t think it ever really recovered from drunken midnight railway sleeper maneuverings…

Progress though. Progress.

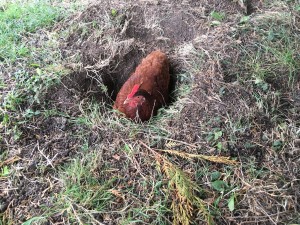
Oh, also – the chickens appear to be digging a tremendous hole in the garden…

Tremendous Chicken Hole

Save

Save

Attic walls

The rules with an old house seem to be: Gypsum is bad. Plasterboard is bad.  Modern vapourproof insulation is bad.  None of that celotex or kingspan stuff.   It all adds to moisture imperviousness, and these old houses need to breathe.  If you don’t let the moisture out, your timbers rot.

We needed to create walls and insulate the space up in the loft, so we bought a boatload of this stuff – woodfibre board.  It came on a pallet, it’s light, dusty, fits up the stairs into the loft, and was pretty easy to cut and fit.

After a few hours of working with it, I think we got pretty good at fanangling it into corners and around tricky wonky beams and whatnot.

from this...

from this…

boarded walls

to this..


We’re quite pleased with that.  The really annoying bit is that we ran out of those fancy plastic washers that stop the screwheads pulling through the material, leaving the job unfinished..  That bit on the left on the next image- it’ll have to wait for next weekend.

ran out of washers..

ran out of washers..

Once that’s finished, we get it lime plastered and that’s that. Nice warm breathable walls.  And no squirrels.

The Attic is a Squirrel-Free Zone

So, yesterday was a super-productive day here at The Dingle. First thing, we utterly failed to go to parkrun. In our defence, it was raining…

But we did go to Kent’s in Hereford because Ronnie the builder from the pub told us it was the place to go for soffits.

So off we went.

Having no idea about these things, I figured we’d probably be shelling out a couple of hundred quid and it’d be a bit of a ballache fitting the things, because of drilling holes and putting vents in and that.

But on arrival, the helpful young man pointed out soffits with vents already within them – and we got 15 metres of the stuff, cut up small enough to fit in our car, plus a box of pins to fix them.

They’re not going to be visible at all, so we didn’t have to worry about what they looked like. And they’re not really true soffits anyway, they’re simply there to ensure no critters get into the cavity behind the rafters and set up shop there.

After a sustaining meal of boiled eggs and soldiers and a cuppa, we dragged everything up into the attic and got started.

There was a hazelnut in the middle of the floor. Like some kind of dire warning from the squirrel posse that this was their territory. Not to be deterred, though, we pressed on. Keeping a weather eye out for terrorist squirrels…

First job: removing all the bricks loosely fixed to the top of the dwarf wall. The previous owner had put them up there to make it less draughty – here’s what they looked like before we removed them:

Under the eaves with bricks...

Under the eaves with bricks…

And without. This is the front of the house:

Draughty...

Draughty…

And the back of the house. As you can see, there is no soffit here. We got a good view of the chickens bockling around in the courtyard…

Looks like there is actually a soffit on the front of the house

Looks like there is actually a soffit on the front of the house

Fitting the soffits was actually really simple, and only took us a couple of hours. We got a system going: Joe would measure all the distances between the rafters. I’d saw the soffit into the right lengths. Joe would nail them onto the timber.

Here’s the result – front of the house:

Tidy.

Tidy.

And the back of the house. Much less draughty:

Dusty.

Dusty.

A job well done. Not authentic, perhaps… but we’re beginning to realise that if we do everything exactly as it “should” be done, we’ll need a bottomless pit of money. So we’re concentrating on doing the best for the house – making sure it can breathe, making it as authentic as possible – but not bankrupting ourselves or driving ourselves crazy in the process.

We do have to chip out all the concrete that’s in contact with the timbers, though, because it rots the wood. Not breathable, see.

So that’ll be a fun job over the next few weekends.

We’re pleased with our progress today. Tomorrow (Sunday) we’ll be starting to fit the breathable, eco-friendly, insulated plasterboard.

Jobs still to do before the floor goes down:

  • Fit the plasterboard
  • Decide on lighting and wiring
  • Decide on plumbing locations for the shower room
  • Chip out concrete adjacent to timbers
  • Plaster the ceiling and walls
  • Paint the gable end wall for a textured look – or do we lime plaster it? Yet to be decided
  • Probably a bunch of other stuff we’ll discover later on…

Perhaps the most difficult job today was cleaning up afterwards. Up until now, the attic had been strewn with rubble, piles of dust and sand, old nails and tacks, and tools scattered everywhere. Now, the tools are neatly packed away, all the crap is gone, and the place is swept and tidy. Still very dusty, but it’ll stay that way for weeks, I’m sure…

Nettles

So you spend a couple of hours pulling up nettles. You’re left with a massive pile of the things, all a bit too wet to burn. Hundreds of kilograms. look:

2016-06-12 19.42.16

That’s a five foot high pile of nettles.

Upon showing this picture to people I know on facebook “Make nettle wine” was a suggestion.

“Make nettle soup!” was another. Just how much nettle soup is it possible to want?

My favourite suggestion though, was “Make nettle pesto!”  Seriously? Is there anyone on the planet that has a large enough lunacy to want to store three hundred kilos of nettle pesto?  What the hell would you do with it all?  How much would the olive oil cost?

Please, dear reader, whoever you are – feel free to nip over to our place and take as many nettles as you may wish for.  If you don’t like the look of the ready-harvested ones, you can even go and pull up your own.  There’s plenty.

© 2024 Project Dingle

Theme by Anders NorénUp ↑