Restoring an old cottage...

Category: electrics

And Vix & Joe Said, “Let There Be Light!”

In the beginning was the wiring. And the wiring let us add light. In the attic.

And it looks magnificent!

Joe looking proud of our handiwork under three lights

Gorgeous innit? And the lighting isn’t bad either…

This is proper progress. We can walk upstairs to the attic, flick a switch, and turn lights on. Here’s how we did it…

We didn’t want to butcher the original oak ridge beam by planing a flat surface onto it, so we pondered our options. In the end, we bought round oak pattresses, drilled them so we could run wires through them, and fitted them to the sloping ceiling. We wired along the ridge beam using the lovely flex.

Wires along the ridge beam to a pattress

Wiring the lights

It looks fab; you can barely see the wires unless you look, then when you do look, they’re beautiful.

Once we had the pattresses up, we fitted the pendants and hung them centrally from the ridge beam using hooks from More Handles.

Steel hook with braided flex from pattress

A catchy little hook…

We added gorgeous aged copper shades from Bailey’s, and the attic lighting is done! We’ll have lots of table lamps and a fabulous floor lamp when we move up there. Watch this space…

Three beautiful pendant lamps

Three little beauties

Wiring Up The Attic Like A BOSS

Ancient houses bring interesting challenges, such as: how to deal with the wiring.

With a newer building, you just chase the wires into the wall and plaster over them, job done.

In an ancient structure, with exposed timbers and lath and plaster, and newer cork panels, and strong oak joists, it’s not that simple. You can’t wire through oak joists because they’re smaller than softwood ones, so there’s a risk of banging a nail into a live wire. Not a big risk, but the regs don’t like it.

And you don’t want to go chasing wires into walls when there are timbers in the way.

So what do you do?

You find the World’s Most Expensive Cable and the World’s Most Expensive Sockets and Switches, and you crack on.

Of Chalk And Saddle Clips

We started with chalk and marked out where we wanted the sockets, switches, and saddle clips for the cables. Don’t want any (more) expensive mistakes.
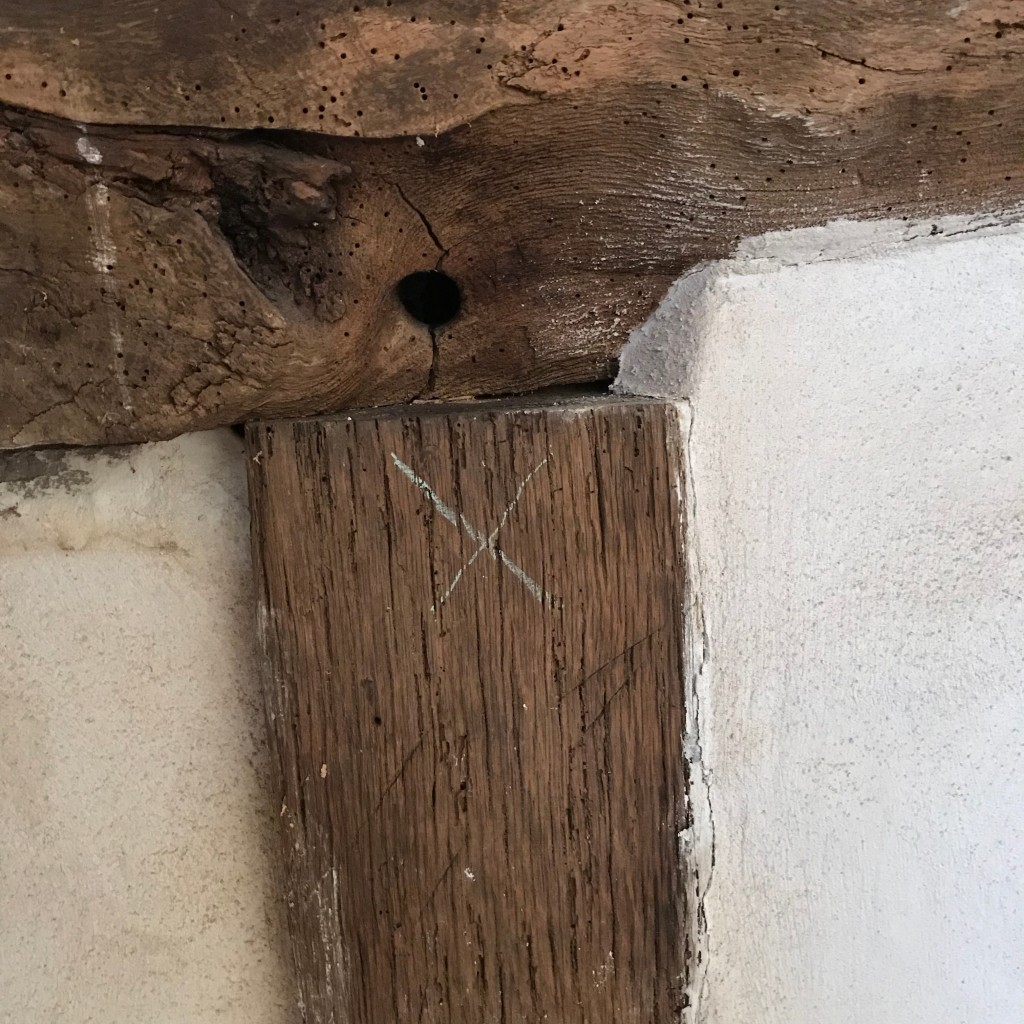
Chalk mark on timber

Deciding where to put sockets.

We didn’t put the sockets on the timber in the end, we put them on the plaster in the corner to the left of that X.

Chalk mark and saddle clip on timber

Marking saddle clip positions.

We made sure the saddle clips were spaced at regular distances (except when we had to wire around bends). This was exactly as fiddly and annoying as it looks like it was. I mangled many innocent tacks.

One Week Later

I now have a new respect for conservation sparkies.

I’ve never done anything so fiddly in my life. There was much swearing and gnashing of teeth – but we’re delighted with the results. Here’s what we did.

We took the 2.5 twin-and-earth wire (beautifully braided in old gold and a special order from the fabulous chaps at Flexform) from the junction box, into and out of four sockets, through the panel, and along the front of the mezzanine. When we’ve finished plastering, we’ll take pics. It’s actually pretty neat and tidy and it looks fab.

However, it was not as easy as it sounds: there are no straight lines in this house, so we followed the lines of the timber. It’s a work of art and it took hours.

Wiring and timbers

Wiry Art

You might be wondering why there’s a cheap-ass black plastic back-box on that there wall. Good question. Especially when you find out these beautiful bashed antiqued brass sockets go on top:

Antique brass sockets

Glorious sockets

We chose one with USB ports and three standard double sockets, all from Jim Lawrence. They’re beautiful but super expensive. With brass back-boxes too, we wouldn’t have been eating this month. The black ones are barely visible unless you know they’re there…

Which, of course, we do. So I’m going to replace them one by one, when Joe isn’t looking.

One of the sockets has turned out to have a faulty switch, but the woman at Jim Lawrence couldn’t have been more helpful. They’re sending a replacement next week. The others work perfectly.

When we turned on the ring main, with Joe working his way along the fusebox switch by switch, it was just like that scene out of Jurassic Park. Not even kidding.

Fuse box scene from Jurassic Park

Scenes from The Dingle earlier today.

Two Weeks Later

Mum and dad came over for the day and brought soup and an extra pair of hands.

Joe and Dad and I got cracking on the lighting circuit. We’re putting three pendant lamps in the attic bedroom and one pendant lamp in the double-height hallway above the stairs.

There will be two switches in the bedroom – one for the bedroom lights and one for the hallway light – and one switch on the first floor, for the hallway light.

Normal lighting wire for moving volts around is three-core (two plus earth) 0.75mm. Wire to the switches is four-core (three plus earth).

We tacked them up the oak doorway frame and into an oak pattress, then into gorgeous antique brass dolly switches thusly:

Braided cable on oak frame

Tidy.

Chalk marking the pattress position

Chalk marking the pattress position

Dolly switches

Dolly Parton switches (because they’re so pretty)

That earth tape is to mark which switch is which. The bottom switch – the one marked with the tape – works the attic bedroom lights. The top switch works the hallway light.

Or they will, when the lights arrive…

Always Be Learning…

The great thing about this is, I knew nothing about electrics before we started this. In fact, I feared the electrical world. Joe understands electrics, because he has his 17th Edition.

(Yes, we’ll need to get an electrician to certify everything when we’ve finished the house.)

I now understand how to wire a ring main, how to wire a lighting circuit, how to wire sockets and switches and lamps. In fact, I’ve done all these things in the last three weeks. That’s pretty damn cool.

Electrickery

There are a limited number of things I know about the chap who lived here before us.  He was well thought of by the village. People liked him, and enjoyed seeing him thrash his motability scooter at unprecedented speeds down the high street. As a younger man he’d run the local scout group, and there’s quite a few middle-aged chaps I’ve met in the pub who knew him when they were a child. These facts have been gleaned in the local pub. There’s only really one thing I know about him that comes from the house itself.

I know he had no fear of electricity.

I know this from the junction boxes, from the randomly placed pullswitches, from the wrist-thick bundle of cables that encircle the house at gutter level.

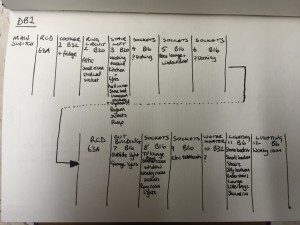
So, in an attempt to untangle the facts, we spent some time a few days ago finding out which MCB does what at the main consumer unit (which is halfway up the stairs)

So, here’s a rundown of what we found:

  • Main switch – nothing to report
  • RCD, 63 Amps. Somewhat unbelievably, this immensely complicated tangle is protected by a 30mA RCD.  I find this both reassuring, and amazing.
  • MCB1, Type B32.  Label: Cooker. Connected to.. the cooker. we’re off to a good start.
  • MCB2, Type B20. Label: Ring Circuit.  Here is where I’d expect all the wall sockets. Turns out it’s only the sockets in the attic, and one socket on the gable end bedroom.
  • MCB3, Type B20. Label: Stairlift. We don’t have a stairlift, so I was expecting this not to be connected to anything.  However, it runs the washing machine, the kitchen sockets and lights, one hall socket, the stone extension bedroom sockets and the immersion heater.
  • MCB4, Type B16. Label: Sockets. This one’s not connected to anything.
  • MCB5, Type B16. Label: Sockets. This supplies half of the sockets in the living room.
  • MCB6, Type B16. Label: Sockets. Nothing.  Nada.
  • Another RCD, 63Amps.
  • MCB7, Type B16. Label: Outbuilding. This supplies a bunch of external lights and the shed, which has it’s own consumer unit and more wiring than we can wrap our heads around.
  • MCB8, Type B16. Label: Sockets. This supplies a random smattering of sockets throughout the house, plus the lights in the stone extension ground floor.
  • MCB9, Type B20. Label: Sockets.  This powers the electric toothbrush.
  • MCB10, Type B32. Label: Water Heater. Not connected to a thing.
  • MCB11, Type B6. Label: Lighting. This supplied lighting to 70% of the house
  • MCB12, Type B6. Label: Lighting.  Lighting for one bedroom only.

Photo 25-04-2016, 19 39 29

So there you have it. I’m no expert, but should lighting and sockets be separate? Isn’t 20A a bit much for a toothbrush?

Looking at the cableruns, it looks like any time they wanted a new socket, light, or switch they simply looked for the nearest piece of wire, whether it be above or below, for lighting, sockets, ring or spur – and cut into it to splice a new bit in.

It’s not really salvageable.  The house will need a complete rewire. But it’s awesome fun!

We’d have loved to have met the previous owner. He seems like he was a real character – everyone has a good word to say about him. And he’s created this crazy, wonderful, quirky house – which looks insane, but everything works. I suspect he was something of an eccentric genius and I wish I’d known him.

© 2024 Project Dingle

Theme by Anders NorénUp ↑