Restoring an old cottage...

Category: Stone Room

We Made A Door!

This post is all about making oak doors.

But before we dive into that, we wanted to share the finished shower cubicle — because we finally grouted the tiling and silicone sealed all around and it looks flipping lush.

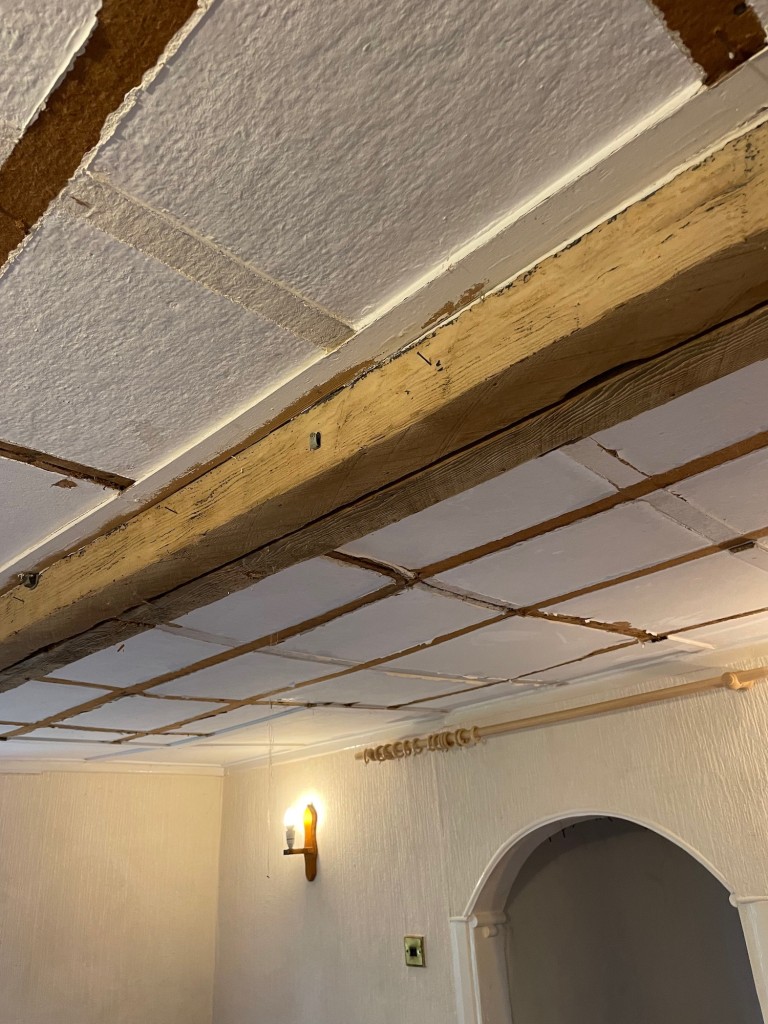
Oh — and Joe used leftover oak skirting boards to finish the ends of the stud walls, and they look beautiful too.

Ta da!

Okay, onto doors.

Now, the bathroom is along a tiny corridor because the fireplace and chimney take up a lot of space between the two parts of the house. We decided to put the door at the bathroom end, because there was already a doorway there.

A long time ago now, Ken built us a new doorframe and we asked him to keep it wonky, like everything else. With hindsight, this may not have been the most sensible request — although it does look charming.

We asked the guy who made our staircase and all our windows (and he’s making new front doors for us) for a quote for the bathroom door — just a simple oak plank door, nothing fancy, and the quote came back at £653 + VAT.

Ouch.

Not saying it wasn’t worth it — Kelvin does beautiful work — but it was much more than we wanted to pay for a single interior door, so we looked around at pre-made doors. None of them really looked up to the standard we wanted.

“Well, it’s a simple oak door,” we said. “How complicated can it be?”

Turns out, not complicated — but extremely fiddly. We can see why doors are expensive things because it’s not so much the making of them, but the fitting of them.

The process was really fun though and we’re super proud of ourselves. Here’s how we did it:

  1. Went to Ludlow Salvage and bought £200 of 25mm thick oak boards, and chopped them up so they were a little longer than we needed them to be.
  1. Bought some plastic clamps and borrowed a router from Joe’s mate who is a chippy and set everything up on the table in the garden.
  2. Cut the planks to roughly the correct height (at the highest corner — remember the wonky doorframe?) and thoroughly sanded and spokeshaved and chamfered the edges.
  3. We used the borrowed tool to create tongue and grooves the length of the planks, which was nerveracking but SO much fun, then whooped with delight as it all fitted together beautifully. We laid pennies along the tongue and groove gaps as an expansion gap, and clamped it all to the table.
  1. Cut the spare planks into three ledges to tie the door together and support. Some people recommend gluing it all together; we decided not to do that because it can explode with movement and that sounded like more drama than we fancied. So we went old school and screwed it all together.
  2. We drilled holes so we could sink the screws, then cut little cores from spare oak to fit into the holes and hide the screws. We stuck them in with wood glue, lined up the grain, then sanded them smooth. Looks pretty good!
  1. When the planks were fastened together and everything was sturdy, we took the door upstairs, stood it as close to the doorframe as possible, then drew around the doorframe onto the oak to create a template to get the shape as close as possible.
  1. Then came the endless and verrrrrry careful cutting, shaving, sanding, fitting, cutting, shaving, sanding, fitting, repeat ad nauseum. Finally got it into roughly the right shape and size.
  1. We treated it for woodworm (more on woodworm later) and then oiled it with Osmo and left it for a couple of weeks to go on holiday, perform on trapeze, and generally be busy.
  2. We bought some hinges from From The Anvil, who make gorgeous ironmongery, and a latch which Vicky hated so it’s going back and we’ll get a different one that meets her exating requirements. It was at this point we discovered the merits of vertical doorframes, because although the door fit perfectly, it wouldn’t open wide enough to let us in, because it was opening downhill and the bottom was getting stuck on the floor.
  1. Cue much swearing and faffing and pondering. In the end, we decided to chisel out a space in the doorframe and countersink the top hinge, and pack out the bottom hinge, thus making a vertical door in a wonky frame. We also took a couple more millimetres off the bottom corner of the door. It now fits perfectly. Behold!

We are so delighted with it — it looks AMAZING and we’re really proud of ourselves. We’ll definitely be making the rest of the internal doors ourselves, partly because we want to spend the money elsewhere, and partly because we really enjoyed the process.

There are few things quite as satisfying as making something useful with your own hands.

Mental health tip: go make something with your hands. Paint or write or draw or carve or make a table or a door or something. It’s magical.

The Most Overengineered Shower Cubicle Ever

It’s just hit me today that this bathroom is quite the undertaking. I mean, it’s not like we’re just ripping out an old bathroom and installing a new one. Maybe rerouting a few pipes. Bit of tiling.

Nope; we’re installing a full bathroom with shower wetroom area into a room that has never been a bathroom before and it is an epic project. So Imma stop moaning about how long it’s taking, and instead be impressed with us. Or roll my eyes at us. One of the two…

We are making a lot of mistakes. But that’s okay; we’re learning from them, and then making entirely new and exciting mistakes, and learning from those too. We’re realising that every single job we want to do requires us to have done three tasks previously, and each of those required pre-work too. It’s brain-melting.

And because we are not builders or plumbers or responsible adults, we’re freaking out about what we need to do, and massively overengineering everything. Remember our massive floor and ceiling joists that will probably outlast the heat death of the universe? Well, we may have gone slightly overboard with the stud walls too. I think Joe’s builder friend raised an eyebrow or two. But more on that in a moment.

We’ve essentially divided the bathroom into three parts:

  1. The main space, for the bath, sinks, massive houseplants, and an incredible utterly weird chair I’ve found in a local junk shop.
  2. The toilet cubby hole place.
  3. The shower cubicle.

We’ve built a stud wall divinding the shower and toilet areas, and then stud walled the back wall of the shower too, so we can put piping back there and build a niche into the wall. Then we straightened up the end wall that’s actually attached to the house with battens and marine ply.

Batten frame built out from wonky old wall, so we can create a tiled wall that is straight

Walls are juuuuuust a little wonky

You can see the amount of lean if you look at the bottom of the batten frame. This was our second attempt, by the way. The first time, we fixed the marine ply to it, then went away from the room for a few days. When we came back, we thought it looked a bit… off. It was. A spirit level showed us we weren’t even close to vertical, so it all had to come off. You might think we’re being super-fussy and we are, but we also know that if the walls aren’t vertical and square in the shower area, the tiling will look awful.

So we did it again, and got it cock on:

Spirit level showing the panel is now vertical

Ooh so satisfying

Then we built the stud wall that will form the end of the shower area and divide it from the toilet area. As you can see, it’s quite sturdy:

Overengineered stud wall dividing the bathroom

Studly stud wall

Then we did the same thing along the back wall, to create space for the pipework and to create a niche for bottles and soap and all the gubbins we use in a shower.

Joe pretends to shower in front of the new stud wall

Scrubbing up good

We’ve built a niche and also a backboard to fix the shower valves to. This may be one of our mistakes, but if it turns out to be, we rectify it in future… we’ve decided to have the shower on the stud wall to the left, the part projecting into the room.  But the shower valves will be on the back wall, so we can turn on the shower before getting into it—so we don’t get blasted with cold water.

However, there is going to be no way to remove the wall to get at the pipes should there be a leak—so we’re taking a bit of a risk here. We’ll obviously throughly pressure test everything but if we do have a leak, we’ll have to rip the wall apart to fix it. If that happens, we’ll relocate the valves and plumbing to the stud wall that protrudes, and install a removable panel so we can get at it. I dunno if we’re being foolish or not. Maybe future us will curse present us. Who knows!

Here’s the niches in progress:

3-sided batten box with marine ply backing to create niche

Niches. Where there are riches, apparently.

And that is all for now. Join us again to find out how we manoever a massively heavy shower tray into place without destroying it and us…

Odds, Ends, and an Actual Floor

We’ve not made much progress since Christmas, but we have done a few odds and ends.

Odd

We’ve been meaning to make a little shelter to sell our eggs from for ages, because otherwise people tend to wander into the garden and walk into Vicky’s office while she’s working.

So we used some left-over fibre roof tiles, some odds of batten, and a couple of chunks of joist, and created a snazzy little egghouse.

Random pieces of wood and a couple of roof tiles ready to make into an egg shelter

Bits and pieces

There’s enough room for an egg holder, some egg boxes, and a honesty jar.

Shelter with egg box and jar inside, and words on the top: Dingle eggs £1.20 for 6

Yum yum

£1.20 for half a dozen eggs, half the proceeds go to the British Hen Welfare Trust, which is where we go to rehome ex-battery chickens.

End

There’s been a gaping hole above the tunnel from the living room to the Rayburn Room for aaaaages.

We finally got around to building a frame and whacking some wood-wool panels up there ready for plastering—eventually.

The tunnel all panelled over with fairy lights

Tidy tunnel

The Rayburn has left the building…

We knew we wouldn’t be using the old oil-fired Rayburn anymore because we recently switched over to gas, rather than oil. It’s not worth converting it, so we’ll probably get an electric Aga when we do the new kitchen.

Joe advertised the Rayburn on Facebook, and a couple came to pick it up—and we got 150 beans for it. Winning!

Manoeuvering the Rayburn using rollers and muscles and hope

Pretty heavy. Rollers were useful.

Looking forward to turning the Rayburn Room into a library, and installing a woodburning stove in the fireplace.

Empty fireplace

All ready for plastering, beautifying, a new hearth stone, and a woodburner

Oh and a proper solid floor

And finally, having spent months wobbling around on bits of shaky plywood and OSB, and wondering if Joe would put his foot through the floor again, we decided to lay a proper subfloor.

We had a little help from Kenda and Mike to get started:

Joe on left and Mike on right, putting noggins into the floor

Men doing manly floor things

The rest of it looks like this only without the gaping holes:

Marine ply screwed to the joists, with insulation visible beneath

The beginnings of a solid floor

And now the whole floor is screwed down and solid, and you can jump up and down on it and everything.

Hurrah!

Walls on Top of Walls

The room that will become our bathroom is on the first floor of the Victorian stone portion of the house. The stone walls have been lime plastered in the past, patched with gypsum plaster, and then skimmed with gypsum, painted, wallpapered, painted again, and generally added to over the years.

As we’ve taken layers of wallpaper and paint off, we’ve had a bit of a conundrum: plaster has come off in places too, which is pretty common in old houses. Plus the tops of the walls, where they disappear into the ceiling, were a right mess.

Old walls with plaster crumbling

Messy messy walls

What to do?

Do we patch the holes and skim over?

Pull all the plaster off and start again from scratch, filling in all the big holes?

Or do we build a new set of walls inside the old walls, leaving the surfaces as-is, and have a more-or-less square room?

Vicky was in favour of pulling the whole lot off and starting again; Joe was in favour of building a framework inside the walls.

In the end, when faced with the magnitude—and dusty mess—of basically pulling down the walls, we decided to batten the walls and put up wood-wool panels ready to take lime plaster.

Battens going into the wall to hold the wood-wool panels

Battens going into the wall to hold the wood-wool panels

Our main concern was losing too much room area by effectively bringing in all the walls by a couple of inches each—but it’s a large room.

How We Did It

We bought a whole bunch of 38 x 18 mm battens from B&Q, and fastened them to the walls as a frame. We measured the frame so that the wood-wool panels from Ty-Mawr would fit neatly to them.

This was actually a monumental pain in the butt because it involved masonry drills and not really knowing whether or not any of our plans would actually work…

Writing on wall reads: Vicky + Joe made this bathroom Winter 2021. It was both fun and a right pain in the arse. S0 WHY HAVE U TAKEN OUR WALLS DOWN?

We really did have a right old time with this

We piloted through the battens to prevent them splitting, then used a masonry drill bit to put holes through the plaster and into the solid stone of the wall.

This proved super-irritating because quite often we’d miss a stone, or it would shift, or the gods of renovations would just be in a bad mood that day. It was a trying time.

Once the holes were drilled, though, we screwed the battens into the walls using 120mm concrete screws. That frame is solid as a very solid thing.

We were genuinely worried we were not going to be able to find anything to work on those walls, and that we would end up having to pull all the wall surfacing down and start again. Thankfully, though, the screws held and we were able to start fixing the wood-wool panels thusly:

Wall, battens, and the first wood-wool panel screwed into the bottom of the wall

First panel goes on

These lining panels are simply screwed into the battens using wood screws and big plastic washers to spread the load and prevent the screws being pulled through the panel. They’ll take lime plaster beautifully. The room already looks vastly different:

Room’s looking swish and ready for plastering

Room’s looking swish and ready for plastering

Looking much tidier

Looking much tidier

One of things we’re pleased with is the main window, which was a right mess. The window “ceiling” was pretty much open to the eaves and we were losing loads of heat, so we stuffed a bunch of insulation up there, then built a mini-frame with battens to hold the wood-wool. We had to make wedges because the window slopes backwards, and we needed to leave as much of the oak windowframe visible as possible to allow as much light in as we could:

IMG_6482

Then we fixed the wood-wool panels and now a multitude of horrors are hidden, the wind no longer whistles in, and it’s tidy tidy tidy:

Fully paneled window return

Look at that! Out of sight, out of mind…

We’re pretty chuffed with the result and we’re excited to see how the plastering goes.

The room still feels pretty large for a bathroom, it’s much warmer, much more soundproof, and it’s definitely going to be easier to work with.

We’re getting quotes for plastering to be done for us because we don’t fancy plastering the ceiling and dealing with the loft hatch. The plan is to have softly rounded plaster around the window frames, and oak windowsills, which we’ll need to install before any plastering is done.

Then we’ll be creating a waterproof shower cubicle by building a stud wall and lining it with specialist tiling wall panels and a ceiling panel that are all fully waterproof—then tiling it.

More on that next week…

Oh—and also!

Ken came along and built us a new doorframe:

A wonky old doorframe made from bits of crappy leftover wood scraps

Before: wonky and saggy

New oak doorframe

After: beautiful wonky oak doorframe

You may be wondering why we didn’t just straighten up the top of the doorframe. Which is a reasonable question.

You can see the stonework above the doorframe—there was no proper stone lintel, and we didn’t fancy taking out that structural stonework to make the doorway higher. And to level it below the stone would mean an extremely low doorway for Joe to limbo through. So wonky it remains. Much like the rest of the house.

Then we had a quote for an oak door from the guy who does our windows (who is amazing) and we laughed and laughed and decided a summer project for us would be to make our own oak door because how hard can it be?

Much Lofty Excitement!

We are pleased to announce that the resident bats now have a more luxurious living space than we do.

The space above the bathroom-to-be is now insulated, boarded, and housing our camping gear, some books, and a load of shoes.

I spent a dusty afternoon up in the rafters with Henry hoover and filled three hoover bags with bat poo, cobwebs, and dust. Let’s take a little look at the before:

Dusty dusty dusty

Dusty dusty dusty

And the after:

Dust and cobweb and bat poo free!

Dust and cobweb and bat poo free!

Tidy!

Once that dirty job was out of the way, I, Joe, and my dad Adrian filled the spaces between the ceiling joists with Thermafleece natural sheep wool insulation—150mm of it. If we were building a modern house we’d have to adhere to building regulations which state a minimum of 270mm insulation—and we may add a layer in the future, but for now we’re sticking with 150mm because a) immediate cashflow, b) the logistics of adding extra height to accommodate extra thickness would be a pain in the butt, and c) the benefit of extra insulation after 150mm is not significant.

Graph showing diminishing return from extra thickness of insulation

Graph from The Greenage

Check out this site (where I found this graph) for more information.

Thermafleece sheeps wool insulation laid between ceiling joists.

Thermafleece sheep’s wool insulation

Once the insulation was in, we boarded out the loft using Wickes’s structural OSB loft panels. I measured, Joe and my dad cut, and I laid them all and screwed them down.

Tidy stone wall, rafters, and freshly laid OSB loft boards

Floorboards down—and it’s transformed the look and feel of the space

The loft was kinda my little project.

We’ve left the screws a bit half-done because we’ll need to take up some boards to lay down wiring and fit lights into the ceiling. We also need to add a little extra boarding right up to the edges of the roof—although we may possibly board vertically where there’s little usable space. We’ll see.

An old IKEA shelving unit made its way up into the loft, too. We were going to get rid of it entirely as it was pretty ugly and took up too much space in the living room—then realised it’d be useful up in the loft to give us more tidy storage space. More shelving will go up there eventually so we can make good use of the space we have—storage space is pretty hard to come by in this cottage.

Camping gear stored in IKEA shelving unit in loft

Clean, dry, non-dusty space for our camping gear

Look what we moved from the Wonky Room:

A big pile of camping stuff and general crap

All this stuff went upstairs into the loft—hurrah!

To the loft:

Show boxes lined up in the loft under the low edge

Happy shoes

Finally we added a temporary battery-powered LED light; eventually we’ll get an LED strip to go along the ridge beam.

Ta da! We’ve significantly increased the size of our house, which feels pretty cool.

The Stone Room Floor of Death + Woe

That floor we opened the last post with? Yep, time to go. It’s been grim. Really really grim.

We started downstairs in the Rayburn Room and ripped all the weird fake panel bits off the ceiling:

Ceiling panels

Ceiling panels were kind of structural…

Stripped off the fake panelling

Stripped off the fake panelling

Then we put on masks and gloves, took a brave pill, and Went Upstairs.

And discovered such delights as this section of floor which isn’t really attached on one side at all hahahaHAHAHA such fun!

Gap between floor joists lovely

This floor is actually held up here with hope

And this exciting bundle of bare wires that go who knows where and are stuffed into a broken junction box under the floor with highly flammable wood and dust and crap WOO!

An exciting collection of wires going who knows where

Fun with wires!

And this floor joist which is two scraps of wood held together by one old nail which I put my foot on AND NEARLY DIED SUCH LARKS!

Secure floor

Secure floor

We perfected our balancing techniques (and when I say we I mean Joe because I got proper vertigo up there looking through the floor at the room below it’s NOT RIGHT) and pushed out all the MDF ceiling panels. Which, we truly believe, were partly structural. Which is also terrifying.

In the end, though, we dragged out everything and ended up with this magnificent, cathedral-like space:

Truly cathedral-esque

Truly cathedral-esque

And this exciting door into nothingness:

White wooden door with black iron hinges opening onto nothing

It’s like a haunted horror house

So, yep.  Next thing was to fit the wall plates, which you can see my dad working on in the pic above, and then the floor joists, which we pretty much fitted in the same way as we fitted the ceiling joists above. More on that later…

The Floor + Ceiling of Almost-Certain Death

When you think about a floor, what do you picture?

Boards, maybe a carpet or rug… and beneath it, strong sturdy wooden joists built to last forever (more or less) and carry multitudes of footsteps..

That’s what we picture.

What we don’t picture is THIS:

The underside of the bathroom floor, scraps of timber joined with bolts

Fun with floors!

Note the poorly joined random scraps of wood.

This part was fun too—see the actual gap where the joist fails to connect with the beam?

Bits and pieces of timber joined to fill gaps when the staircase was removed

This is where an old staircase used to be

This is actually cool though because from the shape of it and the retro-bodging, we’re pretty sure there was a staircase in this corner of the room. We know this end of the house—the stone portion—used to be the village shop, and we think it may have been two separate dwellings at one point. So it makes sense that it’d have its own staircase.

Honestly I don’t know how we didn’t fall through that floor in the four years we used it as a bedroom.

But no more! Because we’re finally turning the Stone Room into a bathroom and the Rayburn Room into a library. Hurrah!

Before we go on, though, let us say this: although we’ve uncovered some fairly horrifying electrics and alarming structural stuff, we’re having a great time. Not just because this is genuinely fascinating and fun and we’re learning lots, and it’s extremely satisfying creating a home with our own hands…

But also because we’re getting a real insight in the history of the house and the resourceful and innovative (and delightfully eccentric) people who’ve lived here.

It’s a story of people who wanted to reuse as much as possible. Who perhaps didn’t have a huge amount of money, so did what they could with what they had. And who were absolutely unafraid of electricity.

We’re so grateful that we get to peek into some of this history, and catch a glimpse of the personalities who’ve lived here over the centuries. What a privilege to be the caretaker of a place like this 🙂

So. Here’s what we’ve done over the past few weeks, since the bats moved out (actually they never moved in again we don’t think, but we still held off work until the start of September)…

Stone Room Ceiling Horrors

We started by pulling down the ceiling in the upstairs Stone Room. My dad came to help and got thoroughly covered in dust, bat poo, and general awfulness from a roof space filled with 150 years of living. Oh, and we all enjoyed the exciting wiring, which makes absolutely no sense at all.

My dad in a mask up a ladder sorting errant wiring

My dad shortly after I yelled at him and Joe because they weren’t wearing masks

That ceiling structure, too, was made of spiderwebs and hope, but at least it didn’t have to actually hold anything up.

It came down pretty easily, which is when we spotted this:

View up into the eaves of the rubble wall, with loosely packed terrifying rocks

The Giant Death Rock of Damocles: yes, it’s that massive one right in the middle

This boulder is so big that we couldn’t lift it out. So we were somewhat alarmed when we touched it and it moved. And not just a fraction, but in a menacing way that suggested it had had enough of sitting in the roof space and was ready to come down and start a fight.

You’ll notice it’s positioned perfectly above the doorway and it absolutely would have crashed through the brittle plastic ceiling panel (not kidding it was plastic), onto the unfortunate person’s head, and thence through the floor to the Rayburn Room below. And probably from there into the molten centre of the Earth.

The first thing we did was mix up some lime mortar and cement it back into place, along with a few of its smaller but no less rowdy siblings.

So we’re no longer afraid of giant death from above, which is a relief.

Next up: clear debris from the tops of the walls and find stones suitable for drilling into and affixing a ring beam.

We levelled this around the room so it’s very horizontal. We’re pretty smug about this which is amusing because it’s now the only horizontal thing in the house.

Joe and my dad drilled 16 mm holes into the stone walls, and we inserted threaded steel rods. We hung off them to make sure they were strong enough. I think you could probably hang a car off them.

Joe angle grinds the bolts to a more sensible length. Many sparks.

Pretty fireworks so I immediately stopped proceedings to put up a firewall…

We are extremely ingenious and use a snow shovel to protect the flammable stuff from sparks

Very sophisticated firewall to prevent sparks from starting a fire that’d kill us all

In fact, we’re fairly sure that if the rest of the house falls down, that ceiling structure we’ve built will remain standing.

Next up: some scribing, maths, a little bit of swearing and sweating, and we drilled some holes into the ring beam to correspond with the wall bolts—and held our breath as we finagled it into place.

The ring beam placed above the bolts so we could scribe the distances and drill holes that actually fit

Much careful measuring and drilling of holes…

It fits! Hurrah!

Bolts in, and it’s time to do the other side.

Joe and I repeated the process on the opposite side of the room, et voilà! We have a ring beam.

Ring beam fixed to the stone wall with great big bolts

Woo hoo! The holes all matched!


Next job: cutting the cross joists to length and fitting them to the ring beam with brackets. This was a fiddly job made more fun by working at height on a wobbly floor covered with pieces of chipboard that may or may not collapse at any moment.

We used little pieces of wood to make hangers so we didn’t have to hold massive pieces of wood over our heads, then wedged the joists in tightly, then screwed the brackets into place—and tightened up all the ring beam bolts which had loosened as we expanded the house.

Little piece of wood fixed to the large joist to position it

Making our job easier with spare bits of oak

We’re pretty pleased with the result. The ceiling is probably strong enough to hold a bathtub. It’s what you might call overengineered, but that’s cool. It’s not going anywhere.

Joe hangs by his hands from two of the new ceiling joists

Joe proves that we are fine workpeople

(Aside: this moment started a competition which has not yet ended. Joe did one pull up, so I did three. Then Joe did three. So I did four. And so on. We’ll continue this until one of us is dead.)

Joists all fitted and looking solid

The joists are in!

Look at how wonky that roof is! Love it.

Then we fitted a loft hatch, because of course we did. Here it is, floating in a ceilingless ceiling:

The loft hatch ladder hangs down, forlorn and alone, in a ceilingless room

Loft hatch to nowhere

The ladder is very long and as yet uncut. Joe looks on, gurning.

Think there might be more ladder than room here

At some point, of course, we’ll put up a proper ceiling and cut the ladder down to size. But for now, we’re happy with our overhead installation art.


Bats in the Not-a-Belfry

There’s a line in the Discworld book The Truth, by Terry Pratchett, that goes:

“A lie can run around the world before the truth has got its boots on.”

Case in point: if you have or suspect bats in your house, They say that it’ll cost you one meeeeeeeeellion dollar to do any works you had planned, if you’re allowed to at all.

Honestly, the number of people who have said to us, when we’ve mentioned bats or newts, “Ooh don’t say anything because otherwise you won’t be allowed to do any work or make any changes and you’ll get prosecuted etc. etc. etc.”

I always suspected that was batbullshit, and I was right. Plus, we are tree-huggers and we are happy to host bats and newts. Bats eat midges. Newts are awesome.

(There are fascinating psychological reasons why this kind of nonsense story perpetuates despite a screaming lack of any evidence, and if you’re interested — and you should be — check out the book Made to Stick by Chip and Dan Heath.)

Anyway, back to the batshit.

The next mini-project in the ongoing saga of The Dingle is the Stone Room on the first floor. It is to become the Most Magnificent Bathroom in the World.

There’s plenty to do in there, and you’ll be able to follow along as we go… but one of the first jobs was to pull down the ceiling and put a new one in.

Because the current ceiling is made of spiderwebs, cheese, cheap bolts, and hope.

When we had our new boiler fitted (blog post to follow about that shortly), we were finally able to drag the water tanks out of the loft space above the Stone Room and get rid of them. When we went up there to do that, we noticed what a shocking state the ceiling was in.

And we also noticed this:

A giant pile of poo

A giant pile of poo

Which is a giant pile of what we thought was bat poo. Certainly very small poos, and lots of it.

We did some googling, crumbled it between our fingers, and came to the conclusion that it was probably bat poo.

Plus, we know we have lots of bats flying around The Dingle of an evening, and although we’ve never paid that much attention to where they appear from and disappear to, old houses are perfect for bats.

So I called the Bat Conservation Trust for advice.

(Actually, I called a consultant I found on the internet, and we had a chat, and he recommended I contact the BCT because they do free checks and advice, whereas we’d be paying him. Good man. Thank you.)

Today, a volunteer and a trainee volunteer from the BCT arrived and had a look around. In ordinary times, they’d have come in and poked around themselves, but COVID has scuppered that kind of thing, so we got modern and used technology.

They asked for samples of the poo, and we FaceTimed around the loft space.

Up I went in my overalls to stagger around on the ceiling (did I mention it’s made of cheese and spiderwebs and isn’t fit to support anyone let alone a person?) and gather little pots of poo.

The poo from the main pile was definitely bat poo. They’ve taken it away to see if they can identify what species we have. And the poo from the other end was bird poo and mouse poo. Which is good news for us if the bats are only at one end of the roof space.

We’re quite keen to get this sorted because there’s water ingress when it rains on the interior wall, where the flashing has come away from the roof-wall interface. You can see the water damage here:

Not really dry…

Not really dry…

Ken our timber guy reckons it’ll be fine with a bit of reinforcing which is grand because we DO NOT want to replace the purlin and do major roof works. Plus that will require all sorts of licences for the bats.

And at the other end, there are large holes between the wall and the roof, and some of the fascias are rotting so we’ll need to replace/repair and cover those, and we need to know what we can do.

Daylight where daylight should not be

Daylight where daylight should not be

The volunteers are going to write up their report over the next day or so, and put it through to Natural England as an urgent job for us.

We expect to hear back in 2—4 weeks, and he said it’ll probably be more like 2 weeks.

They could not have been more helpful. Their main aim is twofold: to protect the bats AND to enable us to get on with the work we want to do as quickly and inexpensively as possible.

They’re well aware of the nonsense people believe: that conservationists deliberately make it difficult for people to do work.

Of course they don’t. It’s not in their interests. Because when they make it difficult for people, people don’t declare bats and do all sorts of stuff that harms the bats.

Bats are great: they don’t cause damage, most of the time we don’t even know they’re there, and they eat tons of insects. A common pipistrelle bat can eat 3,000 midges and mozzies and flies in a single night!

And it’s really easy and inexpensive to provide for them.

The only issue really is timing: they build maternity roosts from around May until the end of August, so we won’t be allowed to do any work that could affect access between those dates.

That won’t be a problem for us, we’ve timed it well. We’ll be able to build the new ceiling and block the loft space off, leaving the bats in peace until the end of summer. Then we can go back up and do any further work we need to do.

Probably what we’ll have to do is partition off a portion of the loft space for the bats, and then put a droppings tray on the boarded out floor so we can remove droppings once a year. (Which is cool because bat droppings are fantastic fertiliser for my vegetable beds.)

We’re fine with that. It’ll cost us a few quid and we can do the work ourselves, and we’ll be helping the bats, which makes everyone happy.

So, if you suspect bats in your house, and you’re worried about it scuppering your plans to renovate or repair: don’t be.

Ignore people who like spread rumours without having facts, and give the Bat Conservation Trust a call. Their volunteers are super-friendly and helpful, and will work with you to do the best for you and the bats.

Thank you BCT!

Hammer House of Horror: The Bathroom Saga

Picture the scene: wind howls through the gaps in the stone.

Cobwebs like ropes caress the face like grimy ribbons.

And underfoot, there is a 1-inch carpet of mouse and bird poo… plus a dead sparrow.

Nope, we are not in a Hammer house of horror. We are in the space above what is to become our bathroom.

Look at the horrors!

But it’s all FANTASTIC news because we can finally crack on with said bathroom after 5 years of no proper heating and a tiny grimy shower room. Hurrah!

Ripping Stuff Out

Here’s what the Stone Room looked like just a few short days ago:

Joe stands in orange overalls dismantling the old immersion heater cupboard

Goodbye horrible old cupboard and immersion heater!

And look at this amazing 80s wallpaper 😀

Orange, brown, and yellow patterned wallpaper

Incredible 80s wallpaper

Last Monday, plumbers came and disconnected our hot water. They took the water tanks out of the loft space, emptied and removed the immersion heater, and left us to it for the better part of a week.

We had some sponge baths with boiled water from the kettle, and I washed my hair with water so cold it gave my entire head cramp. (Try it: it induces brain freeze the likes of which you have never experienced.)

Then the chaps came back and fitted our very first condensing boiler. Ta da!

The new boiler all plumbed into the corner of the room

Ooh fancy! Hot water AND heating…

We now have hot water on demand and A WORKING RADIATOR! The Rayburn Room is warm again!!!

(Side note: the Rayburn Room hasn’t had a working Rayburn for a year and is to become the library, that radiator is temporary because I want cast-iron ones, and there’s still a ton of plumbing to do.)

The plan is to eventually move the boiler downstairs into the utility room, but we won’t be able to build the kitchen and utility room for a couple of years yet. So for now, we’re building an airing cupboard around the boiler and plastering up to the board it’s fitted to.

And now all the gubbins is out of the Stone Room, it means we can start the long and disgusting process of turning it into a bathroom.

Things we have discovered so far:

  • The Stone Room floor joists are 3 inches deep by 2 inches wide, with notches for plumbing pipes. For those not in the know, that is Not Big Enough to support a floor. It’s amazing we haven’t plummeted through it.
  • Creative plumbing decisions.
  • Absolutely freaking terrifying ceiling joists that gave me the horrors climbing up there.
  • Horrifying wiring: bare wires nestled warmly into the fibreglass insulation.
  • A dead sparrow 🙁
  • A LOT of mouse/bird/squirrel poo. Like, piles and piles of it.
  • Birds’ nests.
  • The world’s most epic cobwebs, but no spiders, oddly enough.
  • Water running down the stone wall, which was nice.
  • Plenty gaps in the roof: much fresh air, which was nice I suppose.
  • Ceiling panels made out of cardboard. Also panels made out of that plastic we used to cut up in CDT classes at school.
  • Roof braces held on with old hinges.

Cobwebs and a pile of mouse/squirrel/bird poo on the stone wall

Lots of cobwebs, a nest, & a big pile of poo

Horrifying wiring junction buried in insulation

Honestly I’m amazed we haven’t had a fire

Water trickling down the inside wall above the ceiling

The leaky roof. Which is nice.

(Side note: fibreglass insulation is evil stuff and I am SO BLOODY ITCHY RIGHT NOW. And yes, I was wearing gloves and mask and eye protection and overalls and a hat and PPE up the wazoo and IT GETS EVERYWHERE. There’s a special place in hell for the person who invented fibreglass fuzz.)

Because I weigh less than Joe, I was duly shoved up through the hatch with a clamp lamp and a plastic bag. I set about rolling up the insulation and passing the tidy bits down to Joe, who bagged them. I bagged the scraps and bits and pieces up in the loft to prevent too much crap raining down on Joe.

Vicky’s feet dangle out of the loft hatch

Making my way into the unknown

We filled six huge bin bags, which Joe later hauled to the tip.

Black bin bags full of old insulation

All this came out of the loft space

I also removed several dustpans full of poo.

And lots of bits of paper, plastic bottles and canisters, scraps of insulation, tarry stuff that was coming away from the rafters, and pieces of MDF that were lying around looking like things to put weight on, but which were NOT for that at all.

Once we got rid of as much of the insulation and general rubbish as possible without falling through the ceiling, we started ripping the ceiling panels off and creating a big, big hole.

View from under the ceiling, through the holes, to Joe doing some wiring

Joe makes some wiring less scary

Oh, and unwiring some wires that didn’t seem to do anything anymore.

It’s been quite a day…

But at the end of it, we got to have an EPIC shower powered by our new boiler, with frankly quite alarming pressure, and so it wasn’t all bad.

Next in the Stone Room: continue removing the ceiling, sweep and hoover and make as tidy as possible, repair the leaky roof and the holes under the eaves, and hurl some lime plaster at the rough loose stone to make it a bit tidier and sturdier.

After that, we’ll pull all the old plaster off the walls and put in new oak windows (which we’ve just ordered), then take the floor up.

After that, we’ll replace the ceiling and the floor — at which point we can start actually creating a bathroom! And deciding whether or not to have underfloor heating…

UPDATE

Having done some searching of images on the Google, we now have a suspicion of bats. So we have a local batman on his way to do a preliminary survey. All work in the roof space has stopped for now, and the next thing we’re going to do is focus on the walls below the ceiling line and replacing the Stone Room floor, and stripping out the Rayburn Room.

Then we shall wait and see what the batman says and do what needs to be done.

Strip Some Wallpaper, She Said

As several years’ worth of rain has fallen in the past week, we decided against knocking a hole in the front of the house today.

(Of course, it’s been sunny all day so we could have done the wall panel in the end.)

Instead, we fired up the wallpaper steam stripper, opened the windows in the Stone Room, and got stripping.

A Little Background

The Stone Room is the Victorian addition to the house. It’s a square, solid stone, two-storey structure stuck onto the left-hand side of the original house. It’s offset slightly too – it protrudes about four feet to the front of the house, presumably because of the shape of the banks behind the house. But who knows.

There used to be a window in the front until the 1950s (we think), then the previous owner filled it in. We haven’t decided whether or not to reinstate it yet, but we’ll definitely be rebuilding the in-fill because it looks a mess from the outside and we’d rather it blends in.

The Stone Room was our bedroom until a month or so ago, when we moved up into The Beautiful Attic. It’s going to become our huge, decadent bathroom.

There’s a small-ish window in the back, looking up the garden, and a tiny window in the side.

Small windows

We’re going to make the window on the left bigger

We have plans to make the back window much bigger and take it down to the floor so Vicky can lie in the bath and look up the garden.

Saturday Stripping

Before any of that happens, though, we need to strip the room back to its bones. We’ll need to replace the floor so it can take the weight of a bathtub (and, you know, people) and we’ll need to replace the ceiling because it’s a bit of a horror show.

Also, the roof leaks and the roof space is dark and full of terrors.

Awful mess

The Stone Room roof space is dark and full of terrors

We also wanted to investigate the impression on the far wall – you can see where there was once a fireplace. We’re not holding out much hope, but you never know… We’ll probably put one back when we start making the room beautiful.

Before beauty, though, comes The Great Horror.

We stripped all the structural anaglypta wallpaper off…

Stripper Joe

Stripper Joe

And we found some cool remnants of old pretty wallpaper:

Archaeological wallpaper

Archaeological wallpaper

That Escalated Fast…

And knocked some bloody great holes in the wall. Which was exciting.

Turns out there’s just random bricks shoved into the old fireplace, and we can still see the firebox and firebrick. Nothing pretty though.

A lot of plaster came off with the wallpaper, so we thought, “Sod it, let’s see what the stone walls are like.”

Turns out, the interior stone wall is in pretty good shape. It’ll need repointing and whatnot, but we may make it a feature stone wall and limewash it.

Big mess

Feature wall, yes?

The rest of the walls, we’ll repoint then insulate with cork boards (probably) and lime plaster. We may put some wood panelling up. No idea yet. Watch this space!

Creatures On The Ceiling

One thing we will miss about sleeping in that room is our Ceiling Creature Companions. When we had the timbers sandblasted, it created some interesting shapes on the plasterboard. Like this velociraptor:

The velociraptor

The velociraptor

And this kingfisher:

The Kingfisher

The Kingfisher

Anyway – having made a mahoosive mess, we’re done for the day. Tomorrow will be more of the same if the weather is wet, or we’ll knock a great big hole in the front of the house again.

© 2024 Project Dingle

Theme by Anders NorénUp ↑