Restoring an old cottage...

Tag: renovation (Page 2 of 2)

The Floor + Ceiling of Almost-Certain Death

When you think about a floor, what do you picture?

Boards, maybe a carpet or rug… and beneath it, strong sturdy wooden joists built to last forever (more or less) and carry multitudes of footsteps..

That’s what we picture.

What we don’t picture is THIS:

The underside of the bathroom floor, scraps of timber joined with bolts

Fun with floors!

Note the poorly joined random scraps of wood.

This part was fun too—see the actual gap where the joist fails to connect with the beam?

Bits and pieces of timber joined to fill gaps when the staircase was removed

This is where an old staircase used to be

This is actually cool though because from the shape of it and the retro-bodging, we’re pretty sure there was a staircase in this corner of the room. We know this end of the house—the stone portion—used to be the village shop, and we think it may have been two separate dwellings at one point. So it makes sense that it’d have its own staircase.

Honestly I don’t know how we didn’t fall through that floor in the four years we used it as a bedroom.

But no more! Because we’re finally turning the Stone Room into a bathroom and the Rayburn Room into a library. Hurrah!

Before we go on, though, let us say this: although we’ve uncovered some fairly horrifying electrics and alarming structural stuff, we’re having a great time. Not just because this is genuinely fascinating and fun and we’re learning lots, and it’s extremely satisfying creating a home with our own hands…

But also because we’re getting a real insight in the history of the house and the resourceful and innovative (and delightfully eccentric) people who’ve lived here.

It’s a story of people who wanted to reuse as much as possible. Who perhaps didn’t have a huge amount of money, so did what they could with what they had. And who were absolutely unafraid of electricity.

We’re so grateful that we get to peek into some of this history, and catch a glimpse of the personalities who’ve lived here over the centuries. What a privilege to be the caretaker of a place like this 🙂

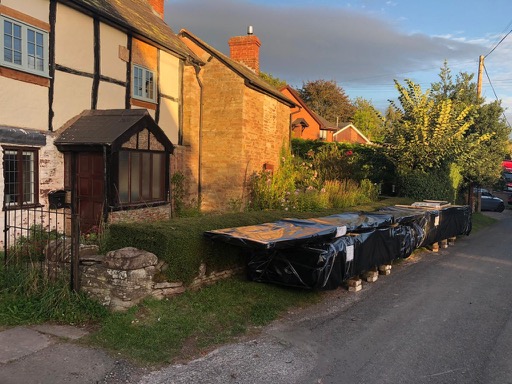
So. Here’s what we’ve done over the past few weeks, since the bats moved out (actually they never moved in again we don’t think, but we still held off work until the start of September)…

Stone Room Ceiling Horrors

We started by pulling down the ceiling in the upstairs Stone Room. My dad came to help and got thoroughly covered in dust, bat poo, and general awfulness from a roof space filled with 150 years of living. Oh, and we all enjoyed the exciting wiring, which makes absolutely no sense at all.

My dad in a mask up a ladder sorting errant wiring

My dad shortly after I yelled at him and Joe because they weren’t wearing masks

That ceiling structure, too, was made of spiderwebs and hope, but at least it didn’t have to actually hold anything up.

It came down pretty easily, which is when we spotted this:

View up into the eaves of the rubble wall, with loosely packed terrifying rocks

The Giant Death Rock of Damocles: yes, it’s that massive one right in the middle

This boulder is so big that we couldn’t lift it out. So we were somewhat alarmed when we touched it and it moved. And not just a fraction, but in a menacing way that suggested it had had enough of sitting in the roof space and was ready to come down and start a fight.

You’ll notice it’s positioned perfectly above the doorway and it absolutely would have crashed through the brittle plastic ceiling panel (not kidding it was plastic), onto the unfortunate person’s head, and thence through the floor to the Rayburn Room below. And probably from there into the molten centre of the Earth.

The first thing we did was mix up some lime mortar and cement it back into place, along with a few of its smaller but no less rowdy siblings.

So we’re no longer afraid of giant death from above, which is a relief.

Next up: clear debris from the tops of the walls and find stones suitable for drilling into and affixing a ring beam.

We levelled this around the room so it’s very horizontal. We’re pretty smug about this which is amusing because it’s now the only horizontal thing in the house.

Joe and my dad drilled 16 mm holes into the stone walls, and we inserted threaded steel rods. We hung off them to make sure they were strong enough. I think you could probably hang a car off them.

Joe angle grinds the bolts to a more sensible length. Many sparks.

Pretty fireworks so I immediately stopped proceedings to put up a firewall…

We are extremely ingenious and use a snow shovel to protect the flammable stuff from sparks

Very sophisticated firewall to prevent sparks from starting a fire that’d kill us all

In fact, we’re fairly sure that if the rest of the house falls down, that ceiling structure we’ve built will remain standing.

Next up: some scribing, maths, a little bit of swearing and sweating, and we drilled some holes into the ring beam to correspond with the wall bolts—and held our breath as we finagled it into place.

The ring beam placed above the bolts so we could scribe the distances and drill holes that actually fit

Much careful measuring and drilling of holes…

It fits! Hurrah!

Bolts in, and it’s time to do the other side.

Joe and I repeated the process on the opposite side of the room, et voilà! We have a ring beam.

Ring beam fixed to the stone wall with great big bolts

Woo hoo! The holes all matched!


Next job: cutting the cross joists to length and fitting them to the ring beam with brackets. This was a fiddly job made more fun by working at height on a wobbly floor covered with pieces of chipboard that may or may not collapse at any moment.

We used little pieces of wood to make hangers so we didn’t have to hold massive pieces of wood over our heads, then wedged the joists in tightly, then screwed the brackets into place—and tightened up all the ring beam bolts which had loosened as we expanded the house.

Little piece of wood fixed to the large joist to position it

Making our job easier with spare bits of oak

We’re pretty pleased with the result. The ceiling is probably strong enough to hold a bathtub. It’s what you might call overengineered, but that’s cool. It’s not going anywhere.

Joe hangs by his hands from two of the new ceiling joists

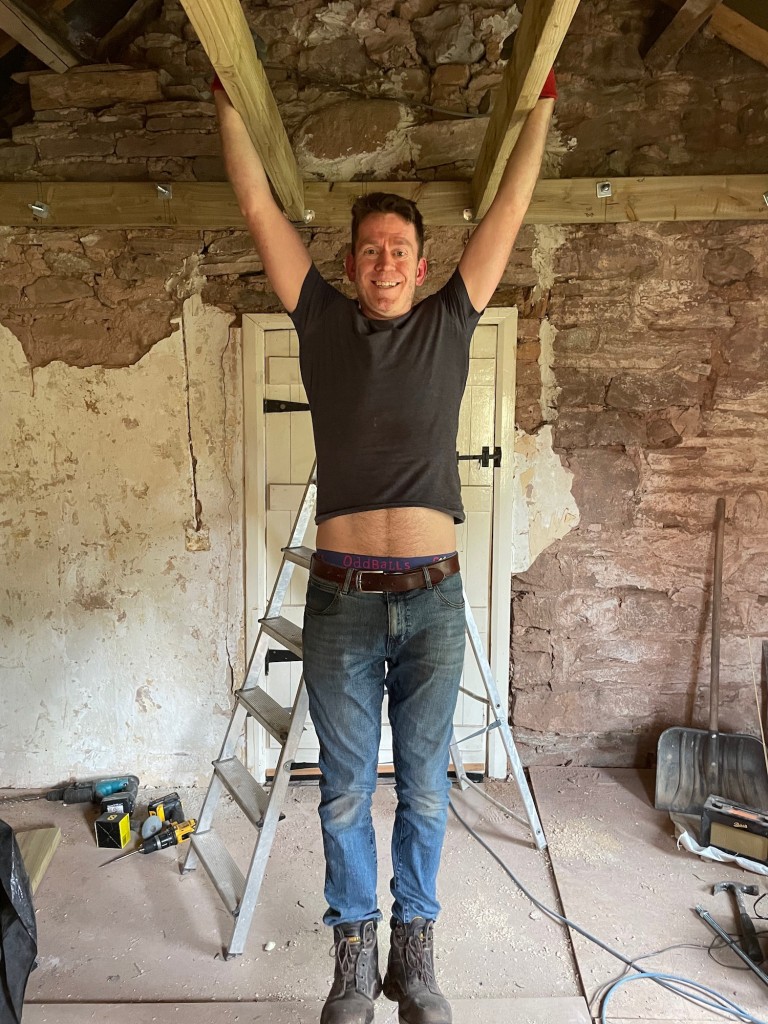
Joe proves that we are fine workpeople

(Aside: this moment started a competition which has not yet ended. Joe did one pull up, so I did three. Then Joe did three. So I did four. And so on. We’ll continue this until one of us is dead.)

Joists all fitted and looking solid

The joists are in!

Look at how wonky that roof is! Love it.

Then we fitted a loft hatch, because of course we did. Here it is, floating in a ceilingless ceiling:

The loft hatch ladder hangs down, forlorn and alone, in a ceilingless room

Loft hatch to nowhere

The ladder is very long and as yet uncut. Joe looks on, gurning.

Think there might be more ladder than room here

At some point, of course, we’ll put up a proper ceiling and cut the ladder down to size. But for now, we’re happy with our overhead installation art.


A Patio, a Bathtub, + the Biggest Table in the World

We’ve got so much space outside, you’d think we spent all our time out there, right?

Wrong.

And we were feeling guilty about it. All this beautiful garden and woodland, and we spent a lot of time hiding in the house. Partly because it needs a lot of work and it’s overwhelming, and partly because the area nearest the house looked like this…

A weedy miserable space filled with crap

A desolate, trash-panda wasteland

Not the most inviting place to spend time, right? So we got to work.

My mum and dad had just decided to remodel their garden, so they had a whole heap of perfectly good paving slabs, which they very kindly gifted to us.

Then they came over and helped us lay it.

We bought 3 tonnes of sand (only used 2 in the end) and made a lazy person’s patio.

1. Clear all the crap away + level-ish the ground

Joe and dad dumping sand onto the ground to level it

Sand. Lots and lots of sand.

2. Make straight lines + lay slabs

This was super fiddly and required lots of lifting and shifting and swearing and jiggling to get it all more-or-less level.

Joe and dad use timber for a straight edge

Technical stuff

3. Chucking the slabs down

Eventually we moved to a “that’s near enough” model for laying all the slabs because it was about 252 degrees C that day. And you know what? It was near enough. Look:

Part of the patio, nearly finished

Not too shabby

We’ve got a few bits and pieces left to do, like edging the patio so the sand doesn’t all wash away, and finding some fine sand to fill the gaps, but it’s pretty much done for now.

Whiskey the little grey cat rolls around waving her legs in the air like she just don’t care

Patio has the Whiskey seal of approval

Eventually, when we have a beautiful kitchen with big doors that open onto the patio, we’ll have a stone floor that carries from the inside to the outside. But for now, we love our new patio. Thanks mum and dad 🙂

Building a Giant Table

Of course, once we had a patio, we needed somewhere nice to sit.

Our friends did a magnificent job of turning spare waney edge oak boards into a long table using stuff we had lying around, but that wasn’t really ideal.

2 slabs + some bricks to make a table leg

Impressive improv from creative buddies

Spare oak boards balanced precariously on slabs and other building gubbins

Kinda resembles a long medieval table right?

So we bought some painters boards and scaff planks, bought some hairpin legs, and borrowed a belt sander from some neighbours—and made the world’s most giant and magnificent patio table. It’s a bit tall, but hey ho.

After a coat of Danish oil, it looks stunning:

Finished table using scaff planks + hairpin legs

What a beautiful giant table!

Just to clarify, this is how big it is. Joe for scale:

Joe lies on the table and looks small

It’s larger than an entire man

We’ve still to make the benches, so watch this space…

Things to Do with Old Bathtubs

And as for the old bathtub that’d been gathering water and rubbish for four years, we upcycled that into a fabulous planter.

A bathtub, a bucket of soapy water

Prepping using eco washing up liquid

We painted the outside in Little Green primer and exterior paint in Giallo (a glorious rich yellow) and built a tiny dry-stone wall around the bottom to hide the feet and the gap.

Yellow painted bathtub surrounded by stones, containing cucumber + aubergine plants

Growing our own food in a giant plant pot

It’s now home to the most splendid cucumber plants and a couple of aubergines.

And the raised flowerbeds around the courtyard are looking stunning too:

Lupins + valerian

Lupins + valerian

Noodle the cat hiding behind lupins + blue things

Noodle surveying his flowerbeds

Future plans: to build a pergola and grow jasmine and honeysuckle over it, to provide a little shade.

We’re really pleased with it, and it’s a lovely place to sit out and have lunch or dinner now.

Surprise Windows

You wouldn’t think a person would forget they’d ordered—and paid the deposit for—very expensive oak windows, would you?

Well, we did.

Back at the end of June, I got a text message to say:

“I’ll be delivering your windows tomorrow afternoon—will you be in?”

“Um—what windows?” said we.

A little searching of memories and emails revealed the bathroom window order. And lo! the bathroom was on track again.

Side note: our deadline for having the new bathroom done is Christmas 2021. At which point I shall climb into a hot bath and stay there until spring.

So… yeah.

The Stone Room—soon to be the Grand Bathroom—now has beautiful new windows that actually close. And open.

It doesn’t have a ceiling, floor, or respectable walls, but who needs those things anyway?

Here’s what the windows looked like before. They were cheap, ugly, and single-glazed. The little one on the side of the house was so rotted it wouldn’t even close anymore, so this winter should be considerably less draughty…

View of old single-glazed window with platform on roof below

This is the old window facing the back garden

The side window in the stone wall

Side window was so rotted it wouldn’t close

3/4 view of exterior walls showing old windows

The old windows looking shabby

And from the inside, they didn’t let in much light, making a large room rather dingy and misery-bear:

View of the original window from inside the Stone Room

This tiny window didn’t let in much light

As you can see, we decided to enlarge the window opening as much as we could, bearing in mind the roofline below this window. It’s made a big difference.

Enlarged window opening complete with rubble on roof

A great big ‘ole

Here’s the rather alarming state of affairs we found when we pulled the old windows out and revealed the frameworks:

Blank window opening with wall held up by wood brace

Exciting times!

We discovered, on removing the old window, that the rotten old frame was structural. Standard! So Ken and Phil sourced a new lintel for us and fitted it, thus removing the risk of the entire wall collapsing on us in the bath. Hurrah!

And here are the new windows, looking rather gorgeous… and letting in much more light!

View of the new windows from the inside, letting in much more light

More light!

And the little side window is much more sturdy now:

Small window with new lintel above

Looking much sturdier

We still can’t do much in the bathroom because of the bats, but in August we are going to crack on with removing the floor and putting new extra-strength joists in, so it’ll support a bathtub.

Then in September, we can put in a new ceiling, make sure the bats are happy, and crack on with a proper bathroom.

EXCITING EXCITING EXCITING!

Hammer House of Horror: The Bathroom Saga

Picture the scene: wind howls through the gaps in the stone.

Cobwebs like ropes caress the face like grimy ribbons.

And underfoot, there is a 1-inch carpet of mouse and bird poo… plus a dead sparrow.

Nope, we are not in a Hammer house of horror. We are in the space above what is to become our bathroom.

Look at the horrors!

But it’s all FANTASTIC news because we can finally crack on with said bathroom after 5 years of no proper heating and a tiny grimy shower room. Hurrah!

Ripping Stuff Out

Here’s what the Stone Room looked like just a few short days ago:

Joe stands in orange overalls dismantling the old immersion heater cupboard

Goodbye horrible old cupboard and immersion heater!

And look at this amazing 80s wallpaper 😀

Orange, brown, and yellow patterned wallpaper

Incredible 80s wallpaper

Last Monday, plumbers came and disconnected our hot water. They took the water tanks out of the loft space, emptied and removed the immersion heater, and left us to it for the better part of a week.

We had some sponge baths with boiled water from the kettle, and I washed my hair with water so cold it gave my entire head cramp. (Try it: it induces brain freeze the likes of which you have never experienced.)

Then the chaps came back and fitted our very first condensing boiler. Ta da!

The new boiler all plumbed into the corner of the room

Ooh fancy! Hot water AND heating…

We now have hot water on demand and A WORKING RADIATOR! The Rayburn Room is warm again!!!

(Side note: the Rayburn Room hasn’t had a working Rayburn for a year and is to become the library, that radiator is temporary because I want cast-iron ones, and there’s still a ton of plumbing to do.)

The plan is to eventually move the boiler downstairs into the utility room, but we won’t be able to build the kitchen and utility room for a couple of years yet. So for now, we’re building an airing cupboard around the boiler and plastering up to the board it’s fitted to.

And now all the gubbins is out of the Stone Room, it means we can start the long and disgusting process of turning it into a bathroom.

Things we have discovered so far:

  • The Stone Room floor joists are 3 inches deep by 2 inches wide, with notches for plumbing pipes. For those not in the know, that is Not Big Enough to support a floor. It’s amazing we haven’t plummeted through it.
  • Creative plumbing decisions.
  • Absolutely freaking terrifying ceiling joists that gave me the horrors climbing up there.
  • Horrifying wiring: bare wires nestled warmly into the fibreglass insulation.
  • A dead sparrow 🙁
  • A LOT of mouse/bird/squirrel poo. Like, piles and piles of it.
  • Birds’ nests.
  • The world’s most epic cobwebs, but no spiders, oddly enough.
  • Water running down the stone wall, which was nice.
  • Plenty gaps in the roof: much fresh air, which was nice I suppose.
  • Ceiling panels made out of cardboard. Also panels made out of that plastic we used to cut up in CDT classes at school.
  • Roof braces held on with old hinges.
Cobwebs and a pile of mouse/squirrel/bird poo on the stone wall

Lots of cobwebs, a nest, & a big pile of poo

Horrifying wiring junction buried in insulation

Honestly I’m amazed we haven’t had a fire

Water trickling down the inside wall above the ceiling

The leaky roof. Which is nice.

(Side note: fibreglass insulation is evil stuff and I am SO BLOODY ITCHY RIGHT NOW. And yes, I was wearing gloves and mask and eye protection and overalls and a hat and PPE up the wazoo and IT GETS EVERYWHERE. There’s a special place in hell for the person who invented fibreglass fuzz.)

Because I weigh less than Joe, I was duly shoved up through the hatch with a clamp lamp and a plastic bag. I set about rolling up the insulation and passing the tidy bits down to Joe, who bagged them. I bagged the scraps and bits and pieces up in the loft to prevent too much crap raining down on Joe.

Vicky’s feet dangle out of the loft hatch

Making my way into the unknown

We filled six huge bin bags, which Joe later hauled to the tip.

Black bin bags full of old insulation

All this came out of the loft space

I also removed several dustpans full of poo.

And lots of bits of paper, plastic bottles and canisters, scraps of insulation, tarry stuff that was coming away from the rafters, and pieces of MDF that were lying around looking like things to put weight on, but which were NOT for that at all.

Once we got rid of as much of the insulation and general rubbish as possible without falling through the ceiling, we started ripping the ceiling panels off and creating a big, big hole.

View from under the ceiling, through the holes, to Joe doing some wiring

Joe makes some wiring less scary

Oh, and unwiring some wires that didn’t seem to do anything anymore.

It’s been quite a day…

But at the end of it, we got to have an EPIC shower powered by our new boiler, with frankly quite alarming pressure, and so it wasn’t all bad.

Next in the Stone Room: continue removing the ceiling, sweep and hoover and make as tidy as possible, repair the leaky roof and the holes under the eaves, and hurl some lime plaster at the rough loose stone to make it a bit tidier and sturdier.

After that, we’ll pull all the old plaster off the walls and put in new oak windows (which we’ve just ordered), then take the floor up.

After that, we’ll replace the ceiling and the floor — at which point we can start actually creating a bathroom! And deciding whether or not to have underfloor heating…

UPDATE

Having done some searching of images on the Google, we now have a suspicion of bats. So we have a local batman on his way to do a preliminary survey. All work in the roof space has stopped for now, and the next thing we’re going to do is focus on the walls below the ceiling line and replacing the Stone Room floor, and stripping out the Rayburn Room.

Then we shall wait and see what the batman says and do what needs to be done.

Opening The Dingle’s Eyes

It’s 5.30 am. All is dark. The moon is shining through the new windows, and I can see frost glowing on the cars.

And the room is warm.

Louder, for those in the back?

The room is warm.

Plus, we have actual light shining in.

Because we gave the cottage new eyes, and those eyes are double-glazed oak-framed beauties, and I can’t even articulate how delighted we are with our new windows!

But let’s start at the beginning, with the old windows.

They were not pretty. The frames were rotting, the single glazing rattled, and the fake lead strips blocked out a surprising amount of light. The secondary double-glazing inside helped a little, but it was super-ugly.

And none of the windows opened.

Except the tiny one in the Rayburn Room, which was covered by secondary glazing, so didn’t really open at all.

Why Oak?

We chose oak because we wanted it to last another 400 years, and look beautiful. And neither of us likes uPVC. At all. Especially not on an old cottage (even though some of the new wood-look uPVC is very good indeed – it’s still plastic, and that’s not us).

We knew the new windows would make a big difference; we weren’t expecting the difference to be quite so dramatic, inside and out. We’ve had lots and lots of lovely comments from the neighbours, who are glad to see some visible progress. As are we!

Window by Window

Let’s start with the tiny window on the side of the Rayburn Room, looking out towards the rosebushes. Here it was:

Tiny window in stone wall, ivy

The tiny window

It’s a bit of a mess, with a rotting frame and largely obscured by ivy and, as you can see, a long-dead plant on the windowsill.

This was the quickest and easiest window to replace and it looks fabulous inside and out:

New oak window in stone wall

Tiny window looking smart

New oak window from inside

Tiny window looking brighter inside

Next came the main window in the Rayburn Room, in the stone portion of the cottage.

Ratty old window

Before (pretty ugly, poor thing)…

Replacing it made an enormous difference:

Beautiful new oak window in stone wall

Isn’t it beautiful?

On the list next year is getting the stone portion of the house repointed and repaired, because in the past cement pointing has been used and it’s destroying the stonework. New windows have highlighted the other stuff that needs improving…

Next is the big window in the living room. One of them was broken because someone (us. it was us.) bounced a lump of concrete off it in the summer… here it is:

Old window...

Broken old window and shonky old bricks

And here’s the beautiful new window and new oak lintel above it. Which makes us feel a lot less like the wall might suddenly crumble.

New triple oak window with new oak lintel above

Ooh isn’t it glorious?

And here’s the inside:

Beautiful new window at night, with stunning oak work

Look at that scribing on the lintel!

On the left-hand side of the house, to the left of the porch, is a small window set into 18-inch solid stone walls. It didn’t let much light in, and that end of the long living room was perpetually gloomy. You can see from this photograph that the window opening used to be much larger; we don’t know why or when it was reduced. But we decided to open it up again.

Window, house name, and previous size visible.

Embiggening a window

You can see the newer stonework with the fresher paint. And yes, the house really is as wonky as it looks in this pic.

Here it is from the inside:

Small window, gloomy corner, lit by a lamp.

A gloomy corner

Ken Milloy and his trusty fellow wood-worker, Phil, knocked a whopping hole in the wall, gently removed the original stones (we’ll be reusing those when we build a new porch and new walls elsewhere), and we discovered this:

Original wooden frame buried in stone wall

That’s the original shutter frame!

Ken is pretty sure that’s part of the original frame (you can just see where it’s been chopped about on the right) – and that it was for shutters rather than windows. Glass was extremely expensive when this house was built, so it’s likely the cottage had shutters. But we don’t really know for sure.

That bottom piece of wood is the original windowsill and that is most definitely staying. It’ll be protected by the new piece of oak we’re putting inside as the new windowsill.

Unfortunately, we couldn’t keep the original frame in there; it’s too small. So it had to come out. However, it is staying on the property and we will reuse it as part of something else. We’re not sure what yet, but it will show up on this blog when we figure it out. Funnily enough, a chap from the USA wanted to buy it from us and turn it into a table! Sorry fella, it’s staying with us 🙂

Once again, Ken and Phil installed a new oak lintel outside – and discovered the main beams inside weren’t really being held up by anything. So there was a little extra structural oak work to do inside too. Once again, we’re a collapse-free zone.

Here’s the finished window:

New triple window in stone wall with new oak lintel

Another stunner

And just look how much light pours into that end of the room now!

New wider window lets in tons more light

Flooded with light

If you look closely at this image and the other big window, you’ll see the stunning scribing Ken did to make the new oak fit seamlessly with the old piece. It’s beautiful work and we do a little happy Snoopy dance every time we look at them.

Next is the windowsills. We’re getting 3-inch oak chunks, with wayney edges if we can, but straight-edged if not. They’ll fit perfectly under the new windows when we’ve chipped all the cement plaster out of the way.

Which has got us thinking about what to do with the rest of the living room… but that’s for a future instalment…

For now, here’s a little look at the new curtains. They’re not our forever curtains, but they’re certainly a vast improvement on the mismatched charity shop ones that have served us really well for the past few years…

Red and gold patterened curtains on night-time oak windows

Cosy and stylish!

Imagine how glorious it’s gonna look with the chunky oak windowsill… and how much warmer for the cat bums to sit on.

Vicky Has A New Office

Ever since I started my business, I’ve been working from the dining room table. At Cedar Tree Farm, I was in the main living room. Here at The Dingle, I’ve been working in the Rayburn Room.

I’ve been waiting a long time – nearly eight years – for an office of my own… and finally I have one!

Two weeks ago, I moved into Casa Moxie – and it’s been magnificent.

Not only because I now have my own space, and a proper routine, and can shut the door on work – but because it now means we can start sorting out the stone part of the house.

The room I’ve been working in for the past few years will become our library/snug/music room, and the room above it (once our bedroom) will become the most fabulous bathroom in the world.

But back to Casa Moxie. Let me show you what we did…

Log Cabin-Tastic

We spent a lot of time scouting around, reading endless articles, getting option paralysis, and eventually just staring at all the options in dismay – until my friend Dawn, who’s building her own house, told me about Keops. They’re building a three-bedroom house log cabin on the land they’ve bought.

Keops is a company that builds bespoke log cabins at much lower prices than you might think. Turns out, one of our neighbours lived in a big Keops cabin while he was building his house, and he showed us around it. His cabin is much bigger than what I needed, but it made my mind up, and I made an appointment to go and see them.

A few days later, and I’d paid the deposit and got organised. First task:

A Great Big Concrete Slab

Our neighbour Graham is a builder, so we asked him to lay our concrete slab. After a couple of days having adventures on our awkward steps to get everything up and in place, he did a brilliant job and the perfectly level slab was ready to go.

Preparation for the concrete slab

Filled with rubble and ready to go

Another bonus: we got rid of two dumpy bags full of rubble and crap, because Graham used it as hardcore. There’s something underneath that slab, too – some kind of void filled with larger bits and pieces. I like to think it’s an ancient Templar hidey-hole, and one day Things will burst forth from it. (Don’t worry, it’s perfectly solid and safe.)

Slab

Shiny!

We chopped back the trees to create enough vertical space, and pushed the bank back a little, and all we had to do was wait for the materials to be delivered…

Flat-Pack Office

It seems incredible that this:

Office materials by side of road

Flat-pack office

And this:

Insulation and OSB by side of house

Insulation and OSB

Could turn into this:

Office from up the bank

My office!

Isn’t it fab? And it went up in two days, which is incredible. The materials all come ready-made and ready to lock in together, then the workers fit it all like Lego, put the insulation in the roof and floor, lay the roof, fit the windows, then bugger off.

I made a time-lapse video:

And another:

Timelapse 2

Making It Weatherproof

We only had a few days to make it as weatherproof as possible before it started raining – and it hasn’t stopped since. About a month. Ugh.

Anyway, we treated the entire structure, inside and out, with Sadolin wood preserver, which didn’t take too long.

Then we painted the outside with Sadolin Classic weatherproof paint in gossamer blue. Or, that was the idea. We did about two-thirds of the outside before the weather defeated us and we got properly grumpy about the whole thing. It’s a really, really, REALLY dull job. So I’ve decided to pay an odd-job person to do it for me. It looks kinda patchy at the moment because it’s unfinished. It’ll look gorgeous when it’s done, though.

Side view of office showing painted portion

Part-painted building (the front is mostly done now)

We took the gutters off to paint the fascias, and they’re back on now. It was fun up on the roof – I took a panoramic pic of The Dingle:

View from the roof of the office

Roof-eye view of The Dingle

Going Indoors…

Time to go indoors for painting, floor-laying, and shelf-building.

I painted the walls in the main office in Little Greene’s French Gray Mid, and the details (skirting boards, window frames, door) in French Gray Pale:

Painted walls and skirting board

Beautiful walls!

In the kitchen alcove, I used Little Greene’s Edith’s Eye, which is a kind of yellow-green and I love it. The window frame and details are in French Gray Pale again:

Shelves and worksurfaces in kitchen alcove

My Tea Palace

I was going to have a little fridge in the kitchen, but for now I don’t need one. The water filter does a good job, I have a kettle, loads of different teas, and some funky mugs. Happy days.

Next step: laying the floors. I found the cheapest laminate flooring online I could, and I may live to regret it. We’ll see how long it lasts… it was great fun laying the underlay, because I got to imagine I was building a space station. It was also delightfully warm.

Rolls of gold underlay

Fun with underlay

Pretending the underlay is a space station

See? Space station

And then we laid the laminate floor on top. I suspect the more expensive, thicker laminate is easier to lay… but it wasn’t too bad and it looks great:

Mostly finished laying the floor

Lovely smooth floor

We boxed all the electrical wires inside the skirting board, and fixed the plug sockets just above on the wall. There are track lights running the length of the office, and a light inside the cupboard and in the kitchen alcove.

We’re fitting outside lights this weekend, because I’ve discovered that coming out of a bright office into the pitch-dark Dingle leads to face-planting down the stairs.

Being Thrifty

We left the cupboard as bare wood, partly because we were fed up of painting, but mostly because I wanted to leave some of the cabin in its natural state. It’s a fantastic great big cupboard that I’ve organised beautifully.

The shelves are all made from left-over cabin building materials, which makes me happy:

Shelves

Shelves

Tons of space :)

Tons of space 🙂

I have a solid worktop on each side of the office so I can package up books, do filing, and generally organise my stuff.

My whiteboard lives in the cupboard, too – as does my sewing machine and arty bits and pieces.

Making It Beautiful

Finally, I’ve made it into the stunning office I’ve always wanted! I still have a few pictures I want to frame and hang, and framed book covers to sort out, but it’s more-or-less there. And I have a giant squishy armchair arriving from IKEA tomorrow.

Here it is!

Decorated for Hallowe'en videos

Decorated for Hallowe’en videos

And here’s Flamingo Corner:

Neon flamingo light and potted plant

Flamingo Corner

My mail rack, complete with beautiful flamingo crocheted by my lovely friend Jenn:

Mail rack

Mail rack

My desk, complete with one of my absolute favourite things: my map of Ankh-Morpork:

Ankh-Morpork

Ankh-Morpork

And a little office-warming sheepy gift from my friend Dawn:

Rupert the Rainbow Sheep

Rupert the Rainbow Sheep

A noticeboard for helping me to choose curtain fabric – and to show off Sean D’Souza’s beautiful cartoons:

Choosing curtain fabric

Choosing curtain fabric

The most important thing of all: my bookcase. Complete with extra space for my pole-dancing and trapeze trophies 🙂

Treasure

Treasure

And a space for Noodle the Office Manager:

Noodle the Office Manager

Noodle the Office Manager

Investment

It was surprisingly inexpensive to build and fit out the office, and we suspect it’s already added more value to the house than I’ve spent on it. Here’s a breakdown – hopefully it’ll help if you’re thinking of building a home office.

  • Concrete slab = £2,145
  • Log cabin (including build) = £10,798
  • Wood treatments and paint = £395.28
  • Electrical, lighting, and decorating gubbins = £292.78
  • Flooring = £211.08
  • Kitchen worktop = £100
  • Furniture (desks, bookcases, chairs, sundries) = £1,630.72

Total cost (so far – and there won’t be much more to spend) = £15,583.36

I’m delighted with my new office. It’s very much an investment, and I’m already feeling the benefits – I’m much more focused, much less easily distracted, and I feel like a “proper” business owner now. It’s lovely to have the house back as ours, without me commandeering one of the rooms.

Next step: turn the stone portion of The Dingle into a bathroom and a library. Onwards!

Important Lessons About Laying Solid Oak Floors

After almost exactly three years in The Dingle, the attic has a proper solid oak floor–and we’re bloomin’ delighted!

Having asked grownups to do the scary structural stuff like the big oak beams and joists, and the staircase and roof structure, we thought we’d have a go at laying the floor ourselves.

There were loads of options, but we decided on character-grade solid oak planks with tongue-and-groove edges.

They’re beautiful.

And they’ll be even more beautiful at the end of this weekend, when we’ve oiled them.

We signed the beam

We made this 🙂

Starting the floor was fiddly. We laid the first plank at the top of the stairs between the door frame oak – and rather fabulously, there was a plank exactly the right length. It was pretty nerve-wracking nailing those first nails in. We quickly got rather more blasé about it…

First plank down

Exactly the right fit

Then we had to jigsaw notches around the structure, which went rather well.

Tidy notches

Tidy!

Those strips are 3mm MDF. We used it to fill any gaps between board and joist, so hopefully there won’t be too many squeaks and creaks.

Most of the planks fit perfectly, but the odd one or two weren’t quite perfect – so Joe got a chisel out and did a brilliant job of fettling. Under close supervision by Whiskey, of course.

Whiskey keeps an eye on the chiselling

Supervisor Cat is supervising

And suddenly we were motoring. Slowly, like the first automobiles. But motoring nonetheless.

Now, a cautionary tale. While laying this floor, we learned Important And Useful Things that may help you, should you ever decide to lay a solid wood floor.

Are you paying attention, grasshopper?

Good.

Thing The First: Flooring. Takes. AGES.

We thought we’d spend ages fiddling the first row into place and ages fiddling the last row down (because the end of the attic isn’t so much a rectangle side as an oval). Then we believed we’d turn into an efficient floor-board-laying machine.

Ahahahahahaha.

Oh how we laugh now… because laying floorboards takes bloody ages. Especially when you don’t have clamps (see further down). But it was good fun and we did learn a lot of useful stuff.

I’m sure professional flooring people do this at lightning speed, like those sped-up videos on t’internet. But we did not.

Oh and also it’s totally knackering:

Human face down in hole

Zorsted

Thing The Second: Note Joist Spacing When Ordering

I have no idea if joist spacing is standardised, but just in case: make note of how far apart your joists are when you’re ordering your planks. It will make it easier to lay them and make for less wastage if you have different lengths that’ll fit nicely in the gaps.

When laying a row of planks, you want the join over the joist for strength. The whole thing is like a jigsaw puzzle.

With no edge pieces.

Or picture on the box.

In the end, we did super-well and ended up with very little wastage and only one butt-joint (fnarrr). (A butt-joint is where you can’t tongue-and-groove two planks together, so you just have to butt them up to each other, nail them down, and hope for the best.)

Thing The Third: Label Your Planks

About halfway through laying the attic floor, we had a brainwave. Up until that point, we’d been measuring joists and then going downstairs and measuring loads of planks to find one that fits.

You’re probably reading this and wondering how we manage to dress ourselves – I bet you’d have labelled all the planks at the start, right?

Well, it took us a couple of days but we got there eventually. We measured each plank and wrote the length on each in chalk. Made it much easier to plan.

Just in case this doesn’t occur to you, take our word for it: labelling in advance will make the job much quicker and much less annoying.

Thing The Fourth: List Your Lengths

While you’re labelling your planks with the lengths, write all the lengths down in a notebook so you can cross them off as you use them. That way you don’t have to go downstairs every time you want to plan a row. You can just check your notebook. Easy peasy.

Thing The Fifth: Beg, Borrow, Or Steal Floorboard Clamps

About halfway through our flooring adventure, one of Joe’s BJJ buddies – Pat (thank you dude!) who is a black-belt strangler – saw our Facebook post about our progress and asked if we had floorboard clamps.

We did not.

We were intrigued.

Until then, we’d been using our feet. As in, I’d perch on a joist and shove my feet against the board we were nailing down and put as much pressure on as possible to close the gap while Joe banged nails in. It worked, after a fashion… but you can definitely tell at what point the floorboard clamps arrived because the gaps entirely disappear.

We’re okay with that, because our learning curve is part of the history of the house now. It’s cool.

The clamps sit on the joist, and you wind them up using the handle thing, and they gently push the board tight. Honestly, you would not believe how much easier this made things…

Floorboard clamps in action

Magic miracle lumps

Thing The Sixth: Punch At The End

You might be wondering why we didn’t use secret nails. The reason is because the wise owl at Good Bros Timber who sold us the oak floorboards advised us to use lost-head nails. So we did as we were told. Also, it fits with the rest of the house.

For about half the floor laying adventure, we punched the nails in as we went along, using a big ‘ammer and a nail punch. One of which broke. Nothing to do with me being ham-fisted.

This is a right pain in the bum because the punch is always at the wrong end of the room. Incidentally, bonus tip: have a little wheely trolley and put all your tools in it and wheel it around as you work.

Or, alternatively, every time you stand up, pick up your hammer, nails, and anything else and take it with you or you’ll spend all your time swearing and asking where your hammer is now.

Back to punching: knock all your nails in, then at the end when all your boards are down, you can work your way methodically along each joist punching the nails. It’s much easier than staggering around the floor doing it as you go along.

Thing The Seventh: Take Breaks

Do not underestimate how much hard work this is if you don’t do a lot of this type of thing.

It was surprisingly hard work.

We fell asleep on the sofa about an hour after showering and dinner after each flooring session.

Working tired means you miss more nails (there are some little dents in the boards), you forget to stick nails in (we found an entire board without any nails at all: winning!), you bend more nails with inaccurate strikes (which is really irritating because getting them out is bloody difficult), and you risk hurting yourself.

As soon as you miss the first nail or put a slight bend in one, it’s time to take a break at the least, or pack up for the day if you’re knackered. Trust us: pushing on through is not worth it.

Finally…

My patented technique for getting upstairs. Disclaimer: I am in no way recommending you do this. (But it is fun.)

This is how circus people do flooring:

Really Finally…

At the far end of the room, the wall is seriously bowed. Like an egg. And while I was away for a day, Joe did a stunning job of jigsawing oak boards to fit precisely into that funny shape. It’s perfect.

Here’s the finished floor. Didn’t we do well?

Finished oak floor

Beautiful oak floor

Hope you’ve found this helpful! And inspirational, because if we can do this, you can too 😀

Next week: sanding and oiling (it looks gorgeous).

Newer posts »

© 2025 Project Dingle

Theme by Anders NorénUp ↑