Restoring an old cottage...

Tag: floor

Floored

Approximately 387 years after starting this bathroom project, the Stone Room now has a proper floor!

We laid marine ply over the joists as a subfloor, and then had a good old think about what to put on top. It being a bathroom, it’s gonna get wet (or at least damp) so we needed something that could cope with that.

Bamboo was an option, so was oak or another timber, and we considered tiles or laminate or lino.

We don’t like laminate or lino, and decided against tiles because we didn’t want them to crack as the house moves.

In the end, we chose engineered oak: about 5mm of solid oak on top of ply. It stands up well to temperature and moisture fluctuations, and looks exactly the same as solid oak. We bought random lengths in rustic grade, with tongue and groove, from Good Bros Timber near Leominster.

Lovely piles of floor all sorted neatly. Guess how many times we moved it all around…

The bathroom isn’t quite square, despite our best efforts (nothing in this house is square), so we weren’t sure where to start laying it, and dithered for a while until Vicky made the unilateral decision: we’re starting in the tunnel just outside the room. So we threw a few boards down to do some measuring and make sure that, as far as possible, we’d start with a full board along the wall.

Careful measurements and a giant finger

Cutting the boards to fit the tunnel was pretty fiddly, and we added some battens so we could create a neat step later on.

But we did it, it’s neat and tidy, and then we were motoring.

Tidy!

We used secret screws — countersunk screws screwed in at an angle into the tongue, to hold the boards down and prevent creaking. And we used odd offcuts of floorboard as knockers, to keep the tongue and groove tight and minimise gaps.

Helpful labelling.

We did our best to leave an expansion gap of around 10mm all around the edges of the room, but some of them were a bit tight. Hopefully it’ll be fine.

There were some fiddly bits — we had to cut holes for the radiator plumbing, the bathtub waste pipe, and the sink plumbing and waste pipes. We’ll do the bath tap holes from below later.

We cut holes using a hole saw or a spade bit set, depending on the size we needed, which does a really neat job. And thankfully our measuring was accurate and everything fits. Hurrah!

Precision engineering, that.

It took us about three days to lay the main floor, on and off. Then another half day to add the trim around the edge to hide the expansion gaps.

We made our own tool to cut the beading at angles, rather than buy one — but quickly realised our home-made tool was a bit crap. So it was off to B&Q again to buy a proper one, which worked much better.

Covering the gaps with a proper tool.

This was a right pain, because we don’t have skirting boards, just lime plaster. And lime plaster does not like having stuff knocked into it. We found some oak beading from B&Q which is actually really nice, and did our best to mitre it neatly — although, as already mentioned, nothing in this house is square. We were a bit miffed with the small gaps but honestly the next time we walked in, we didn’t even register it. We’ve bought some Osmo paste to create a resin to fill them in. If we remember.

I did Osmo the oak beading though and it matches the floor now, and looks lush.

Looks pretty good yeah?

Then we No More Nails-ed it to the wall, with the odd little tack into the floor to hold it still. It looks ace.

Advanced Shower Tray Engineering

We’ve done some painting! Which feels a lot like Making Progress.

But we’re getting ahead of ourselves because we’ve done lots more than that.

We’ve finished the structure of the shower cubicle!

The Shower

For the ceiling, we decided to use waterproof panels in white, because they’re really easy to fit and keep clean, and easy to cut to size. We chose Multipanel.

We cut it to size, squirted high-grab adhesive on the back, and pressed them into place:

Ceiling panel with zig zags of adhesive ready to go up.
Adding adhesive to the panel

We put pressure on with a complicated arrangement of leftover cork panels to avoid damaging the panels and long battens of wood and leftover floorboards to help hold it all in place while it dried. Worked a treat.

Stud wall visible beneath ceiling panel, held up with cork and pieces of wood to brace.
Not how the pros would do it, but it worked pretty well

Once the ceiling was up, it was time to fit the waterproof Wedi panels to the stud wall frame. We chose Wedi boards because we wanted something that’d be super waterproof and easy to tile onto.

We cut the boards to size, and fitted them butted up against each other, with Wedi sealant between the joins to ensure no leaks.

The boards fix to the stud wall with screws and washers, which we then painted over with liquid membrane to prevent any water seeping through, and also painted over all the joins. We’ve got tons of the stuff, so we also painted the entire subfloor with waterproof membrane too, because why not?

You can see we’ve also fitted the shower head into the ceiling, as well as the extractor fan and spotlight. We cut round holes into the board for the shower valves to poke through as snugly as possible, and are pretty pleased with ourselves at how neat they are.

Grey Wedi boards lining a shower cubicle. All joints, screws, and floor painted with pale blue-green liquid membrane.
Sealed and fitted Wedi boards

Using the Wedi boards, we cut smaller pieces to create a wall niche in the shower for bottles and stuff (see above). It’s really nice to work with.

The Poo Pipe

When we were away in Canada, our neighbour Graham (who is a builder) put a whacking great hole in the side of our house and poked a poo pipe through it, then ran it down the outside wall and into the main sewage pipe. He also dug a trench and put in a new manhole cover for us.

I don’t think he enjoyed that very much, but we are paying him so that takes the edge off. It’s why we didn’t want to do it ourselves…

So, we now have the toilet waste plumbed in, which was a big job we were a little anxious about.

Speaking of big jobs we were anxious about, we’ve also fitted the shower tray.

The Shower Tray

The shower tray weighs approximately 5,273 tonnes and is made of stone resin. The instructions say to lift it up and gently drop it into place.

Ahahahaha.

Unfortunately (or fortunately, depending on your point of view) we’ve built the shower area so precisely that there was definitely no room to “gently drop it into place” so we had to be creative.

We mixed up sand and cement in a 5:1 mix and added water until it was the consistency of mashed potato.

(Vicky’s aside: this gave me immense anxiety because one person’s perfect mashed potato is another’s sloppy disgusting mess. Is it fluffy? Is it smooth and creamy? WHO KNOWS? In the end we decided on our perfect mash and it seems to have worked out fine.)

Whiskey—our little grey cat—thinks every receptacle of water is hers. Here, she’s leaning right over the edge of a bucket to drink water out of it.
Whiskey supervised the whole process which is why it worked so well

Then we spread the base onto the subfloor, which we had painted with the same waterproof stuff we used on the Wedi boards. Rather marvellously, we managed to get the cement pretty much bob on level, so we felt smug about that.

Joe uses a spirit level to check how level the cement base is.
Looking level!

Next, we took some leftover 15mm plumbing pipe to use for runners. Imagine how they built Stonehenge with log rollers? Well, that was our idea for sliding the shower tray into place. There’s no way we could lower it in from above—it’s enclosed on three sides, with not enough room even to slide a piece of paper between the end walls and the tray.

Instead of rolling the tray along rolling pipes, we made little rails from the pipes, and then pushed the tray along them, into the cubicle, and then slide the pipes out afterwards to allow the tray to settle on the cement bed.

Using pipes to slide the shower tray into place onto the cement bed

Again, it was perfectly level all the way around, and there was much rejoicing.

If you want to see us in action, here’s a video:

Next time: the walls and windowsills…

Odds, Ends, and an Actual Floor

We’ve not made much progress since Christmas, but we have done a few odds and ends.

Odd

We’ve been meaning to make a little shelter to sell our eggs from for ages, because otherwise people tend to wander into the garden and walk into Vicky’s office while she’s working.

So we used some left-over fibre roof tiles, some odds of batten, and a couple of chunks of joist, and created a snazzy little egghouse.

Random pieces of wood and a couple of roof tiles ready to make into an egg shelter

Bits and pieces

There’s enough room for an egg holder, some egg boxes, and a honesty jar.

Shelter with egg box and jar inside, and words on the top: Dingle eggs £1.20 for 6

Yum yum

£1.20 for half a dozen eggs, half the proceeds go to the British Hen Welfare Trust, which is where we go to rehome ex-battery chickens.

End

There’s been a gaping hole above the tunnel from the living room to the Rayburn Room for aaaaages.

We finally got around to building a frame and whacking some wood-wool panels up there ready for plastering—eventually.

The tunnel all panelled over with fairy lights

Tidy tunnel

The Rayburn has left the building…

We knew we wouldn’t be using the old oil-fired Rayburn anymore because we recently switched over to gas, rather than oil. It’s not worth converting it, so we’ll probably get an electric Aga when we do the new kitchen.

Joe advertised the Rayburn on Facebook, and a couple came to pick it up—and we got 150 beans for it. Winning!

Manoeuvering the Rayburn using rollers and muscles and hope

Pretty heavy. Rollers were useful.

Looking forward to turning the Rayburn Room into a library, and installing a woodburning stove in the fireplace.

Empty fireplace

All ready for plastering, beautifying, a new hearth stone, and a woodburner

Oh and a proper solid floor

And finally, having spent months wobbling around on bits of shaky plywood and OSB, and wondering if Joe would put his foot through the floor again, we decided to lay a proper subfloor.

We had a little help from Kenda and Mike to get started:

Joe on left and Mike on right, putting noggins into the floor

Men doing manly floor things

The rest of it looks like this only without the gaping holes:

Marine ply screwed to the joists, with insulation visible beneath

The beginnings of a solid floor

And now the whole floor is screwed down and solid, and you can jump up and down on it and everything.

Hurrah!

The Stone Room Floor of Death + Woe

That floor we opened the last post with? Yep, time to go. It’s been grim. Really really grim.

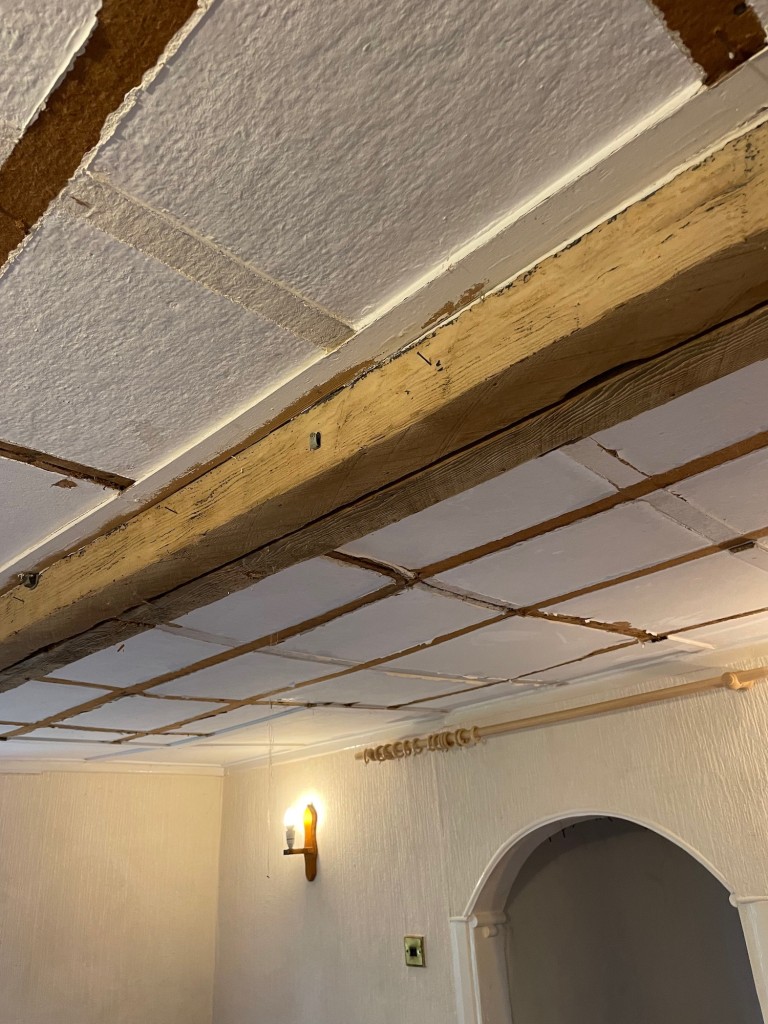
We started downstairs in the Rayburn Room and ripped all the weird fake panel bits off the ceiling:

Ceiling panels

Ceiling panels were kind of structural…

Stripped off the fake panelling

Stripped off the fake panelling

Then we put on masks and gloves, took a brave pill, and Went Upstairs.

And discovered such delights as this section of floor which isn’t really attached on one side at all hahahaHAHAHA such fun!

Gap between floor joists lovely

This floor is actually held up here with hope

And this exciting bundle of bare wires that go who knows where and are stuffed into a broken junction box under the floor with highly flammable wood and dust and crap WOO!

An exciting collection of wires going who knows where

Fun with wires!

And this floor joist which is two scraps of wood held together by one old nail which I put my foot on AND NEARLY DIED SUCH LARKS!

Secure floor

Secure floor

We perfected our balancing techniques (and when I say we I mean Joe because I got proper vertigo up there looking through the floor at the room below it’s NOT RIGHT) and pushed out all the MDF ceiling panels. Which, we truly believe, were partly structural. Which is also terrifying.

In the end, though, we dragged out everything and ended up with this magnificent, cathedral-like space:

Truly cathedral-esque

Truly cathedral-esque

And this exciting door into nothingness:

White wooden door with black iron hinges opening onto nothing

It’s like a haunted horror house

So, yep.  Next thing was to fit the wall plates, which you can see my dad working on in the pic above, and then the floor joists, which we pretty much fitted in the same way as we fitted the ceiling joists above. More on that later…

© 2024 Project Dingle

Theme by Anders NorénUp ↑