Restoring an old cottage...

Category: Attic (Page 1 of 2)

Much Lofty Excitement!

We are pleased to announce that the resident bats now have a more luxurious living space than we do.

The space above the bathroom-to-be is now insulated, boarded, and housing our camping gear, some books, and a load of shoes.

I spent a dusty afternoon up in the rafters with Henry hoover and filled three hoover bags with bat poo, cobwebs, and dust. Let’s take a little look at the before:

Dusty dusty dusty

Dusty dusty dusty

And the after:

Dust and cobweb and bat poo free!

Dust and cobweb and bat poo free!

Tidy!

Once that dirty job was out of the way, I, Joe, and my dad Adrian filled the spaces between the ceiling joists with Thermafleece natural sheep wool insulation—150mm of it. If we were building a modern house we’d have to adhere to building regulations which state a minimum of 270mm insulation—and we may add a layer in the future, but for now we’re sticking with 150mm because a) immediate cashflow, b) the logistics of adding extra height to accommodate extra thickness would be a pain in the butt, and c) the benefit of extra insulation after 150mm is not significant.

Graph showing diminishing return from extra thickness of insulation

Graph from The Greenage

Check out this site (where I found this graph) for more information.

Thermafleece sheeps wool insulation laid between ceiling joists.

Thermafleece sheep’s wool insulation

Once the insulation was in, we boarded out the loft using Wickes’s structural OSB loft panels. I measured, Joe and my dad cut, and I laid them all and screwed them down.

Tidy stone wall, rafters, and freshly laid OSB loft boards

Floorboards down—and it’s transformed the look and feel of the space

The loft was kinda my little project.

We’ve left the screws a bit half-done because we’ll need to take up some boards to lay down wiring and fit lights into the ceiling. We also need to add a little extra boarding right up to the edges of the roof—although we may possibly board vertically where there’s little usable space. We’ll see.

An old IKEA shelving unit made its way up into the loft, too. We were going to get rid of it entirely as it was pretty ugly and took up too much space in the living room—then realised it’d be useful up in the loft to give us more tidy storage space. More shelving will go up there eventually so we can make good use of the space we have—storage space is pretty hard to come by in this cottage.

Camping gear stored in IKEA shelving unit in loft

Clean, dry, non-dusty space for our camping gear

Look what we moved from the Wonky Room:

A big pile of camping stuff and general crap

All this stuff went upstairs into the loft—hurrah!

To the loft:

Show boxes lined up in the loft under the low edge

Happy shoes

Finally we added a temporary battery-powered LED light; eventually we’ll get an LED strip to go along the ridge beam.

Ta da! We’ve significantly increased the size of our house, which feels pretty cool.

Bats in the Not-a-Belfry

There’s a line in the Discworld book The Truth, by Terry Pratchett, that goes:

“A lie can run around the world before the truth has got its boots on.”

Case in point: if you have or suspect bats in your house, They say that it’ll cost you one meeeeeeeeellion dollar to do any works you had planned, if you’re allowed to at all.

Honestly, the number of people who have said to us, when we’ve mentioned bats or newts, “Ooh don’t say anything because otherwise you won’t be allowed to do any work or make any changes and you’ll get prosecuted etc. etc. etc.”

I always suspected that was batbullshit, and I was right. Plus, we are tree-huggers and we are happy to host bats and newts. Bats eat midges. Newts are awesome.

(There are fascinating psychological reasons why this kind of nonsense story perpetuates despite a screaming lack of any evidence, and if you’re interested — and you should be — check out the book Made to Stick by Chip and Dan Heath.)

Anyway, back to the batshit.

The next mini-project in the ongoing saga of The Dingle is the Stone Room on the first floor. It is to become the Most Magnificent Bathroom in the World.

There’s plenty to do in there, and you’ll be able to follow along as we go… but one of the first jobs was to pull down the ceiling and put a new one in.

Because the current ceiling is made of spiderwebs, cheese, cheap bolts, and hope.

When we had our new boiler fitted (blog post to follow about that shortly), we were finally able to drag the water tanks out of the loft space above the Stone Room and get rid of them. When we went up there to do that, we noticed what a shocking state the ceiling was in.

And we also noticed this:

A giant pile of poo

A giant pile of poo

Which is a giant pile of what we thought was bat poo. Certainly very small poos, and lots of it.

We did some googling, crumbled it between our fingers, and came to the conclusion that it was probably bat poo.

Plus, we know we have lots of bats flying around The Dingle of an evening, and although we’ve never paid that much attention to where they appear from and disappear to, old houses are perfect for bats.

So I called the Bat Conservation Trust for advice.

(Actually, I called a consultant I found on the internet, and we had a chat, and he recommended I contact the BCT because they do free checks and advice, whereas we’d be paying him. Good man. Thank you.)

Today, a volunteer and a trainee volunteer from the BCT arrived and had a look around. In ordinary times, they’d have come in and poked around themselves, but COVID has scuppered that kind of thing, so we got modern and used technology.

They asked for samples of the poo, and we FaceTimed around the loft space.

Up I went in my overalls to stagger around on the ceiling (did I mention it’s made of cheese and spiderwebs and isn’t fit to support anyone let alone a person?) and gather little pots of poo.

The poo from the main pile was definitely bat poo. They’ve taken it away to see if they can identify what species we have. And the poo from the other end was bird poo and mouse poo. Which is good news for us if the bats are only at one end of the roof space.

We’re quite keen to get this sorted because there’s water ingress when it rains on the interior wall, where the flashing has come away from the roof-wall interface. You can see the water damage here:

Not really dry…

Not really dry…

Ken our timber guy reckons it’ll be fine with a bit of reinforcing which is grand because we DO NOT want to replace the purlin and do major roof works. Plus that will require all sorts of licences for the bats.

And at the other end, there are large holes between the wall and the roof, and some of the fascias are rotting so we’ll need to replace/repair and cover those, and we need to know what we can do.

Daylight where daylight should not be

Daylight where daylight should not be

The volunteers are going to write up their report over the next day or so, and put it through to Natural England as an urgent job for us.

We expect to hear back in 2—4 weeks, and he said it’ll probably be more like 2 weeks.

They could not have been more helpful. Their main aim is twofold: to protect the bats AND to enable us to get on with the work we want to do as quickly and inexpensively as possible.

They’re well aware of the nonsense people believe: that conservationists deliberately make it difficult for people to do work.

Of course they don’t. It’s not in their interests. Because when they make it difficult for people, people don’t declare bats and do all sorts of stuff that harms the bats.

Bats are great: they don’t cause damage, most of the time we don’t even know they’re there, and they eat tons of insects. A common pipistrelle bat can eat 3,000 midges and mozzies and flies in a single night!

And it’s really easy and inexpensive to provide for them.

The only issue really is timing: they build maternity roosts from around May until the end of August, so we won’t be allowed to do any work that could affect access between those dates.

That won’t be a problem for us, we’ve timed it well. We’ll be able to build the new ceiling and block the loft space off, leaving the bats in peace until the end of summer. Then we can go back up and do any further work we need to do.

Probably what we’ll have to do is partition off a portion of the loft space for the bats, and then put a droppings tray on the boarded out floor so we can remove droppings once a year. (Which is cool because bat droppings are fantastic fertiliser for my vegetable beds.)

We’re fine with that. It’ll cost us a few quid and we can do the work ourselves, and we’ll be helping the bats, which makes everyone happy.

So, if you suspect bats in your house, and you’re worried about it scuppering your plans to renovate or repair: don’t be.

Ignore people who like spread rumours without having facts, and give the Bat Conservation Trust a call. Their volunteers are super-friendly and helpful, and will work with you to do the best for you and the bats.

Thank you BCT!

We’ve Finished A Room!

Actually, we’ve more-or-less finished it, and that was a couple of weeks ago.

The attic is done! Look how pretty it is:

Beautiful cottage bedroom

It’s a proper sanctuary and we LOVE it

We absolutely love it. It’s restful and beautiful and waking up with the sun is delightful.

Here’s how we’ve decorated it…

  • The rug and lights are from Bailey’s near Ross-on-Wye. Their shop is a massive barn showroom filled with stunning things, including lots of recycled and upcycled beauties. It’s a delight just to visit.
  • The large trunk came from Joe’s sister (thank you!).
  • The small trunk came from the fabulous and extremely friendly Salvaged in Leominster.
  • The lampshades and cushions were designed and hand-made by my beautiful and talented friend Katherine Wibmer.
  • All our bedding is always from Cologne & Cotton because it’s lush.

Also, you need to see the extravagant and gorgeous lampshade Joe bought me for my 40th birthday. I’d put a deposit on it, and he surprised me with it.

You need to see it because it’s extravagant and gorgeous, but also because putting it up was a horrifying experience. Here’s why:

  1. Erecting the DangerScaffolding around, through, and over the staircase.
  2. Starting an unstoppable oscillation atop said DangerScaffolding and unable to relax even with Joe shrieking “RELAX RELAX AND IT’LL STOP” at me. (Helpful)
  3. The shade is extremely fragile.
  4. Also extremely heavy.
  5. Also awkward to get your hands in and out of.

Good job it’s 1,000,000% worth it. It’s never, ever coming down though…

Beautiful shell lamp

The Amaze-Lamp. It’s a bit like a spaceship.

Yes, that is daylight you can see in the background, through the wall. We’re on the case.

Things still to do in the attic bedroom:

  • Fit skirting board to the panels either side of the staircase.
  • Fit glass over the triangle timbers on either side and above the doorway.
  • Have a door made with a big window so we can see the lamp.
  • Fill the gaps between the walls and the floor with new plaster so the room is sealed.

But it’s basically done.

Next stop: replacing all the brick wall panels in the front of the house, putting a new oak sole plate in (well, Ken is), then cracking on with turning our old bedroom into a posh bathroom.

I can’t tell you how good it feels to have finished a room. It feels like real progress, when sometimes we just think we’re getting nowhere.

Paint and Oil

The attic is almost done! The attic is almost done!

We’ve spent the Easter weekend painting the attic walls and ceiling in Flutterby clay paint by Earthborn. It’s delightful stuff: goes on easily and dries super-fast and looks gorgeous. Putting it on with a roller, it retains most of the lime plaster texture.

Then we oiled all the exposed timber with Osmo Polyx Oil – same as we used for the floor.

Doesn’t it look beautiful:

Vicky sitting on the floor oiling the timbers

Freshly painted and mid-Osmo

We still have to put skirting board up – but we’re getting Ken to come and take a look. He’s making us a door, too. And we’re getting some architectural glass to fit over the frame at the end. But other than that… we’re almost done.

We’d have been moving into the bedroom tomorrow if we’d read an email properly.

The bed-frame we have now is gorgeous, so we’re moving it up to the attic. But the mattress is pretty aged, so we bought a new one from Emma – it was 35% off and is rated as the UK’s best mattress, so we’re pretty chuffed with that. Paid extra for fast Saturday delivery, thinking it’d arrive Easter Saturday… only on checking the email, it said delivery for Saturday 27, which is too late. So I’m waiting for them to call me and rearrange delivery and give me my extra delivery cash back.

We’re so excited because we also have brand new duvet and pillows made from Merino wool, and gorgeous new bed linen from Cologne & Cotton.

And we have a chair, which I’m going to reupholster in some amazing fabric.

Tomorrow, I shall start making the attic cosy.

And we’re fitting the most magnificent light above the stairs…

Happy sunny Easter, Dingle fans 🙂

Important Lessons About Laying Solid Oak Floors

After almost exactly three years in The Dingle, the attic has a proper solid oak floor–and we’re bloomin’ delighted!

Having asked grownups to do the scary structural stuff like the big oak beams and joists, and the staircase and roof structure, we thought we’d have a go at laying the floor ourselves.

There were loads of options, but we decided on character-grade solid oak planks with tongue-and-groove edges.

They’re beautiful.

And they’ll be even more beautiful at the end of this weekend, when we’ve oiled them.

We signed the beam

We made this 🙂

Starting the floor was fiddly. We laid the first plank at the top of the stairs between the door frame oak – and rather fabulously, there was a plank exactly the right length. It was pretty nerve-wracking nailing those first nails in. We quickly got rather more blasé about it…

First plank down

Exactly the right fit

Then we had to jigsaw notches around the structure, which went rather well.

Tidy notches

Tidy!

Those strips are 3mm MDF. We used it to fill any gaps between board and joist, so hopefully there won’t be too many squeaks and creaks.

Most of the planks fit perfectly, but the odd one or two weren’t quite perfect – so Joe got a chisel out and did a brilliant job of fettling. Under close supervision by Whiskey, of course.

Whiskey keeps an eye on the chiselling

Supervisor Cat is supervising

And suddenly we were motoring. Slowly, like the first automobiles. But motoring nonetheless.

Now, a cautionary tale. While laying this floor, we learned Important And Useful Things that may help you, should you ever decide to lay a solid wood floor.

Are you paying attention, grasshopper?

Good.

Thing The First: Flooring. Takes. AGES.

We thought we’d spend ages fiddling the first row into place and ages fiddling the last row down (because the end of the attic isn’t so much a rectangle side as an oval). Then we believed we’d turn into an efficient floor-board-laying machine.

Ahahahahahaha.

Oh how we laugh now… because laying floorboards takes bloody ages. Especially when you don’t have clamps (see further down). But it was good fun and we did learn a lot of useful stuff.

I’m sure professional flooring people do this at lightning speed, like those sped-up videos on t’internet. But we did not.

Oh and also it’s totally knackering:

Human face down in hole

Zorsted

Thing The Second: Note Joist Spacing When Ordering

I have no idea if joist spacing is standardised, but just in case: make note of how far apart your joists are when you’re ordering your planks. It will make it easier to lay them and make for less wastage if you have different lengths that’ll fit nicely in the gaps.

When laying a row of planks, you want the join over the joist for strength. The whole thing is like a jigsaw puzzle.

With no edge pieces.

Or picture on the box.

In the end, we did super-well and ended up with very little wastage and only one butt-joint (fnarrr). (A butt-joint is where you can’t tongue-and-groove two planks together, so you just have to butt them up to each other, nail them down, and hope for the best.)

Thing The Third: Label Your Planks

About halfway through laying the attic floor, we had a brainwave. Up until that point, we’d been measuring joists and then going downstairs and measuring loads of planks to find one that fits.

You’re probably reading this and wondering how we manage to dress ourselves – I bet you’d have labelled all the planks at the start, right?

Well, it took us a couple of days but we got there eventually. We measured each plank and wrote the length on each in chalk. Made it much easier to plan.

Just in case this doesn’t occur to you, take our word for it: labelling in advance will make the job much quicker and much less annoying.

Thing The Fourth: List Your Lengths

While you’re labelling your planks with the lengths, write all the lengths down in a notebook so you can cross them off as you use them. That way you don’t have to go downstairs every time you want to plan a row. You can just check your notebook. Easy peasy.

Thing The Fifth: Beg, Borrow, Or Steal Floorboard Clamps

About halfway through our flooring adventure, one of Joe’s BJJ buddies – Pat (thank you dude!) who is a black-belt strangler – saw our Facebook post about our progress and asked if we had floorboard clamps.

We did not.

We were intrigued.

Until then, we’d been using our feet. As in, I’d perch on a joist and shove my feet against the board we were nailing down and put as much pressure on as possible to close the gap while Joe banged nails in. It worked, after a fashion… but you can definitely tell at what point the floorboard clamps arrived because the gaps entirely disappear.

We’re okay with that, because our learning curve is part of the history of the house now. It’s cool.

The clamps sit on the joist, and you wind them up using the handle thing, and they gently push the board tight. Honestly, you would not believe how much easier this made things…

Floorboard clamps in action

Magic miracle lumps

Thing The Sixth: Punch At The End

You might be wondering why we didn’t use secret nails. The reason is because the wise owl at Good Bros Timber who sold us the oak floorboards advised us to use lost-head nails. So we did as we were told. Also, it fits with the rest of the house.

For about half the floor laying adventure, we punched the nails in as we went along, using a big ‘ammer and a nail punch. One of which broke. Nothing to do with me being ham-fisted.

This is a right pain in the bum because the punch is always at the wrong end of the room. Incidentally, bonus tip: have a little wheely trolley and put all your tools in it and wheel it around as you work.

Or, alternatively, every time you stand up, pick up your hammer, nails, and anything else and take it with you or you’ll spend all your time swearing and asking where your hammer is now.

Back to punching: knock all your nails in, then at the end when all your boards are down, you can work your way methodically along each joist punching the nails. It’s much easier than staggering around the floor doing it as you go along.

Thing The Seventh: Take Breaks

Do not underestimate how much hard work this is if you don’t do a lot of this type of thing.

It was surprisingly hard work.

We fell asleep on the sofa about an hour after showering and dinner after each flooring session.

Working tired means you miss more nails (there are some little dents in the boards), you forget to stick nails in (we found an entire board without any nails at all: winning!), you bend more nails with inaccurate strikes (which is really irritating because getting them out is bloody difficult), and you risk hurting yourself.

As soon as you miss the first nail or put a slight bend in one, it’s time to take a break at the least, or pack up for the day if you’re knackered. Trust us: pushing on through is not worth it.

Finally…

My patented technique for getting upstairs. Disclaimer: I am in no way recommending you do this. (But it is fun.)

This is how circus people do flooring:

Really Finally…

At the far end of the room, the wall is seriously bowed. Like an egg. And while I was away for a day, Joe did a stunning job of jigsawing oak boards to fit precisely into that funny shape. It’s perfect.

Here’s the finished floor. Didn’t we do well?

Finished oak floor

Beautiful oak floor

Hope you’ve found this helpful! And inspirational, because if we can do this, you can too 😀

Next week: sanding and oiling (it looks gorgeous).

And Vix & Joe Said, “Let There Be Light!”

In the beginning was the wiring. And the wiring let us add light. In the attic.

And it looks magnificent!

Joe looking proud of our handiwork under three lights

Gorgeous innit? And the lighting isn’t bad either…

This is proper progress. We can walk upstairs to the attic, flick a switch, and turn lights on. Here’s how we did it…

We didn’t want to butcher the original oak ridge beam by planing a flat surface onto it, so we pondered our options. In the end, we bought round oak pattresses, drilled them so we could run wires through them, and fitted them to the sloping ceiling. We wired along the ridge beam using the lovely flex.

Wires along the ridge beam to a pattress

Wiring the lights

It looks fab; you can barely see the wires unless you look, then when you do look, they’re beautiful.

Once we had the pattresses up, we fitted the pendants and hung them centrally from the ridge beam using hooks from More Handles.

Steel hook with braided flex from pattress

A catchy little hook…

We added gorgeous aged copper shades from Bailey’s, and the attic lighting is done! We’ll have lots of table lamps and a fabulous floor lamp when we move up there. Watch this space…

Three beautiful pendant lamps

Three little beauties

Wiring Up The Attic Like A BOSS

Ancient houses bring interesting challenges, such as: how to deal with the wiring.

With a newer building, you just chase the wires into the wall and plaster over them, job done.

In an ancient structure, with exposed timbers and lath and plaster, and newer cork panels, and strong oak joists, it’s not that simple. You can’t wire through oak joists because they’re smaller than softwood ones, so there’s a risk of banging a nail into a live wire. Not a big risk, but the regs don’t like it.

And you don’t want to go chasing wires into walls when there are timbers in the way.

So what do you do?

You find the World’s Most Expensive Cable and the World’s Most Expensive Sockets and Switches, and you crack on.

Of Chalk And Saddle Clips

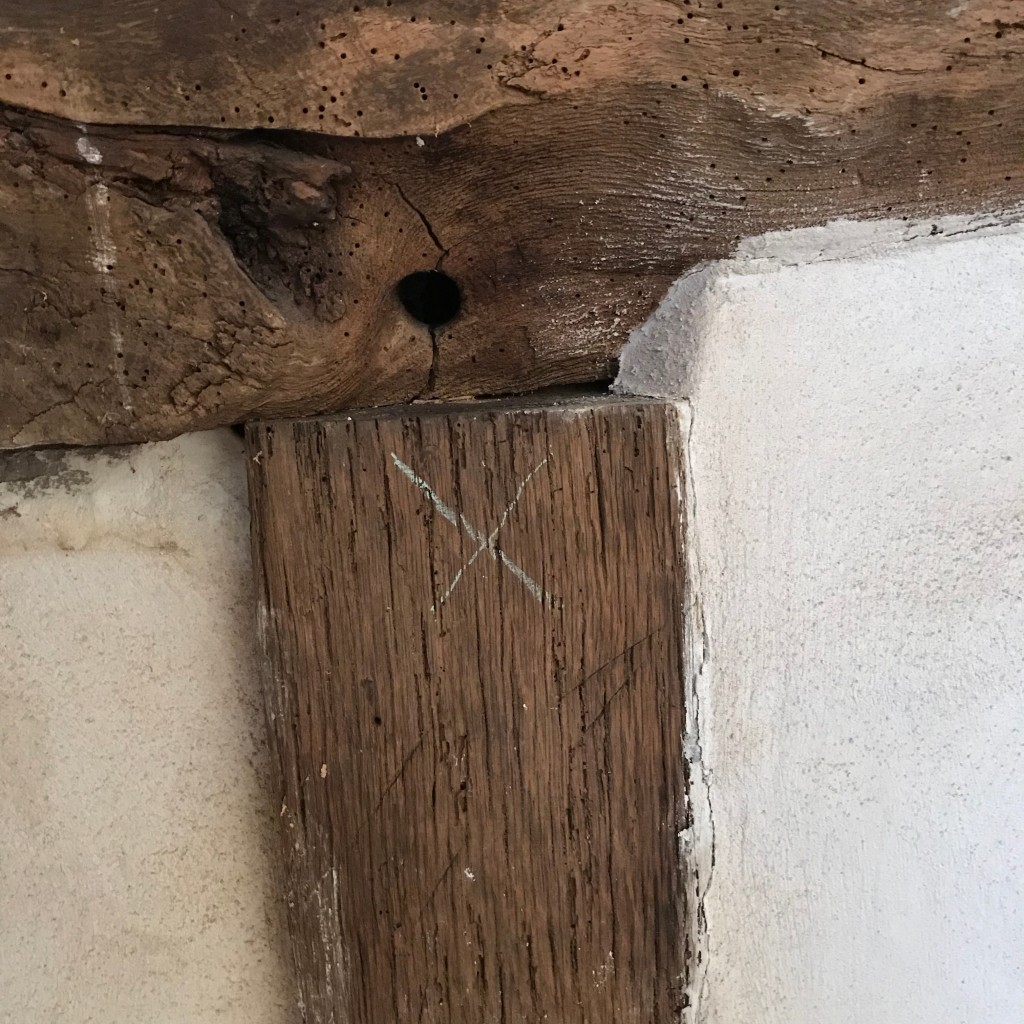
We started with chalk and marked out where we wanted the sockets, switches, and saddle clips for the cables. Don’t want any (more) expensive mistakes.

Chalk mark on timber

Deciding where to put sockets.

We didn’t put the sockets on the timber in the end, we put them on the plaster in the corner to the left of that X.

Chalk mark and saddle clip on timber

Marking saddle clip positions.

We made sure the saddle clips were spaced at regular distances (except when we had to wire around bends). This was exactly as fiddly and annoying as it looks like it was. I mangled many innocent tacks.

One Week Later

I now have a new respect for conservation sparkies.

I’ve never done anything so fiddly in my life. There was much swearing and gnashing of teeth – but we’re delighted with the results. Here’s what we did.

We took the 2.5 twin-and-earth wire (beautifully braided in old gold and a special order from the fabulous chaps at Flexform) from the junction box, into and out of four sockets, through the panel, and along the front of the mezzanine. When we’ve finished plastering, we’ll take pics. It’s actually pretty neat and tidy and it looks fab.

However, it was not as easy as it sounds: there are no straight lines in this house, so we followed the lines of the timber. It’s a work of art and it took hours.

Wiring and timbers

Wiry Art

You might be wondering why there’s a cheap-ass black plastic back-box on that there wall. Good question. Especially when you find out these beautiful bashed antiqued brass sockets go on top:

Antique brass sockets

Glorious sockets

We chose one with USB ports and three standard double sockets, all from Jim Lawrence. They’re beautiful but super expensive. With brass back-boxes too, we wouldn’t have been eating this month. The black ones are barely visible unless you know they’re there…

Which, of course, we do. So I’m going to replace them one by one, when Joe isn’t looking.

One of the sockets has turned out to have a faulty switch, but the woman at Jim Lawrence couldn’t have been more helpful. They’re sending a replacement next week. The others work perfectly.

When we turned on the ring main, with Joe working his way along the fusebox switch by switch, it was just like that scene out of Jurassic Park. Not even kidding.

Fuse box scene from Jurassic Park

Scenes from The Dingle earlier today.

Two Weeks Later

Mum and dad came over for the day and brought soup and an extra pair of hands.

Joe and Dad and I got cracking on the lighting circuit. We’re putting three pendant lamps in the attic bedroom and one pendant lamp in the double-height hallway above the stairs.

There will be two switches in the bedroom – one for the bedroom lights and one for the hallway light – and one switch on the first floor, for the hallway light.

Normal lighting wire for moving volts around is three-core (two plus earth) 0.75mm. Wire to the switches is four-core (three plus earth).

We tacked them up the oak doorway frame and into an oak pattress, then into gorgeous antique brass dolly switches thusly:

Braided cable on oak frame

Tidy.

Chalk marking the pattress position

Chalk marking the pattress position

Dolly switches

Dolly Parton switches (because they’re so pretty)

That earth tape is to mark which switch is which. The bottom switch – the one marked with the tape – works the attic bedroom lights. The top switch works the hallway light.

Or they will, when the lights arrive…

Always Be Learning…

The great thing about this is, I knew nothing about electrics before we started this. In fact, I feared the electrical world. Joe understands electrics, because he has his 17th Edition.

(Yes, we’ll need to get an electrician to certify everything when we’ve finished the house.)

I now understand how to wire a ring main, how to wire a lighting circuit, how to wire sockets and switches and lamps. In fact, I’ve done all these things in the last three weeks. That’s pretty damn cool.

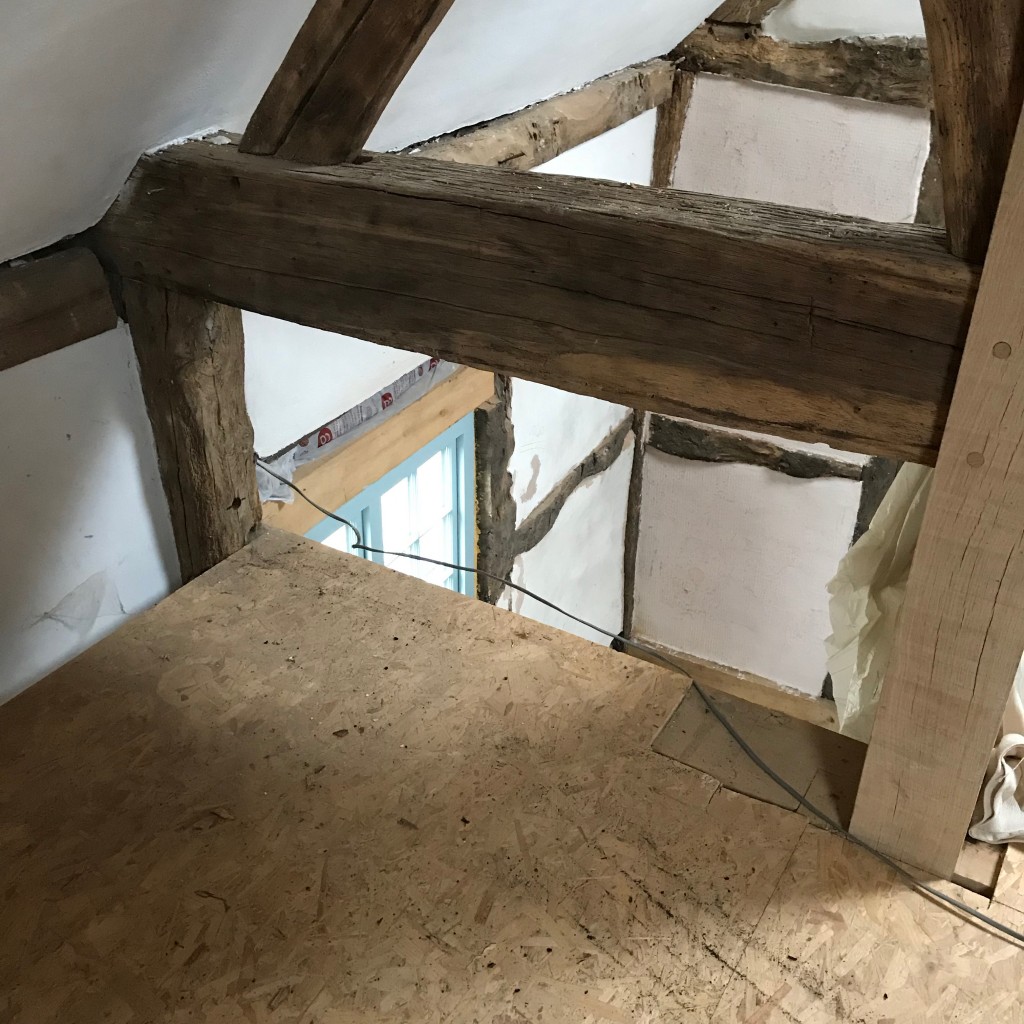
Behold The Very Tiny Wall In The Attic

When the new amaze-stairs went in, we were left with some pretty triangular strut-work above the truss, and two big gaps below, one on either side of the stairs.

Gap between oak truss and floor on 2nd floor.

It’s an ‘ole. Needs filling.

So we got down to filling them.

Wooden battens inside the hole frame

Framing the big ‘ole.

Cork panel from below

Lovely tidy cork panel

Like the gable end wall,  we used the cork panels and lime-cork-hemp plaster-glue to stick them together. We’ve only done one so far, because the builders will need to use the other hole to fit the last floor joists and we don’t want to do the job only to have it damaged. We’re pretty quick at doing this panelling now anyway, so it won’t take long.

Joe lime-plastering the new cork panel

Scratch coat of lime plaster.

Then we got the scratch coat of lime plaster on.

It’s made a big difference to the feel of the attic bedroom already.

Under The Eaves

While we were there and had the gloop made up, we turned our attention to the gaps under the eaves. Here’s where we made a mistake a year or so ago.

When we got overexcited about the attic ceiling panels we’d fitted, we rushed ahead to get them plastered with lime by the expert chaps at PlasLime. They did a great job, exactly what we’d asked for… oh, if only we’d thought it through properly.

At the time, we didn’t know what we were going to do about wiring up the attic, so we asked them to leave a couple of inches gap at the bottom between the sloping ceiling and the supporting timber.

Turns out, we’re mounting all the wiring on the surface using The Most Expensive Wire In The World. So we didn’t need those gaps… and now we need to fill them. Doh.

So we did.

We’re using offcuts of cork:

Cork slivers

Waste not, want not

And stuffing them into the eaves gaps with the cork-hemp-lime-plaster gloop:

Filling gaps with cork

Filling gaps

That gap beneath the timber is annoying. When we put the new windows in, the wall panel above slipped down a little. We need to kick it out and replace it anyway because it’s brick, and we want to cork it, but still…

Then Joe got up on a ladder (I don’t do ladders because they are HORRIFYING) and wobbled around filling more gaps until the gloop ran out:

Joe up a ladder filling gaps

Precarious gap-filling

Plastering: The Final Coat

Finally, we decided to have a go at putting the posh top coat of lime plaster onto one of the gable-end wall panels:

Putting the top coat on

Putting the top coat on

Joe’s done a really lovely job. It needs a little sanding and finishing, but it looks great:

Smooth top coat of lime plaster

Looking smooth!

Coming up next: Tiny Sheep Agility Training!

Predictable Delays But Awesome Stairs

So, somewhat predictably, we weren’t in the new attic bedroom by Christmas.

But our new stairs are up and they look magnificent.

We’re completely delighted with them – not least because they came in £3,000 under budget. Which should give you some idea of how extravagant they were.

But we wanted solid oak, we wanted them to look beautiful and feel beautiful, and that doesn’t come cheap. Nor would we want it cheap.

Still, three grand lighter is a result!

Wanna see them?

Here they are:

View looking up stairs

Magnificent new door frame

And beneath the stairs, we’re going to panel the slope with wine crate lids, then build a cupboard door at the bottom for a little storage:

View under the new stairs

A little secret storage

We’re really pleased with the new floor, too.

Obviously we decorated the stairs with fairy lights for Christmas…

Stairs with fairy lights

Twinkle twinkle little bat

View down the stairs

Twinkle down the stairs

And they pass the Noodle Inspection:

Cow-print cat on stairs

Noodle gives the stairs a good sniffing

We gave the stairs two coats of Osmo oil to protect them, and they’re just about done.

Ken is coming back after the New Year to fit the final floor joists and fix the ugly bracket, and then we can lay the floor, which we’re doing ourselves.

In the meantime… it’s full electrics ahead!

Exciting Times At The Dingle!

The stairs are here! The stairs are here!

After months of waiting and delays, I am writing this with Noodle purring on my knee, listening to our new oak staircase being fitted upstairs.

I am SO. EXCITED. I. MAY. EXPLODE.

Because, you see, when the stairs are up, we can get up to the attic properly and finish off the room. Things we’ll be able to do:

  • Finish the plastering onto the beams.
  • Fit electrics and beautiful lighting.
  • Lay an oak floor.
  • Move our bed up there.
  • Choose some gorgeous furniture.
  • Find an amaze-rug.
  • Fit glass panels to the oak structure.
  • Have a proper beautiful bedroom for the first time in nearly three years.

We really really REALLY want to be able to move in up there by Christmas. We have guests for New Year and we’ve promised them a bedroom instead of a sofa bed, so that’s our goal…

In the meantime, here are the stairs in bits:

Stair parts on props

All fitted together and ready for takeoff.

Oak pieces for stairs

Bits of stairs, newell posts, and other assorted gubbins.

Backside of the stairs.

Backside of the stairs.

Not sure what this bit is.

Not sure what this bit is.

The stairs are going to go up as we enter the first floor, then turn and go straight up to the attic.

Ken the Wonder Joiner is going to chop out a big piece of oak truss (eep) to create a new doorway, then rearrange the oak props and beams so the roof doesn’t fall off.

We also need a new patch of floor around where the stairs will sit, because the beautiful old oak floor you can see in the pictures above is patched where there used to be a staircase from below.

We’ll do pictures when we get to that.

Right now, we’re too excited about the prospect of stairs…

« Older posts

© 2024 Project Dingle

Theme by Anders NorénUp ↑