Picture the scene: wind howls through the gaps in the stone.
Cobwebs like ropes caress the face like grimy ribbons.
And underfoot, there is a 1-inch carpet of mouse and bird poo… plus a dead sparrow.
Nope, we are not in a Hammer house of horror. We are in the space above what is to become our bathroom.
Look at the horrors!
But it’s all FANTASTIC news because we can finally crack on with said bathroom after 5 years of no proper heating and a tiny grimy shower room. Hurrah!
Ripping Stuff Out
Here’s what the Stone Room looked like just a few short days ago:

Goodbye horrible old cupboard and immersion heater!
And look at this amazing 80s wallpaper 😀

Incredible 80s wallpaper
Last Monday, plumbers came and disconnected our hot water. They took the water tanks out of the loft space, emptied and removed the immersion heater, and left us to it for the better part of a week.
We had some sponge baths with boiled water from the kettle, and I washed my hair with water so cold it gave my entire head cramp. (Try it: it induces brain freeze the likes of which you have never experienced.)
Then the chaps came back and fitted our very first condensing boiler. Ta da!

Ooh fancy! Hot water AND heating…
We now have hot water on demand and A WORKING RADIATOR! The Rayburn Room is warm again!!!
(Side note: the Rayburn Room hasn’t had a working Rayburn for a year and is to become the library, that radiator is temporary because I want cast-iron ones, and there’s still a ton of plumbing to do.)
The plan is to eventually move the boiler downstairs into the utility room, but we won’t be able to build the kitchen and utility room for a couple of years yet. So for now, we’re building an airing cupboard around the boiler and plastering up to the board it’s fitted to.
And now all the gubbins is out of the Stone Room, it means we can start the long and disgusting process of turning it into a bathroom.
Things we have discovered so far:
- The Stone Room floor joists are 3 inches deep by 2 inches wide, with notches for plumbing pipes. For those not in the know, that is Not Big Enough to support a floor. It’s amazing we haven’t plummeted through it.
- Creative plumbing decisions.
- Absolutely freaking terrifying ceiling joists that gave me the horrors climbing up there.
- Horrifying wiring: bare wires nestled warmly into the fibreglass insulation.
- A dead sparrow 🙁
- A LOT of mouse/bird/squirrel poo. Like, piles and piles of it.
- Birds’ nests.
- The world’s most epic cobwebs, but no spiders, oddly enough.
- Water running down the stone wall, which was nice.
- Plenty gaps in the roof: much fresh air, which was nice I suppose.
- Ceiling panels made out of cardboard. Also panels made out of that plastic we used to cut up in CDT classes at school.
- Roof braces held on with old hinges.

Lots of cobwebs, a nest, & a big pile of poo

Honestly I’m amazed we haven’t had a fire

The leaky roof. Which is nice.
(Side note: fibreglass insulation is evil stuff and I am SO BLOODY ITCHY RIGHT NOW. And yes, I was wearing gloves and mask and eye protection and overalls and a hat and PPE up the wazoo and IT GETS EVERYWHERE. There’s a special place in hell for the person who invented fibreglass fuzz.)
Because I weigh less than Joe, I was duly shoved up through the hatch with a clamp lamp and a plastic bag. I set about rolling up the insulation and passing the tidy bits down to Joe, who bagged them. I bagged the scraps and bits and pieces up in the loft to prevent too much crap raining down on Joe.

Making my way into the unknown
We filled six huge bin bags, which Joe later hauled to the tip.
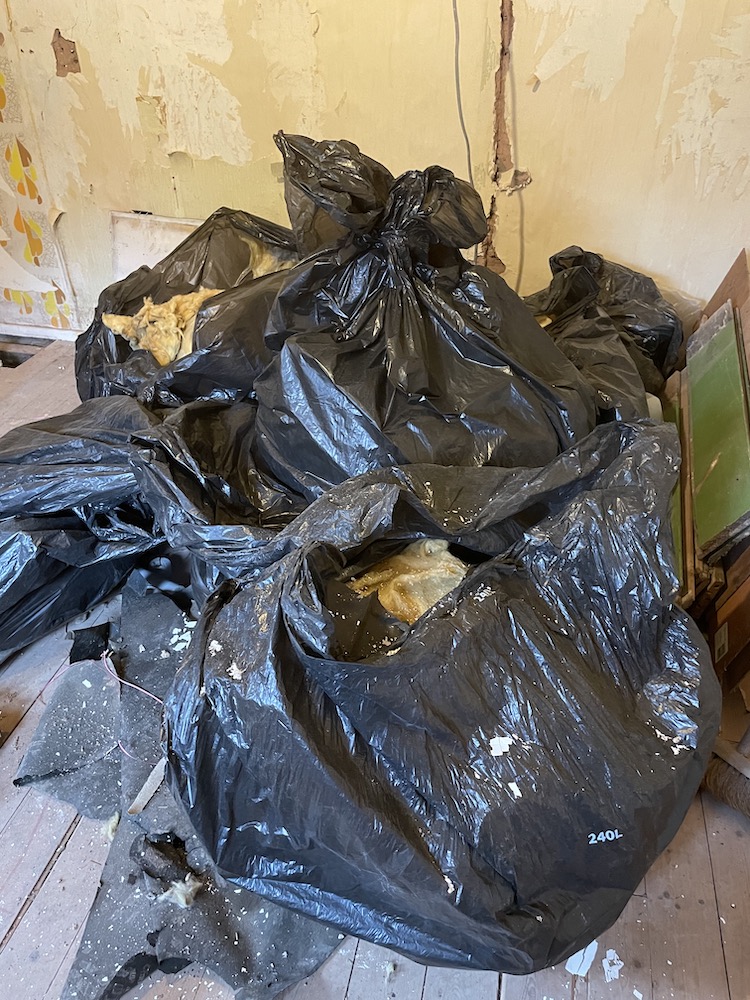
All this came out of the loft space
I also removed several dustpans full of poo.
And lots of bits of paper, plastic bottles and canisters, scraps of insulation, tarry stuff that was coming away from the rafters, and pieces of MDF that were lying around looking like things to put weight on, but which were NOT for that at all.
Once we got rid of as much of the insulation and general rubbish as possible without falling through the ceiling, we started ripping the ceiling panels off and creating a big, big hole.

Joe makes some wiring less scary
Oh, and unwiring some wires that didn’t seem to do anything anymore.
It’s been quite a day…
But at the end of it, we got to have an EPIC shower powered by our new boiler, with frankly quite alarming pressure, and so it wasn’t all bad.
Next in the Stone Room: continue removing the ceiling, sweep and hoover and make as tidy as possible, repair the leaky roof and the holes under the eaves, and hurl some lime plaster at the rough loose stone to make it a bit tidier and sturdier.
After that, we’ll pull all the old plaster off the walls and put in new oak windows (which we’ve just ordered), then take the floor up.
After that, we’ll replace the ceiling and the floor — at which point we can start actually creating a bathroom! And deciding whether or not to have underfloor heating…
UPDATE
Having done some searching of images on the Google, we now have a suspicion of bats. So we have a local batman on his way to do a preliminary survey. All work in the roof space has stopped for now, and the next thing we’re going to do is focus on the walls below the ceiling line and replacing the Stone Room floor, and stripping out the Rayburn Room.
Then we shall wait and see what the batman says and do what needs to be done.


